Kids Art Projects
Make an authentic Air-dry clay chicken in just 5 easy steps

Jun
Hi, I’m artist Lillian Gray and today we are making a chicken sculpture with air-dry clay.
Before you guys watch this video, please make sure you watch my previous video on the basics of it air-dry clay. It is vital that you guys understand how to make slip, how to roll a slab, how to wedge your clay before we even start. So make sure you watch that video and then come back to make your chicken.
Step 1: Preparing the air-dry clay
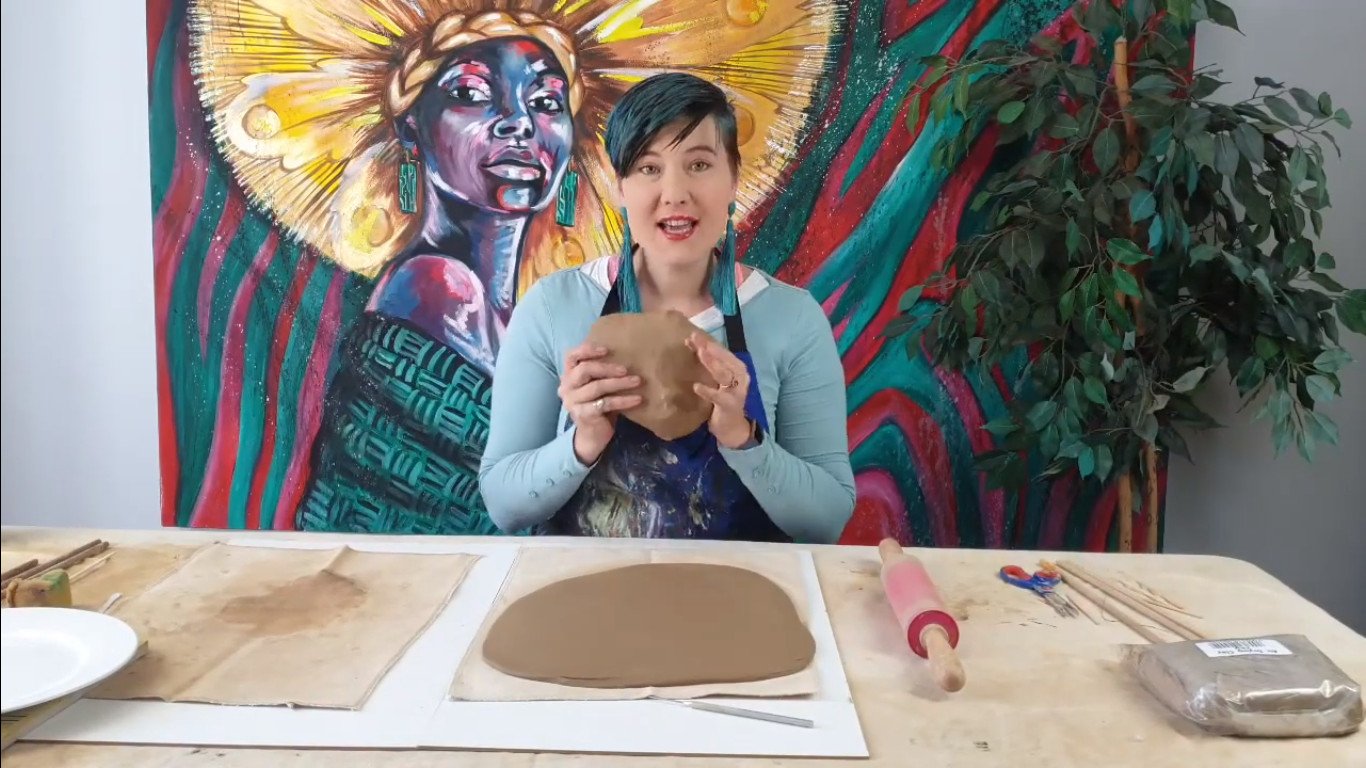
Step one, I’ve wedged my clay. It’s nice and malleable. I’m working with Dala’s air-dry clay. It’s by far my favourite air-dry clay brand and I’ll put a link below where you guys can shop, where you guys can buy it. This clay has already been wedged and I then proceeded to roll a slab. My slab is big enough to accommodate a normal dinner plate. Don’t worry about the plate, you can use a new one because the clay can just wash off. It won’t damage the plate at all.
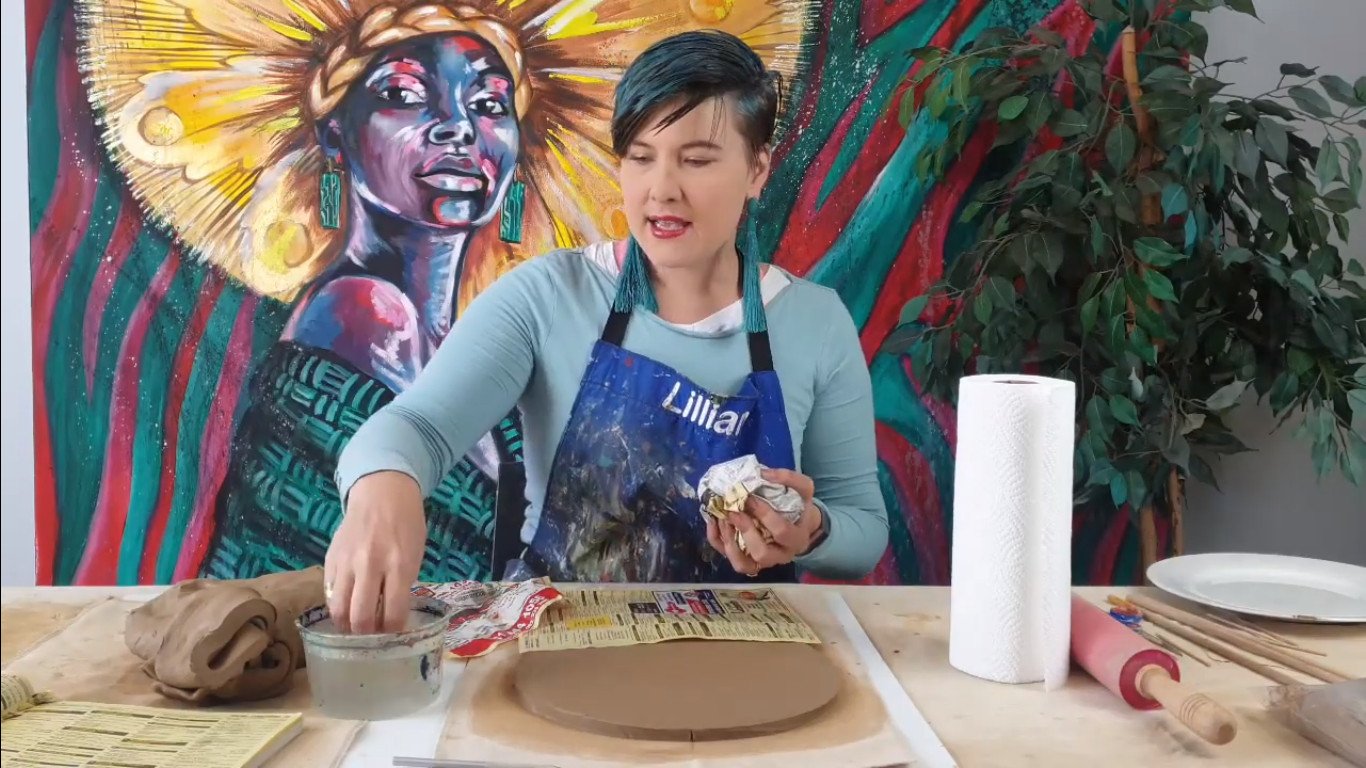
We’re now going to be placing this plate on the slab. So we are going to be placing our round plate on a slab. I’ve got my little cutter. There are various things you guys can use. I’m using a sharp pin. You can use a toothpick or a kebab stick if you want and I’m just gently going. If you guys rush this step too much, you’re actually going to get quite a jagged edge. You don’t want that, so just go slowly and consistently.

I also just want to make you aware that we are working on cloth, the cloth is really awesome, it really absorbs the clay and your clay won’t slip around. After I’ve cut deep enough and I know that I have penetrated all the way through to the cloth, I am removing the excess clay. Remember, this clay you can still use. it’s awesome. I’m just going to bundle it together and just put it aside to use later on when we get to the detail of our chicken. I’m now going to remove the dinner plate and I now have a beautiful circle.
Step 2: Making the armature
When we make a sculpture it’s important to make an armature, so that is the inner structure of the sculpture. What it does is, it strengthens our sculpture and it also allows us to use less clay.
For this chicken, we definitely need to create a ball structure that we’re going to be using to build around. This is how I’m going to be making my inner structure for my chicken. What I’m using here is a paper towel and I’m using old telephone pages. Now I know these were like from an ancient time and hard to find but you can also use brown paper which’s has a bit of a sheen and a gloss.
I am going to scrunch it up. You can also use a newspaper if you want but the glossy paper for me works better. I’m going to be making a ball, I put my glossy paper over and I gently wet my last page because you just want a bit of wetness. The clay is going to make it wet anyway, but you need to provide the clay with space to shrink when it’s drying. Don’t make the ball too hard.
Boys, I’ve often seen you guys tend to make these powerful strong balls so you can hit your sister with it or your other classmates. Don’t do that it just needs to be loosely scrunched, because when your clay starts shrinking when it’s drying, it needs to have a bit of a bounce. I hope that makes sense. So this is how we just make our inner structure. I’m going to be placing my inner structure on my club and I’m now going to wrap my circle around this circle.
Step 3: Making the body of our chicken
I’m just going to be cutting out some wedges so that when it folds over the circle there’s space for my clay to join. Just tiny pizza slices. Three is more than enough. Now I’m going to wrap this around the ball. Now I’ve got the basic structure of the chicken. It’s very important to remember, whenever we join clay we need to scratch on both ends, and we need to use slip.
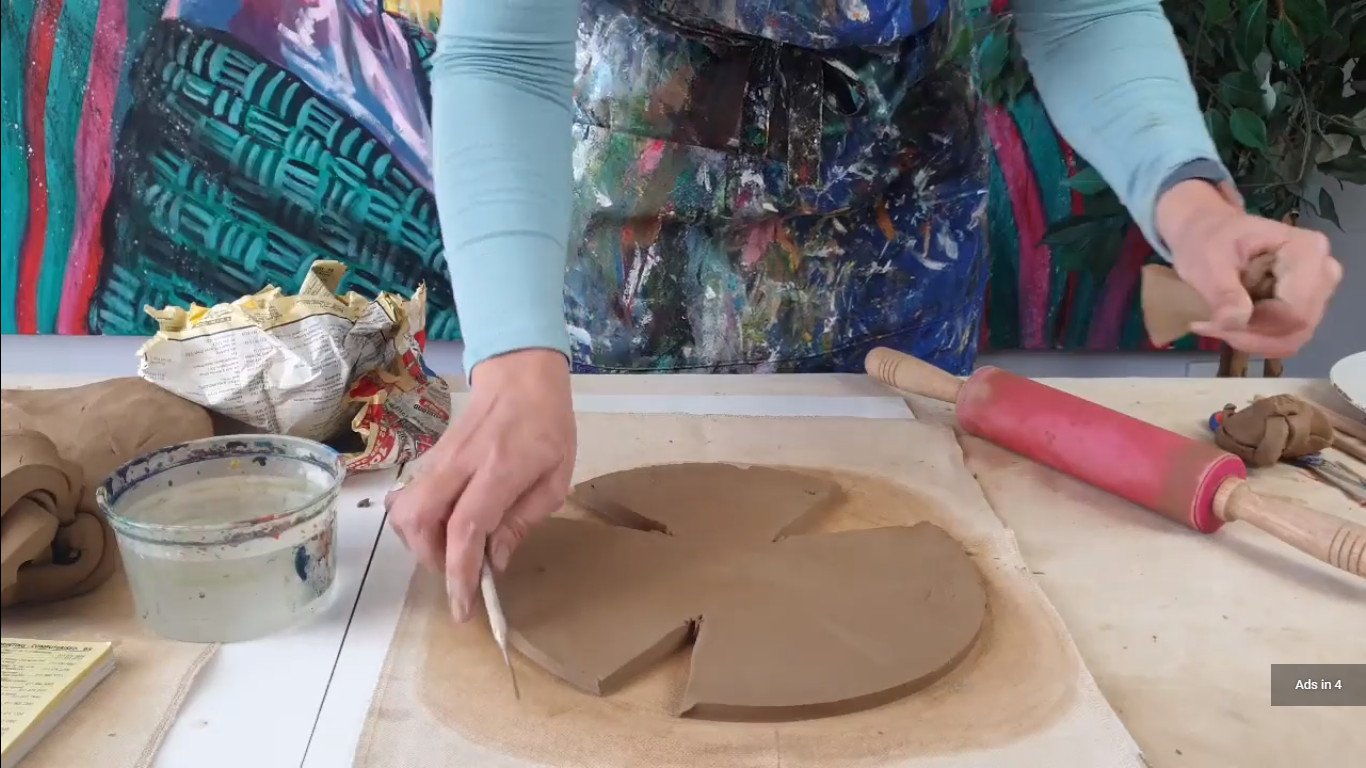
Everywhere I’ve made a wedge, I am going to scratch and really join my clay. I’m also just going to use a little bit of slip and add it in there, to make sure my clay joins properly.

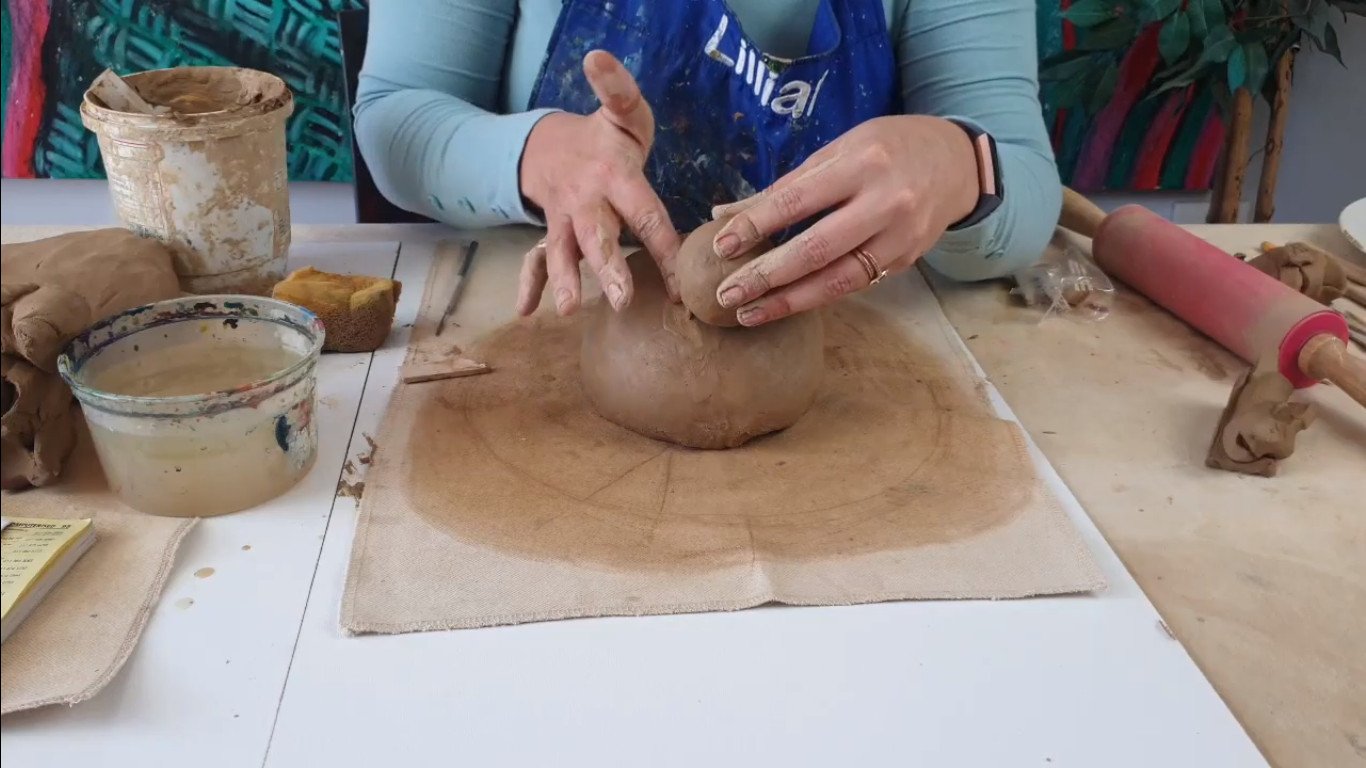
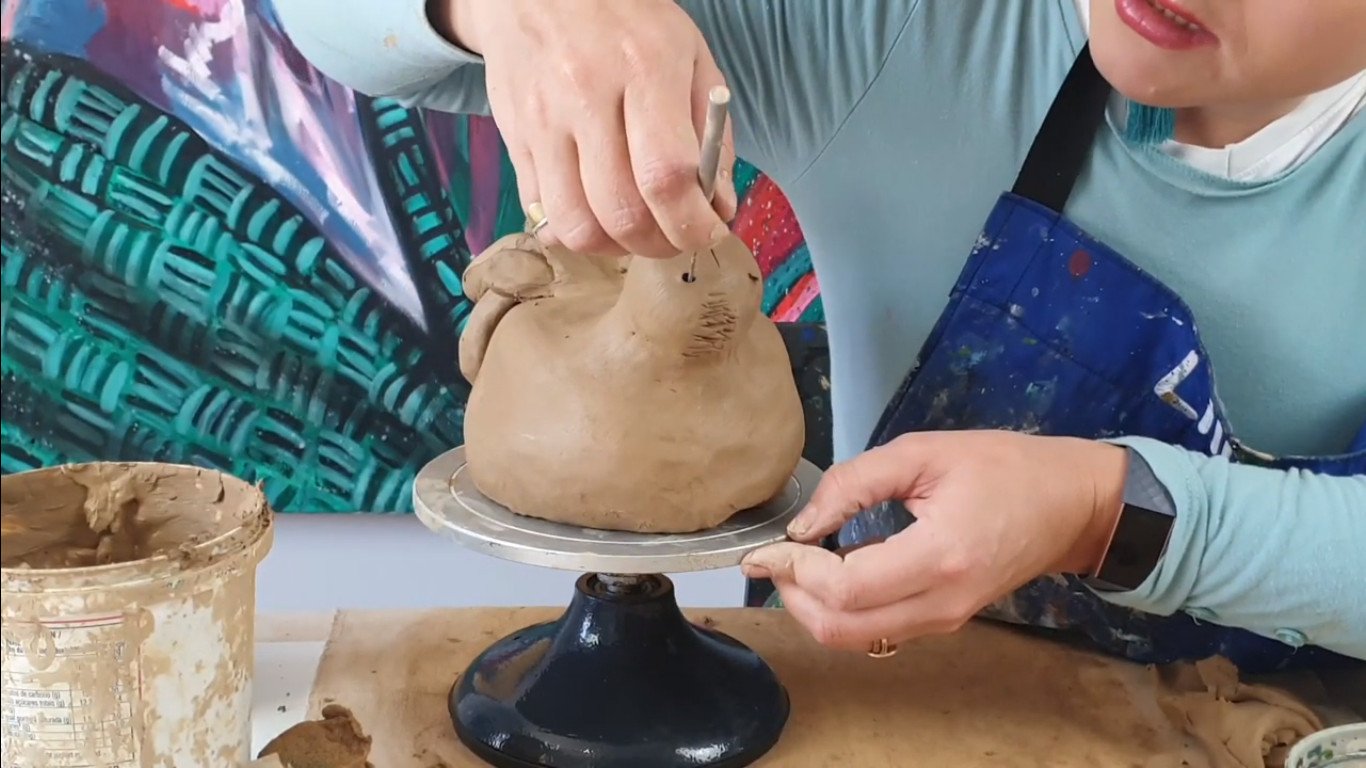
I flipped it around. Now at the bottom of my chicken, it’s going to be super important that you guys don’t close this all the way. The entire idea is that on day three when this has dried for a bit, you want to be able to take out the paper. You need to be considerate of that. You can’t have the entire structure closed.
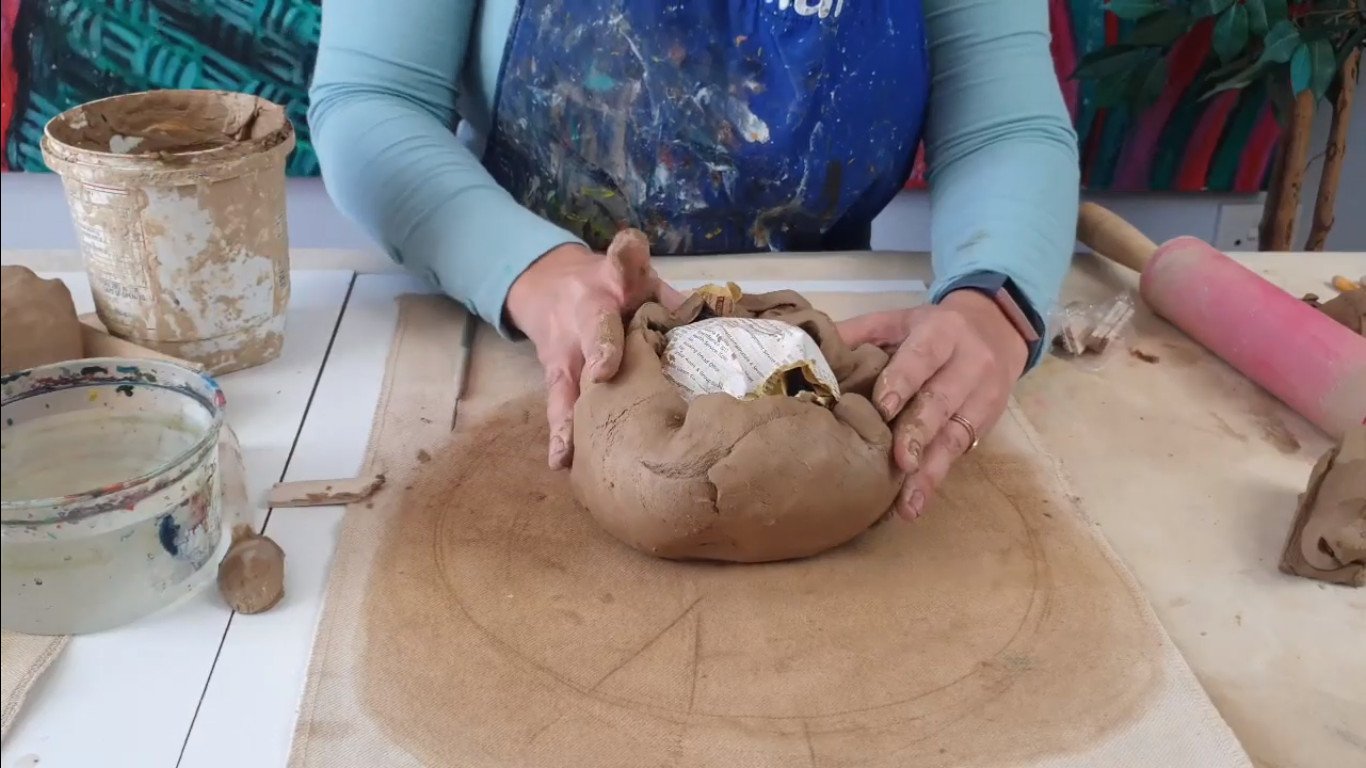
Your clay will also crack. You don’t want to do that, leave enough space so that you can at least get scissors in there to cut the paper smaller if you need to, or pull it out slowly as we progress. I’ve now basically made a little sphere for my chick’s body and I’m just going to make sure that when I flip this around, I’ve smoothed it all and it’s exactly the way I want it.
So just gently press with your hands, make sure it’s round everywhere. You can also take a sponge just wet it’s slightly. Remember you do not want a mud bath. You can just start working off your edges so your chick is nice and round.
Make sure you’re happy and that it’s a kind of a circle, but you want to look from the top. A chicken is an organic shape, so it doesn’t really have to be perfect. We’re making like a vintage chicken for your mom’s kitchen or your own kitchen and it doesn’t have to be completely perfect.

Just make sure, when you look from the top, that it is symmetrical. Try and get it symmetrical. We are now going to start building the head, the neck, and detail.
Step 4: Adding detail and personality to your chicken
So now for the fun part, this is my favourite part, adding personality to my creatures from the clay that I removed from my circle when I made my slab. Basically, sculpturing is just like drawing, where we work with our basic shapes. Now we’re also adding the 3D element. It’s still the basic thing, whatever you are going to construct, you’re going to construct out of the five basic shapes: your circle, your oval, your triangle, a rectangle, and your square.
- The head
- The tail feathers
- The beak and bill
- The comb
Making the head
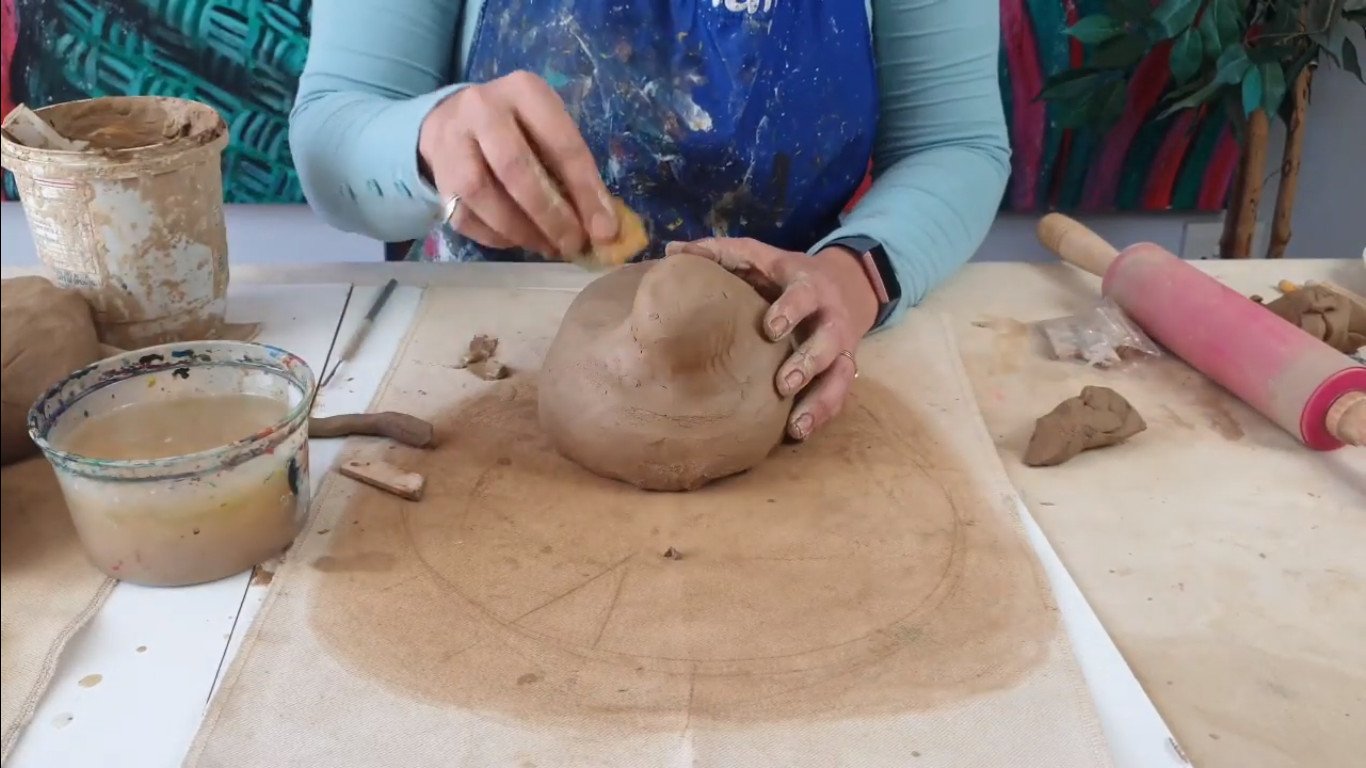
I’ve just added a bit of water to my hands and I’m rolling my circle. My head is solid, it doesn’t have any structure inside. The head isn’t that big so we don’t need to save on a lot of clay and I’m making my circle round. It’s a bit like making a snowball or a mud cake. I’m just making sure I’ve got my head where I want it.
Remember, whenever we join something, we have to scratch and you have to apply slip. That is going to be my next step, joining my head to my body. I’m going to scratch where I want my chicken’s head to be. It is important that you guys don’t put it too far to the front because it might fall off. We want to plonk it and have the center of gravity right above its body.
I’m also scratching the bottom of my sphere that I’ve made and I am now going to apply my slip, which is like my glue, and I am going to join my chicken head. I’ve joined my head. The next step that you’re going to do is, you’re going to take some clay and we’re going to make a worm.

The correct term is a coil in the clay world. So we’re just making a coil and I’m going to wrap this coil around my chick’s neck. I already have a lot of slip and I’m going to be joining my chick’s head. I am going to scratch, really joining my clay, merging it into my little body. I am going to with my finger, work it in into my chick’s body.
Now to work this off nicely, you want to dip your sponge into a bit of water. Please make sure that you get that excess water out, because your clay can really become very sloppy. I am just smoothing out these lines and making sure my head joins quite smoothly with my chick’s body.
Remember when you’re working you want to get rid of all your air bubbles because air really is the enemy of clay. It makes our clay crack when it just starts drying because your clay has a shrinking ratio.
The shrinkage ratio for air-dry clay is almost 30 percent. You need to really get rid of that air so there are no air pockets. so it’s going to make it okay shatter when it dries.
This is my little sculpture wheel I love this thing and I’ll put a link down below where you guys can buy it. This is optional, you really don’t have to have one. It just makes my life a lot easier but I’m going to plonk my little sculpture on my wheel so that I can now really start turning it and I can swivel from head to bum. What also works is, I don’t know if you can maybe get a lazy Susan, which they usually put on a dinner table. You can use those as well and they work really well.
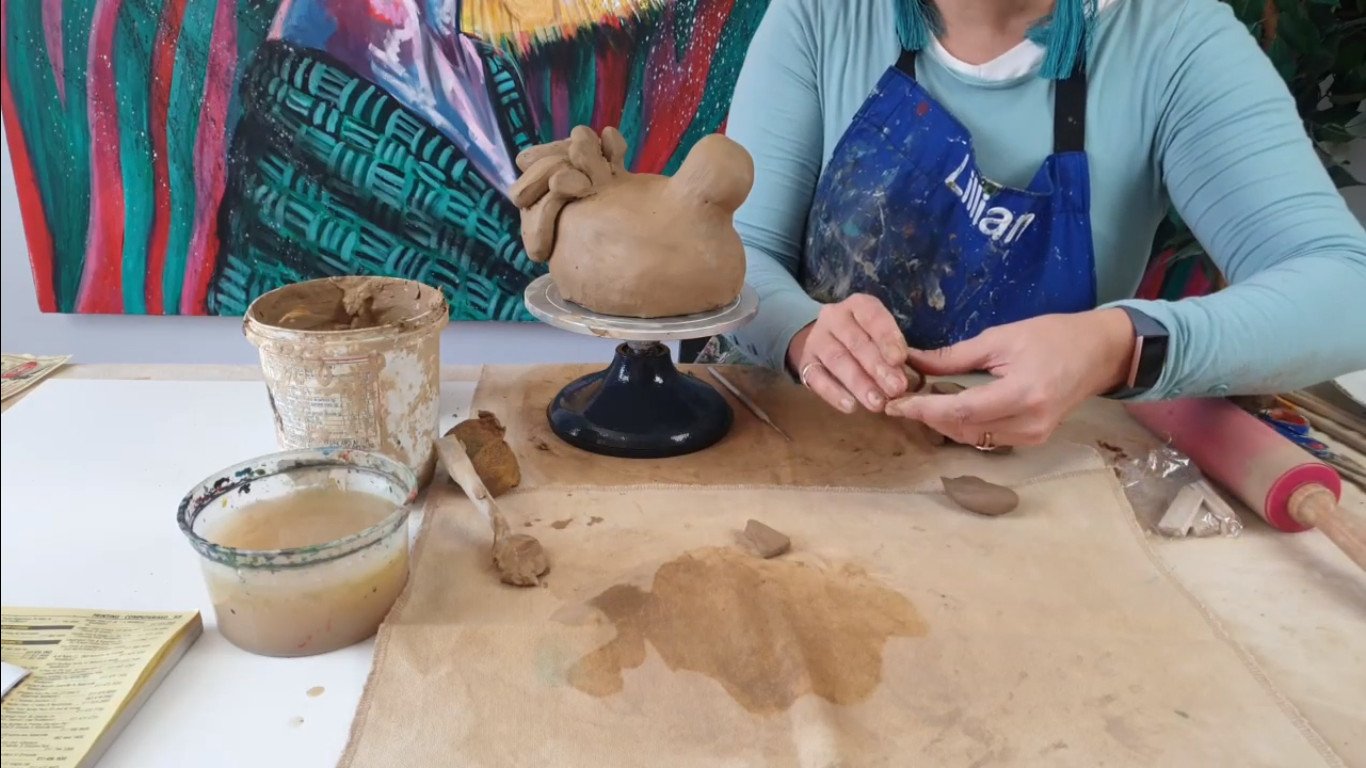
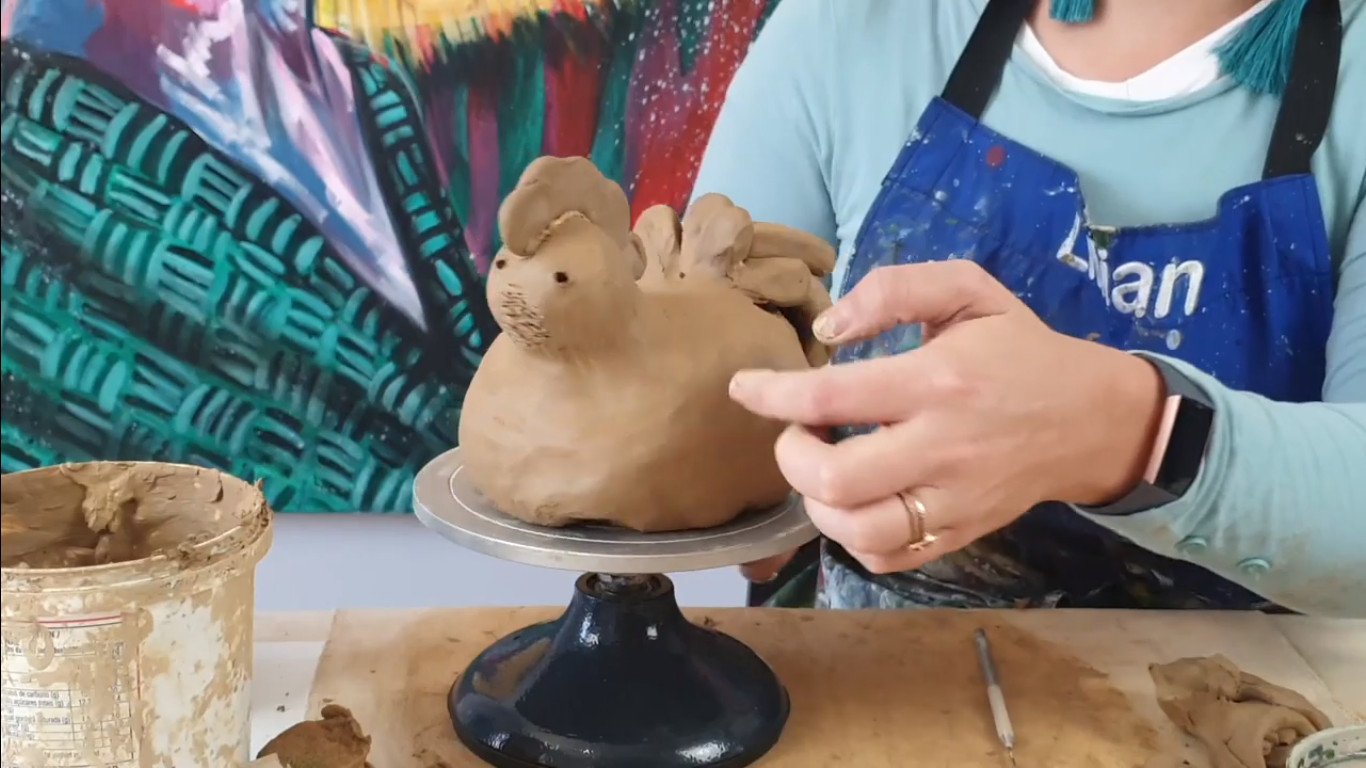
Making the tail feathers
We are now going to swap it around to the bum, and the same principles apply. We’re going to build the tail and we’re going to scratch, adhere and finish off our tail, add some slip so that it is glued. The first thing we’re going to do is I’m going to be placing my tail here. Once again I want my center of gravity to really be on the sculpture, and not here hanging down like a horse’s tail.
We’re going to be scratching. I’m taking some extra clay and really start making tail feathers. I’m taking the excess clay that I’ve got and I am going to split it into equal pieces. I want you to think of once again we working in basic shapes. If your clay is a bit dry, wet it again so that it becomes malleable.
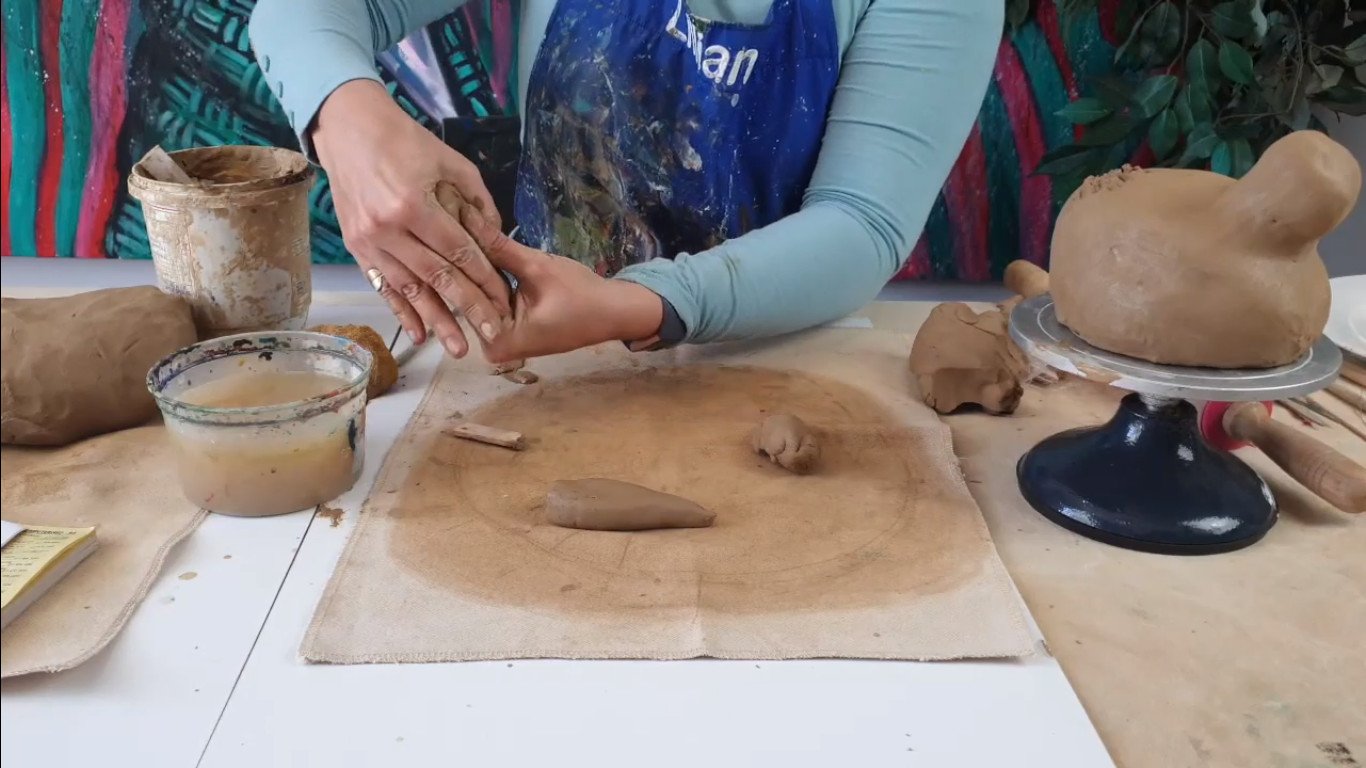
We’re thinking in basic shapes and I am going to be making, it’s almost like a big raindrop or teardrop, and that is what I’m making, so it’s just a circle with a triangle and those are going to be my tail feathers. The whole idea now is to really make three of them. Just wedging it between my hands and using my body as a shape.
I’m going to make three smaller ones now. I’m just going to simplify my clay into three and I’m going to make slightly smaller tail feathers. This is going to be the structure of my tail. Three big ones and three small ones.

Now that we’ve made all our tail feathers, we are going to join them, using the same principle as always. We’re going to apply some slip. Remember to also scratch the feather when you want to attach that. I’m going to start with my big feathers so first just one about the structure. I’m going to bring this in and then bend this over to really start making some plumage.
You will notice here, and there’s a reason I’m doing this, that I’m making it touch here and here. This means you’re going to have to scratch down here as well. You also going to need slip so it’s basically touching the clay at two places so that I am sure this tails not going to fall off. I am just starting to do this one and then the two side big ones.
Remember in art, using an uneven number is always better because it keeps our eye intrigued. As soon as we’ve got symmetry our mind switches off, and we want to visually engage the viewer. We always use odd numbers to create asymmetry on purpose. I’m just going to join these guys.
I’ve attached this now and you can take your sponge and just wrap out some of these edges before you join the other feathers on top. Because then it’s quite tricky getting it smooth. I’m happy and I’m going to add my second layer which is now the medium-size feathers. Same thing scratch, scratch, scratch, slip, slip, slip, scratch, scratch, scratch, and stick and the second place where it’s attaching, remember there you also need a bit of slip and just a bit of scratch I have attached my second layer.

I’ve also made three little smaller drops which I’m just going to add here on the side to really just have that plumage feeling. You know that a chicken is proud of it to tail feathers, that’s what we want to create. I actually think I need two more small ones, so I’m just going to make that.
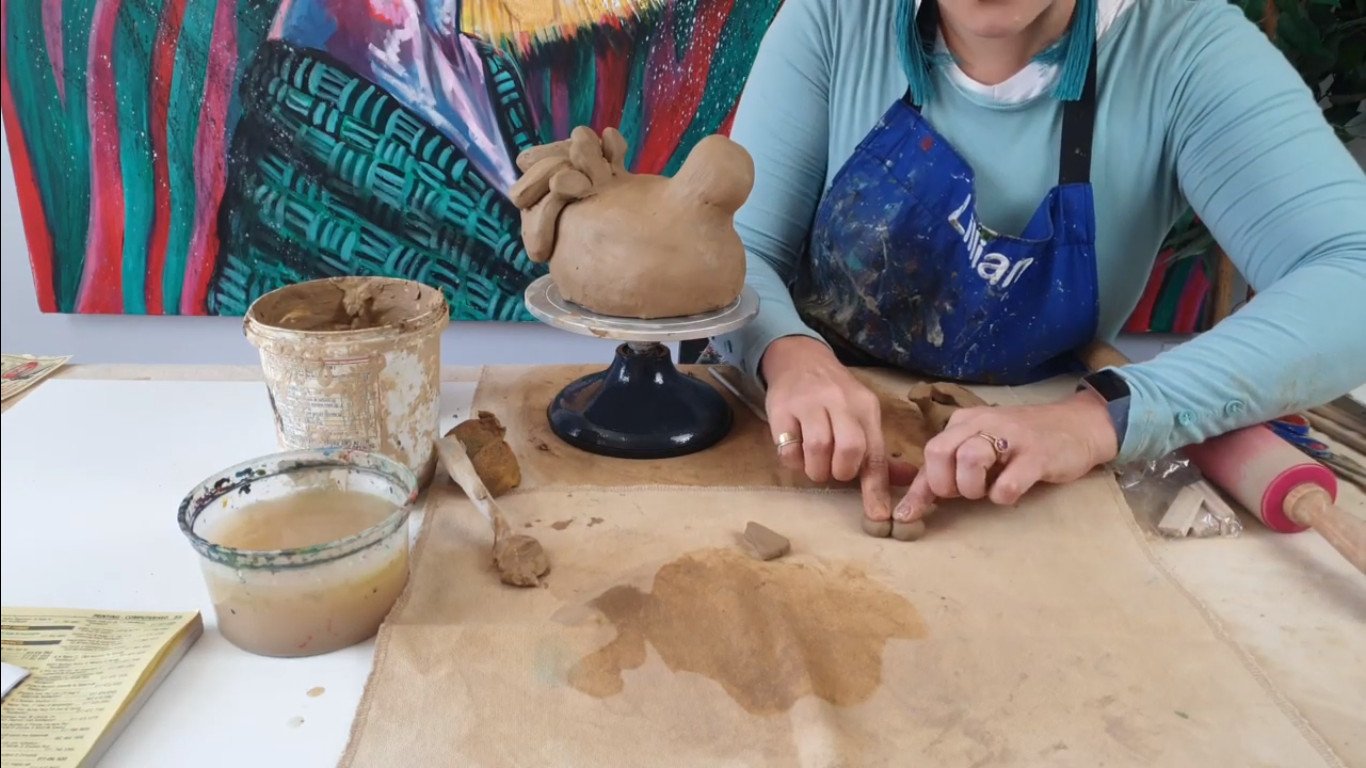
Making the beak and the bill
We’re creating everything by using basic shapes, so we are going to be making our beak, which is just a little triangle. It’s kind of how I’m making my triangle and that’s going to be my beak. The bill of my chicken is literally just two circles. I’m going to be rolling two balls and I am going to squish them together which is going to give me the bill underneath the beak.
I am working them in, making sure that they’re joined quite nicely. Make sure they joined nicely at the front and the back. I like creating all my pieces and planning properly before I start working on the face, because I just think you work much faster. That’s the beak, the bill and now for the comb.
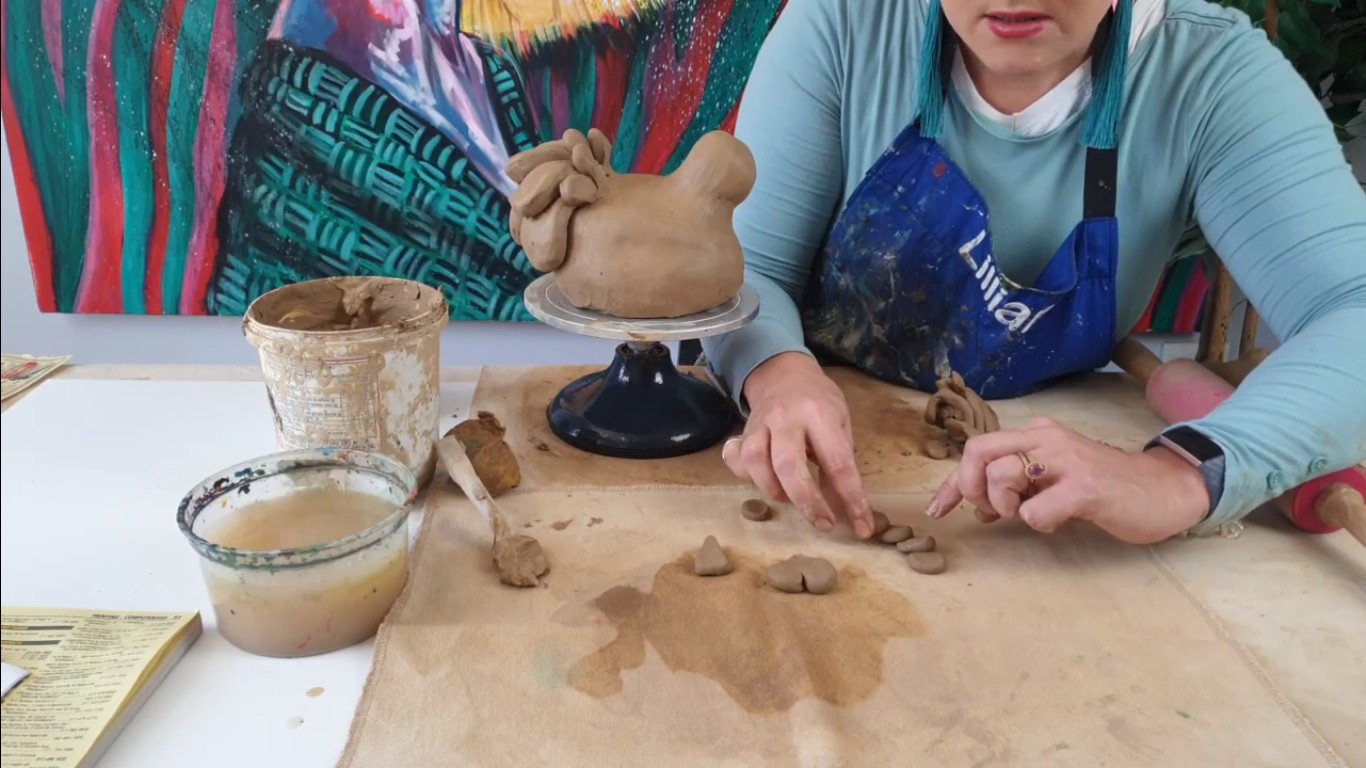
Let’s make the comb now
You’re going to be doing a comb, This is my little secret to doing these kinds of things. I make lots of little balls. Remember we’re working with odd numbers, so I’m going to make five. I am now just going to squish them with my thumb, making flat little disks. Now I’m going to arrange them so that I can start making this comb for my chicken. By doing that I’m just going to squish them into each other making sure they join properly. I’m going to flip it around, make sure I do it on the other side as well.
Putting all the little parts on your chicken sculpture
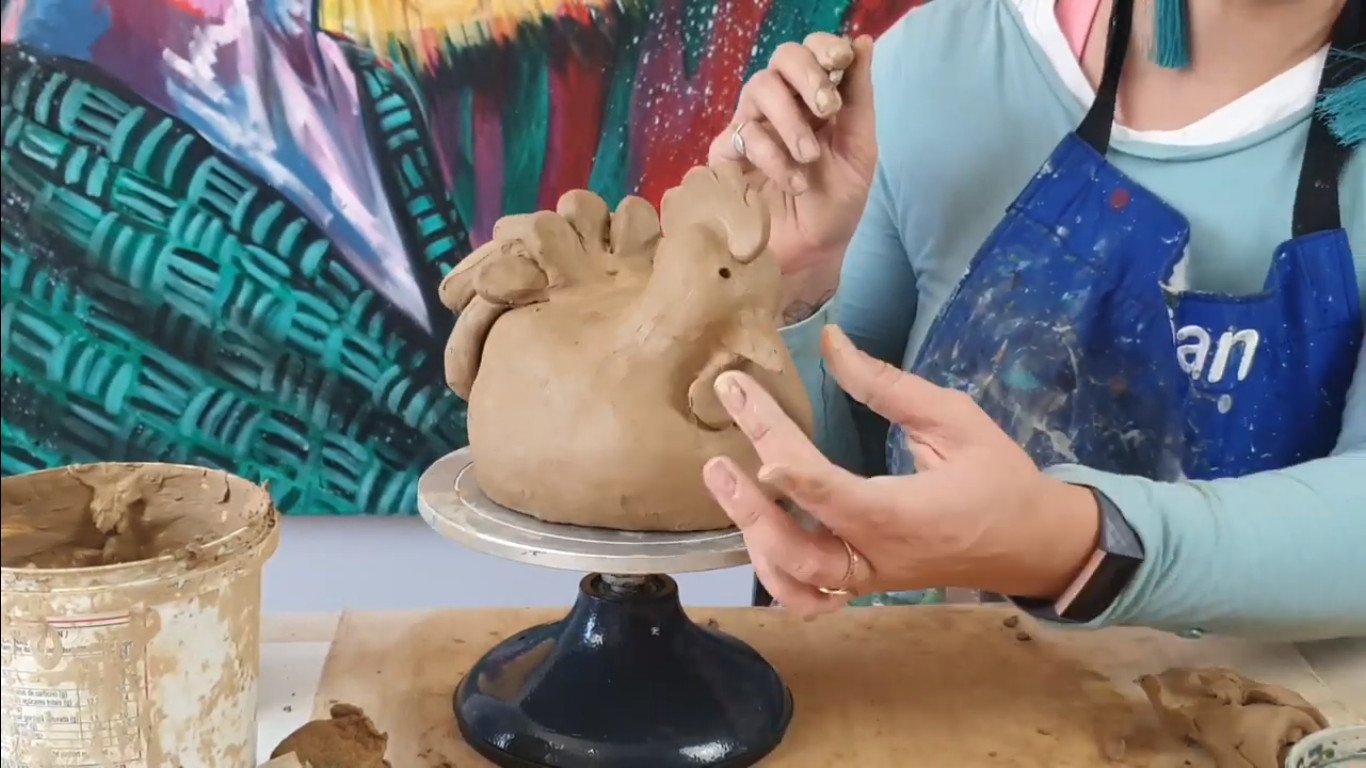
I now have all my little sections for my chicken’s head. So I’m going to move on to my chicken’s head, to make him amazing. First of all, I’m going to look straight on and I’m going to make sure I’ve got the median line of my chick. The median line is the middle and I’m just going make a little indent here.
Once again if you don’t have this pottery stick, You can use a toothpick or a kebab stick. I’m going to make sure that I’ve got the comb of my chicken going all the way down. That is where I plan on joining my comb.
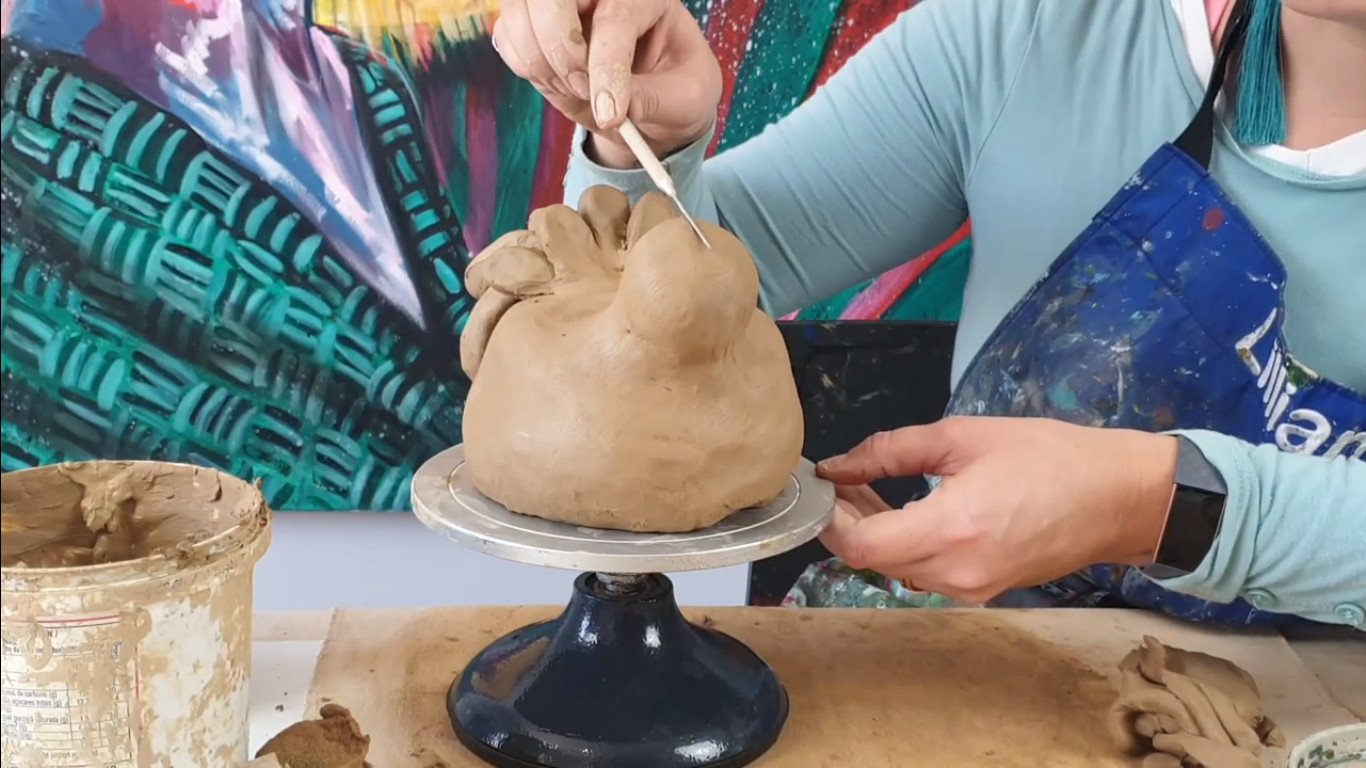
Once again I’m planning. I plan on putting my beak here and I’m going to put my bill underneath. That means I have to scratch there and I’m going to imagine where I’m going to have my eyes. There are lots of different eyes that you guys can make. For this exercise, I’m just going to make two little dots.
Just make sure I’ve got my eyes. Now let’s start. The best place to start is with a comb, so I’m scratching now where I want the comb to join. I’m also going to scratch the comb and, I’m also going to apply slip. You can see the slip is there, really joining it nicely.
I’m using my nail like this, to make sure I get this edge where it’s joining, really merged with each other. And really worked in nicely, making sure I get all the air out, making sure that my comb is there to stay. Okay, I think I’m happy with that joint. I think he looks really, really cute.
We’re now going to join our bill. Always plan so, that you know what comes underneath.
You do that first, so you’re not going to do your beak first because that’s going to be very tricky. I’m going to scratch our bill at the back. You’re going to add your slip. It’s almost like a little heart, I just realized. I’m going to plonk up my bill and I’m going to work it in, making sure it joins properly. Remember, we want to get rid of all the air.

I’ve added my bill and I am now going to add my beak. I’ve rubbed on the scratches I made for my beak, so I just need to redo those. That beats a bit massive, so I think I want to cut it smaller. I’m going to use my tool and to make my little triangle much smaller. That’s working. I’m going to work in my beak, smoothing it out, making sure I’m happy.
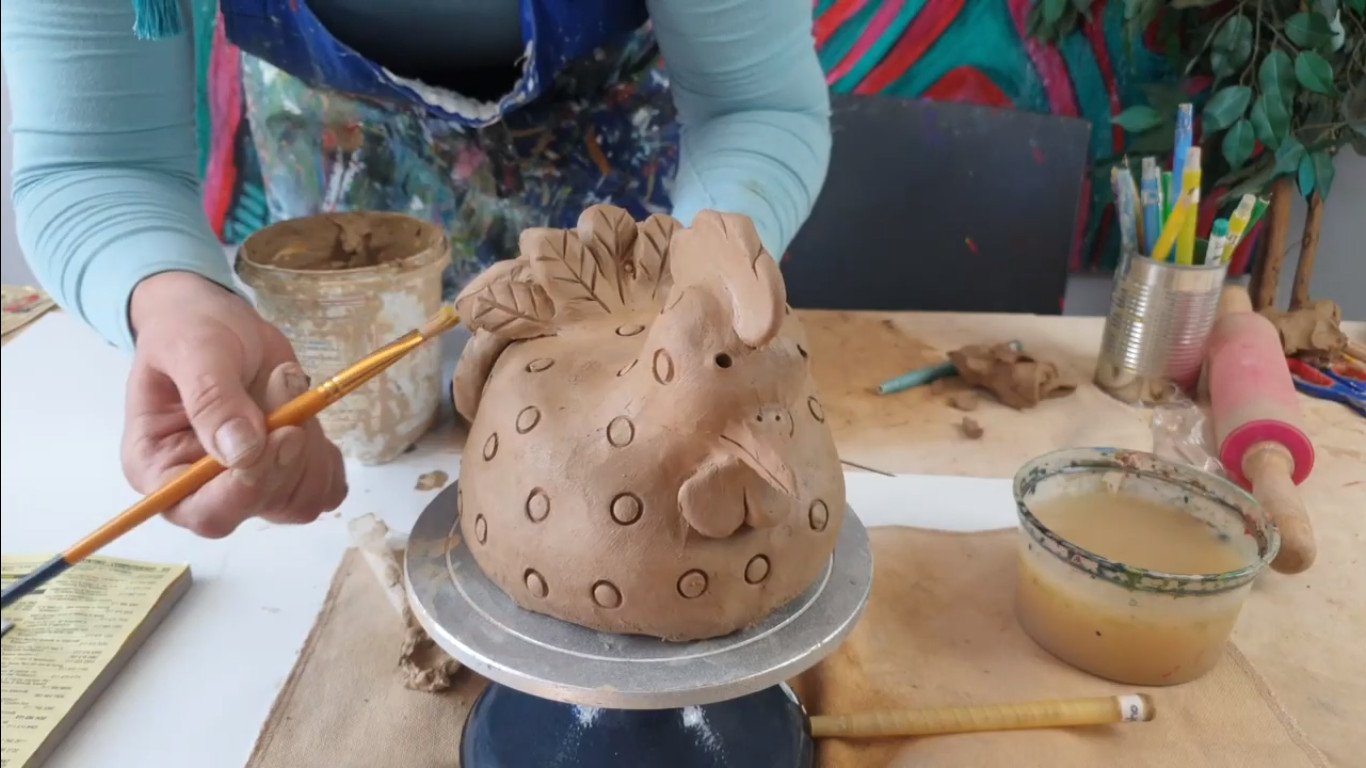
Adding all the cool little details
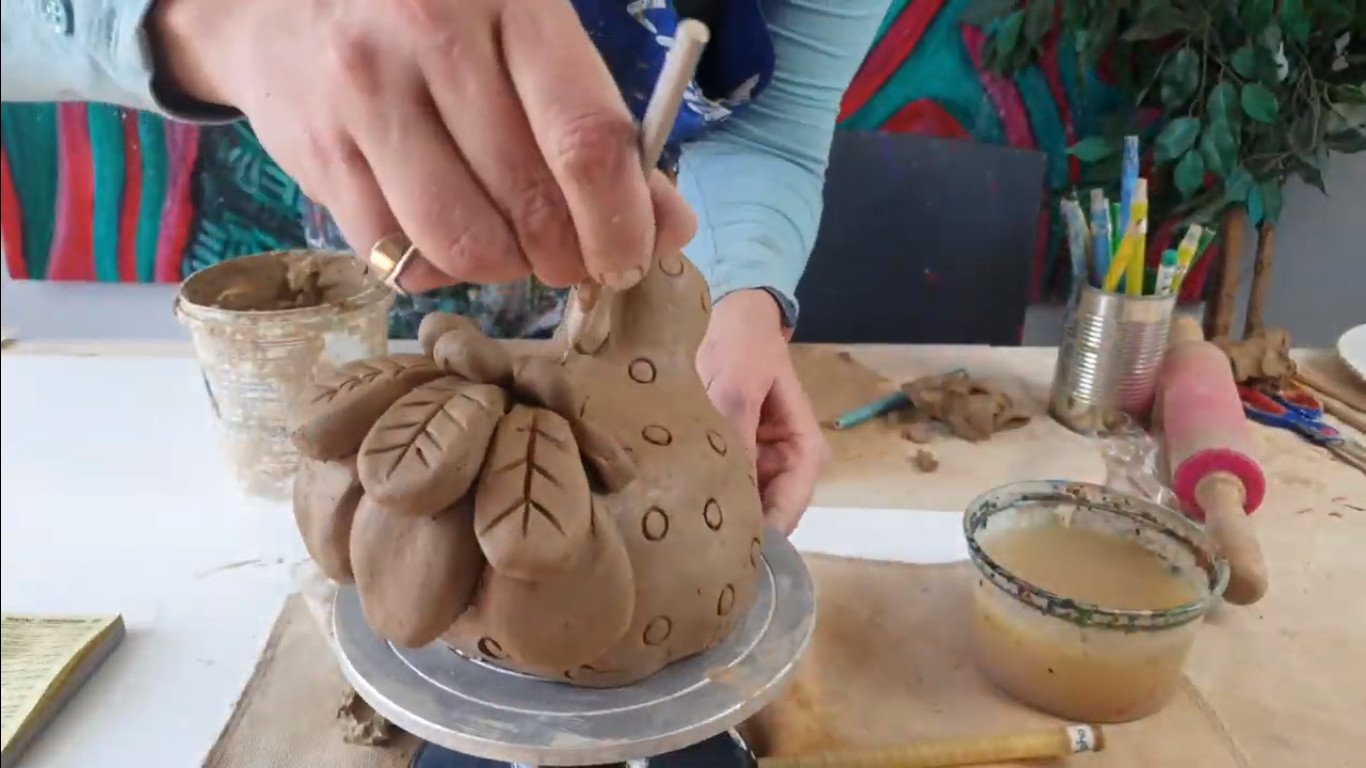
Now I’ve got my beautiful little chicken and I’m going to add a lot of little details. This is now a fun part where you really get to decorate. I’m just going to give him tiny little nostrils so he can breathe. If you want, you can gently cut the beak line and just create that little beak line.

I am also going to give him some dots. This is how we make the dots. What I am choosing is old crayons. These are called twisties and we need to use the front to get such a nice circle. and when you use the back you get a bit of like a star.

You can go around your house looking for stuff that you can use to make pretty dots. I’m going to indent and give my chicken some beautiful spots. There’s more decorating stuff that you guys can do if you want. You can add some texture to your feathers. I am just laying this in and creating a bit of a feather texture.
Cleaning up your sculpture
Cleaning up your clay and making sure everything is neat and tidy is a very important part of the project. It really saves a lot of time when we’re starting to finish off clay because you’re going to have to sand much less. What I usually use is an old brush just to take away whatever fluffiness there is. If there are little crumbs from how I’ve scratched, I just remove all of those things.
I also use the brush to just get in at places where my finger maybe couldn’t have gone in. But you really want to take away all the little fluffy irritations because it’s much less work later on. Remember, finishing well. You’ve spent all this time now, making this chicken. By just finishing it well it really just propels your project into the next level of making it look WOW. We are not making it look completely homemade actually professional, making sure my lines and my little textures are nice and crisp, exactly the way I want them. Whatever else there is that you want to brush off or fix, now is the time to do so.
Fun facts about chickens
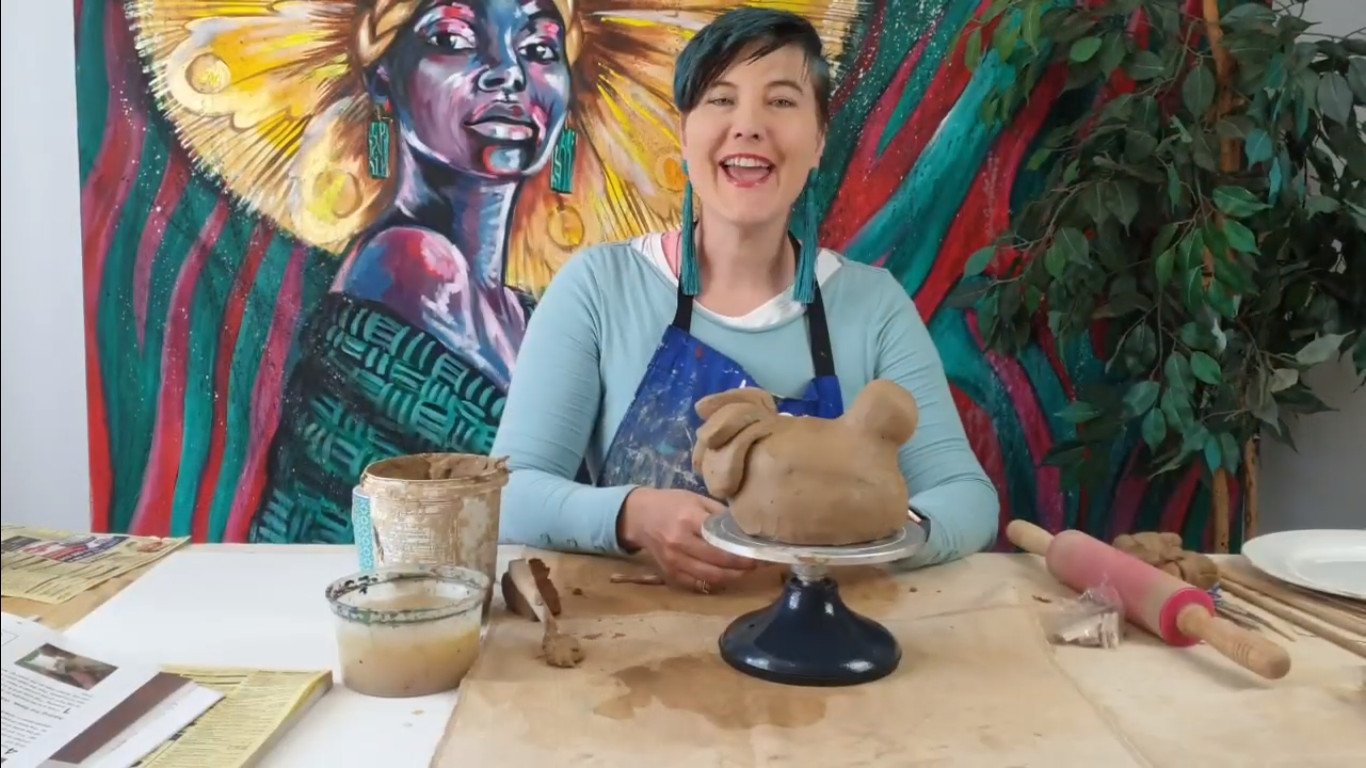
And there you have it this beautiful chicken sculpture. I’ll tell you something fun about chickens. Chickens are actually quite vicious. I was raised on a farm and you know chickens can actually fly a little bit, and they can jump a fence if they want to. They love eating insects and even small mice. So we used to keep them on the farmyard to actually, eat all the scorpions. They love eating scorpions and they’re like smart enough to not eat the poison sac which I find it’s like amazing.
Make the little sculpture your own
So yes, this is how we are going to make our chicken and guys remember this is your project. Don’t copy me straight away. Make it your own. If you want to make a steampunk chicken, make a steampunk chicken with some goggles and some gears. If you want to make a fortnight chicken that I know, goes out at night and spray paint some walls, go and do that. If you want to make a chicken with a mask, you can do that and have some fun. Make it your own okay.
Step 5: Storing your chicken to dry
It’s super important how you store this chicken. I’m actually going to take it off its little sculpture swivel. I’m going to be placing it on a little polystyrene container I’ve got. Do not place it on plastic, it’s not good. You can use cloth or paper towel or something like that if you want to line it and it’s just much better, because it absorbs the moisture that the clay is going to lose while it dries.
I’m now going to wrap it in plastic. I usually use two plastic bags, so that I wrap it from the one side and then from the other side, so there’s really no, you know like crazy air, coming in. And you want to keep it in those bags for at least three days. After three days you’re going to tear the plastic off, you’re going to open the cupboard, and let it air a little bit, and then slowly dry. It must take about a week for the sculpture to dry. Don’t get a dry fast and never put your clay and direct sunlight. It’s going to be a crack, snapple and pop party in there if you do that.
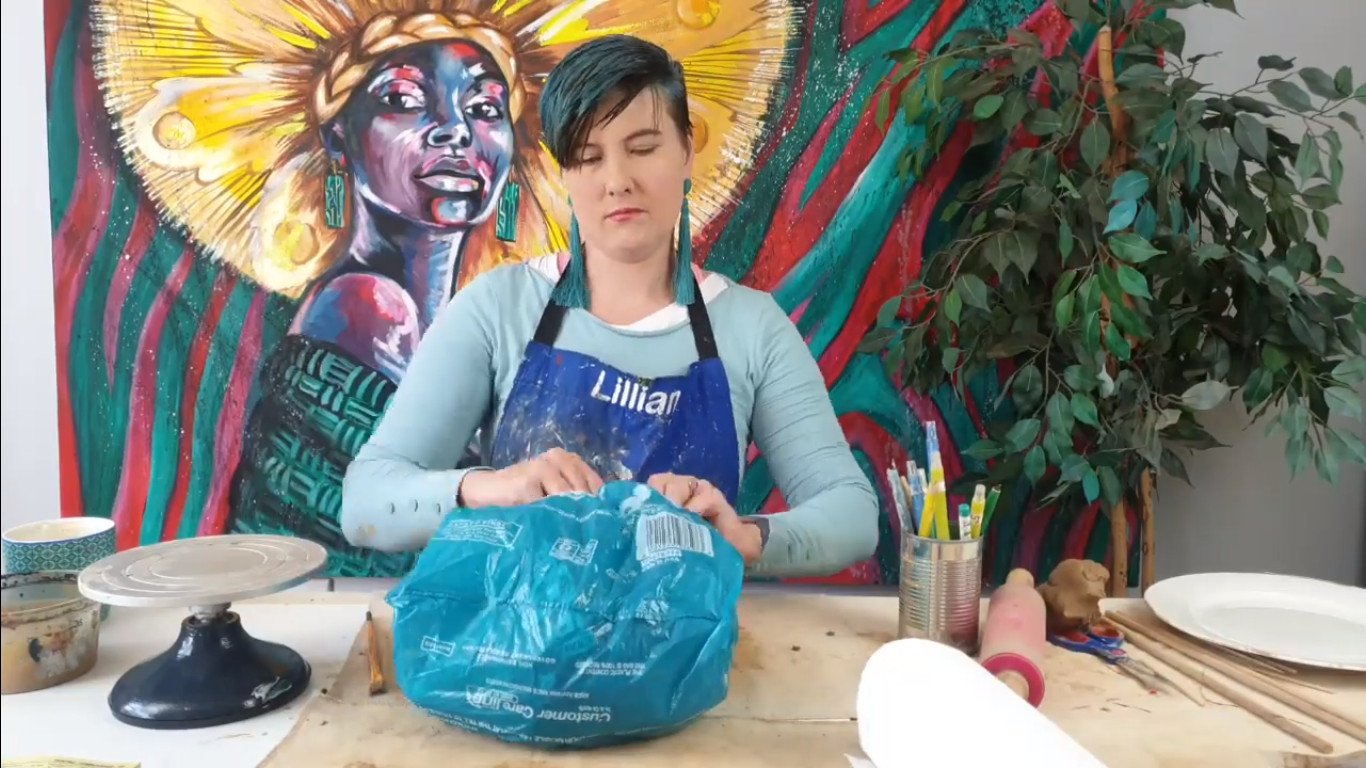
Once I’ve wrapped it in my plastic, I am now going to put it in a dark cupboard for at least three days. I hope you guys enjoyed this lesson on how to make a chicken sculpture with air-dry clay.
I’m Lillian Gray, be sure to give this video a like and subscribe to our channel. Check out our blog for some more art projects.