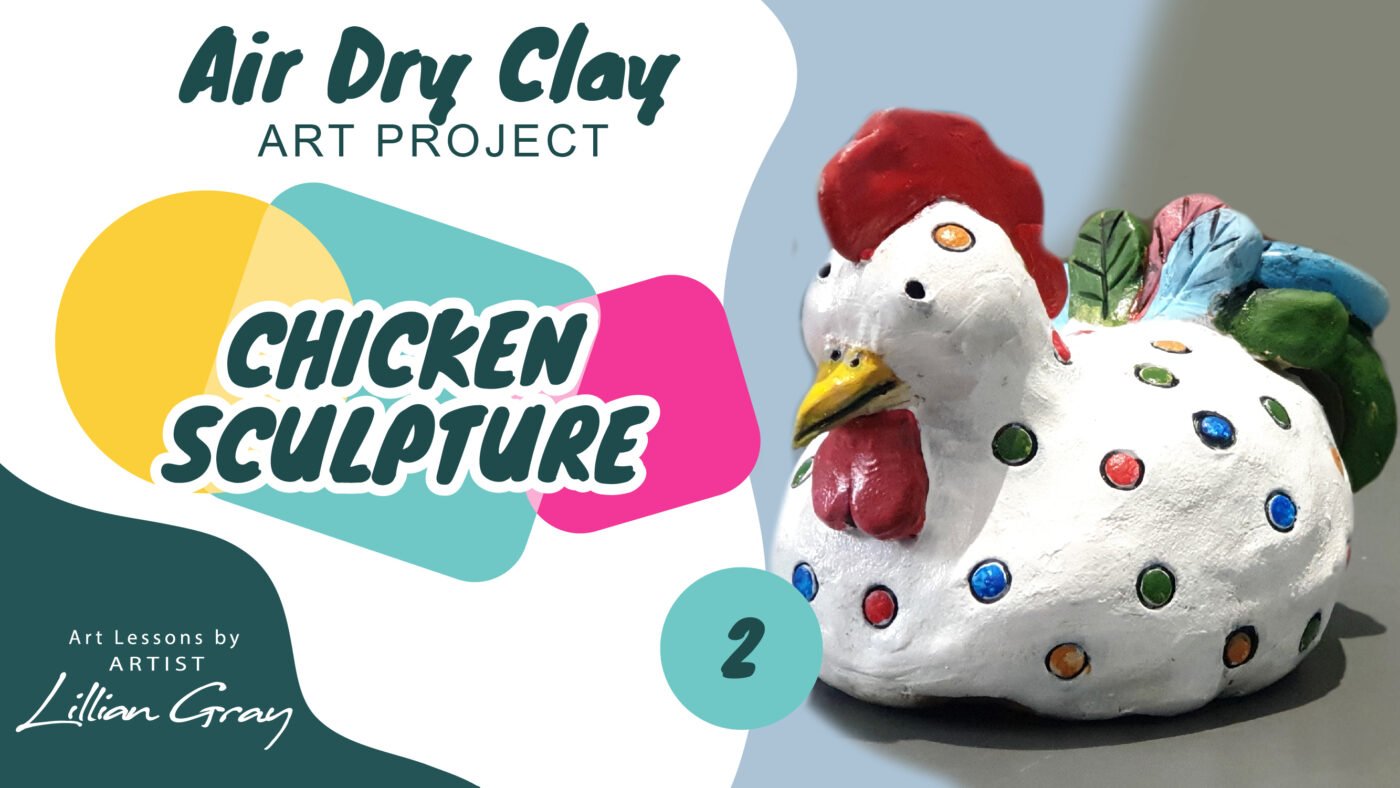
Kids Art Projects
Paint your chicken like a professional using 2 products: acrylic paint and varnish
Jun
Hi, I’m artist Lillian Gray and today’s lesson is about finishing our beautiful chicken sculptures
For this lesson you will need:
- sandpaper
- a coarse sponge
- acrylic paint
- an array of paintbrushes
- Clear spray paint/artist varnish
That’s all the basic things I’m going to use. Remember this is air dry clay, so it’s not like we can glaze this baby and put it back in the oven. We are kind of hacking the pottery environment with all the expensive tools of a baking oven and all those things. So stay tuned and then see how this beautiful chicken turns out.
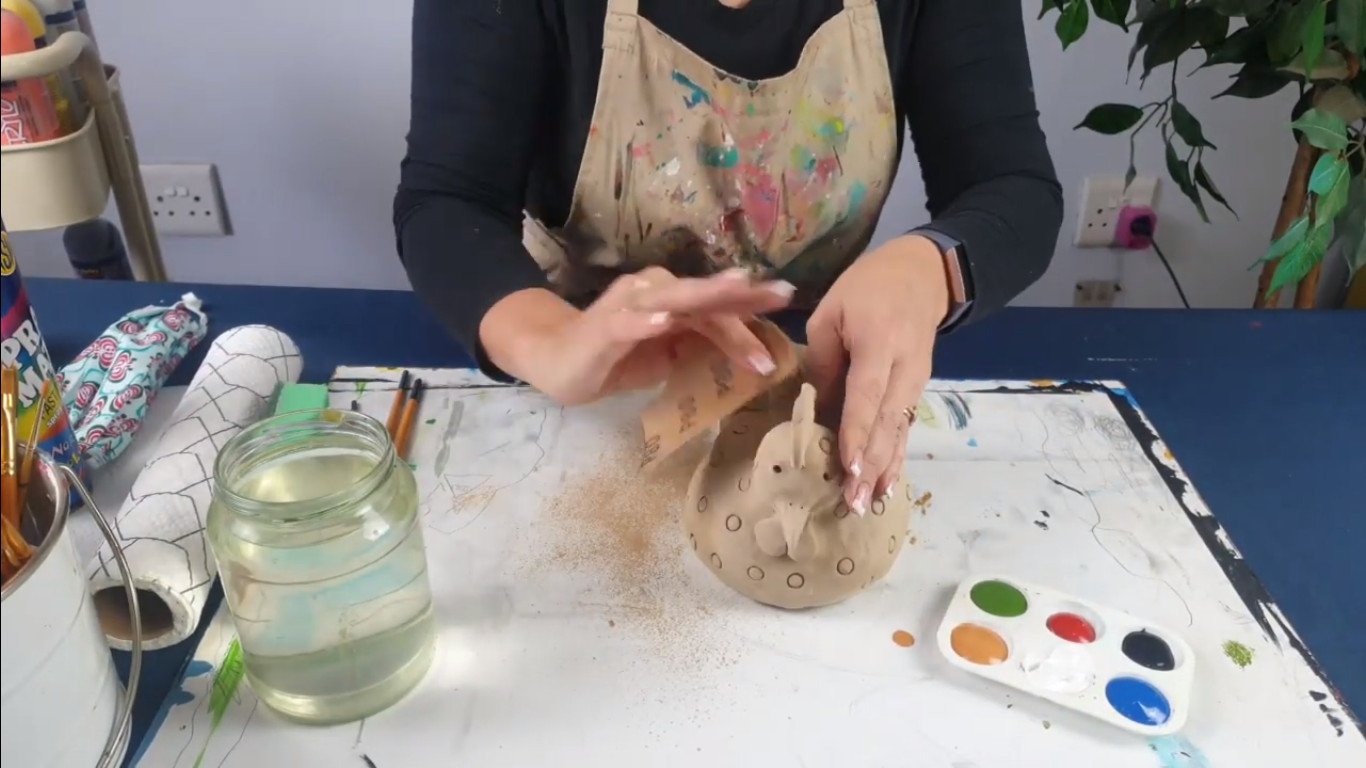
Sand your chicken until it’s nice and smooth
The first thing you want to do is you want to really smooth out your edges. You can either use your sandpaper for the parts that are really rough and if that’s too coarse, you can always opt for a sponge. The rough side of the sponge will also do a great job. Make sure you smooth out everything and get rid of all the dust before you start painting.
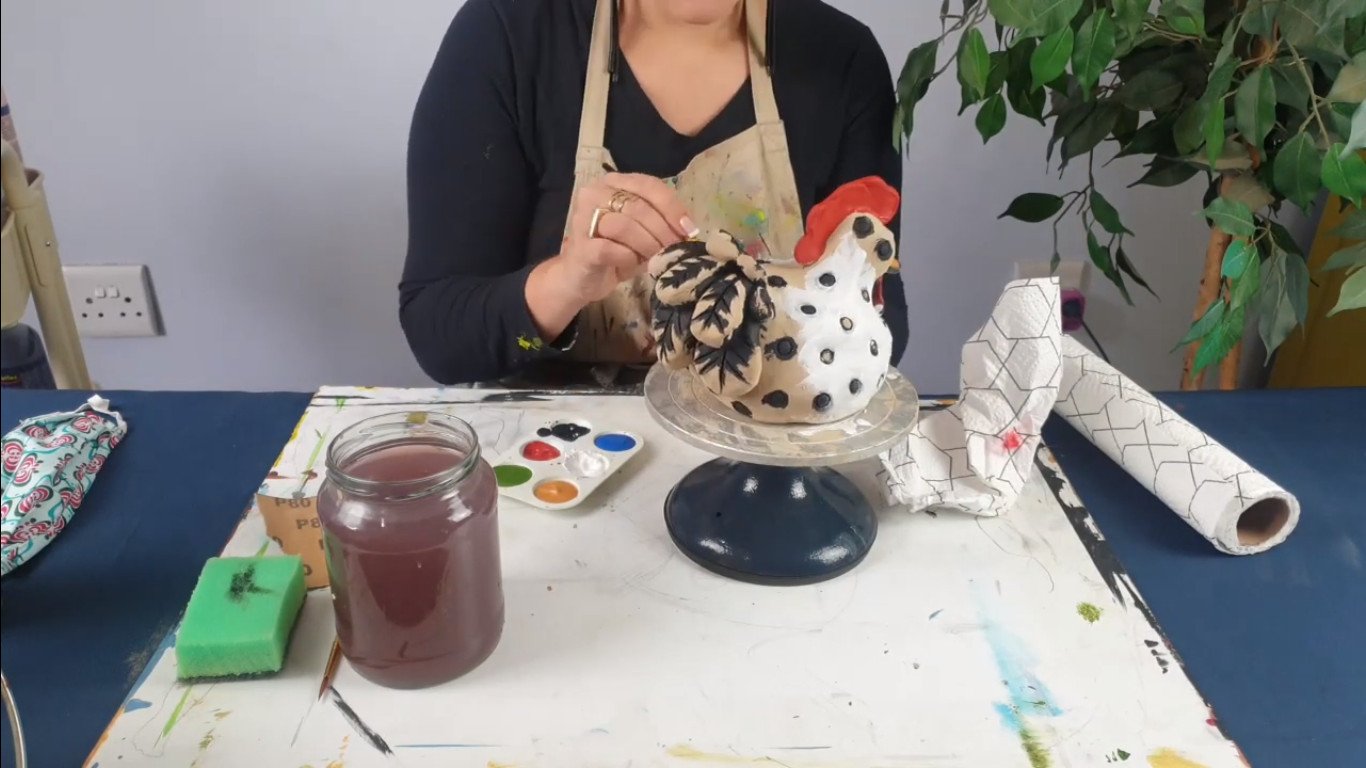
Add black paint to the dots for emphasis
First I’m going to be using a pointy brush and I would like my polka dots to really stand out. What I’m going to do is, I am going to insert this black paint into this little indent crevice of the polka dot and I am just going to make sure that I’ve really fill that. It won’t look like this when we’re done, you’ll see. Be very careful with black. Black is like arsenic, you only need a little bit right otherwise it is really going to make all your other colours muddy.
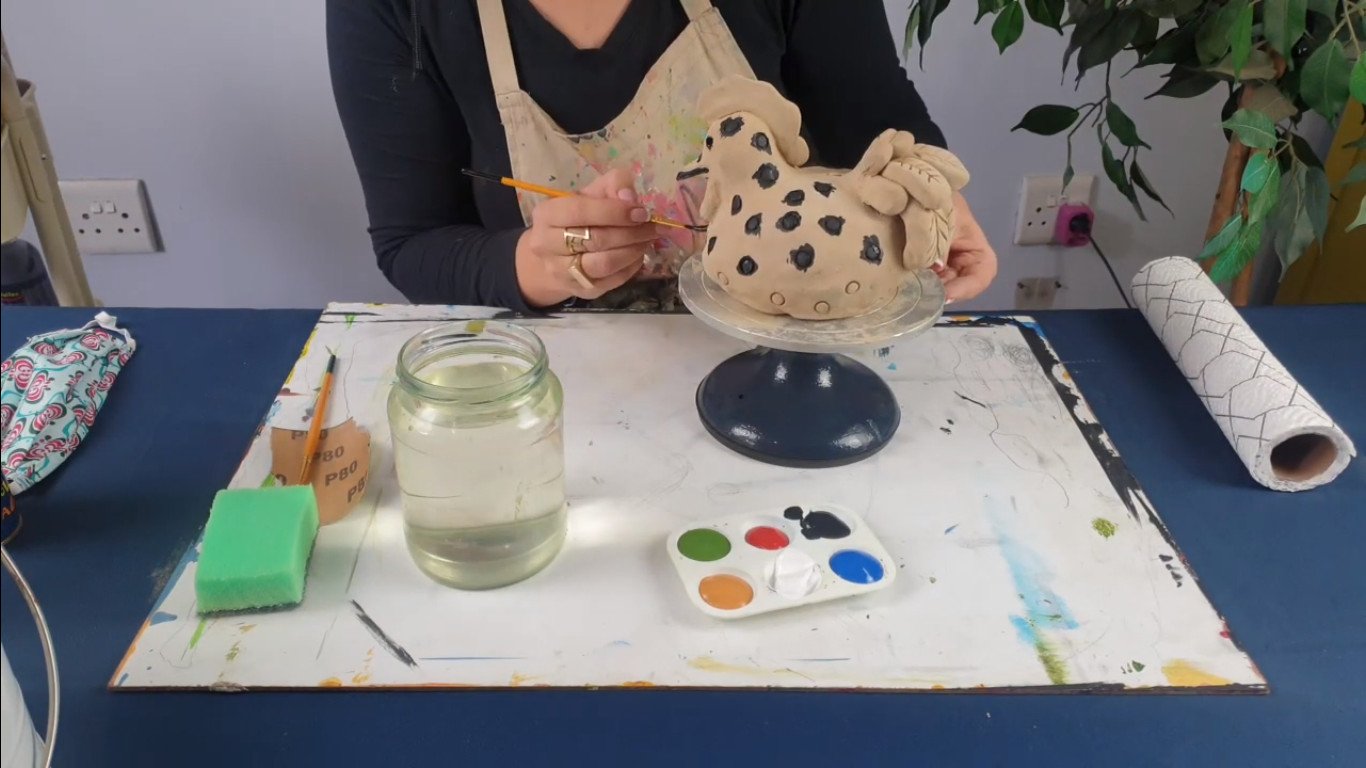
I am definitely going to wait for this black to dry before I’m going to start putting on these beautiful primary colours. I’m working on my sculpture wheel just because it makes life much easier, and I can just quickly turn it and flip it around to make sure I get the paint into every single little area. I’m also going to put some drama in the tail and everywhere the feather pops out I’m also just going to add some black.
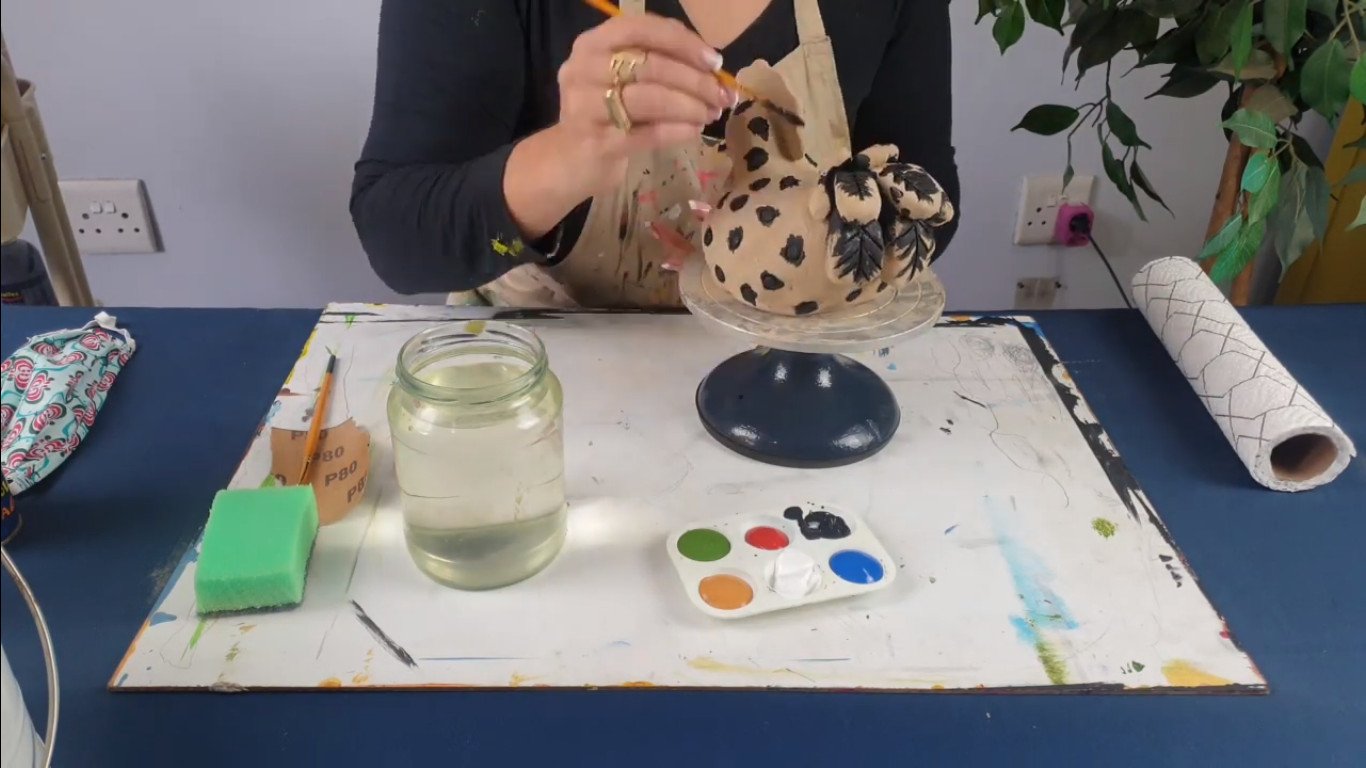
I’m done with the black and everywhere I wanted to add a bit of drama, I’ve done black. I’m washing my brush immediately. Don’t ever leave your brush inside the water, always squeeze the water out and just get your tip back to the shape you wanted it. Remember this is acrylic so you need to wash your brush ASAP. The black is also almost instantly dry because the clay super absorbent and it is acrylic, so I can move on to my other colours.
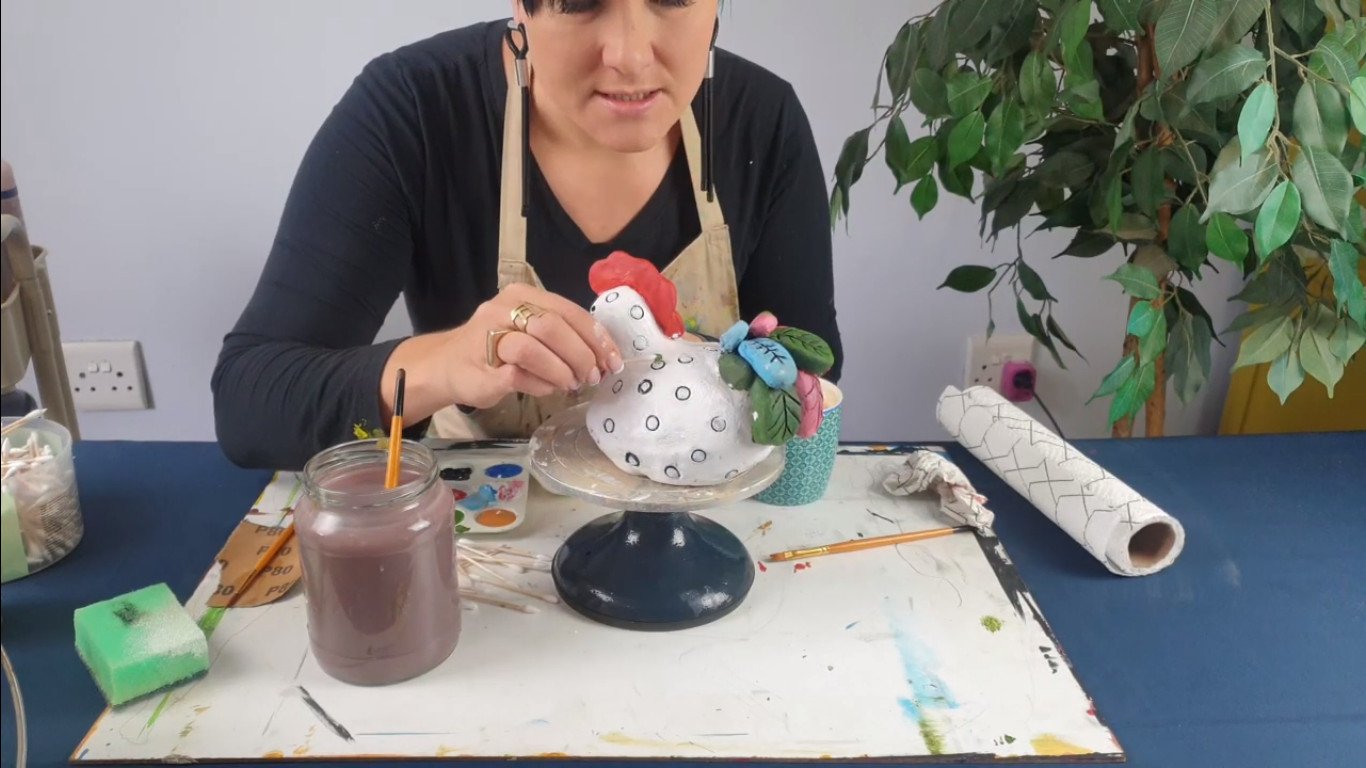
The comb and the bill red
I’m now going to use red for the comb and the bill and then I’m going to start doing the body and the tail.
I just want to show you that you’re not supposed to have that much paint on your brush that goes into the crevices. You want to keep the crevices black so this is literally called dry brushing. You’ve got no water with your acrylic. I never put water with my acrylic and I only have the tip of my brush filled with paint. I’m just brushing over so you guys can see I’m keeping the drama of the black that I’ve added. I’m not covering that.
Give your chicken a solid appearance
I’m going to make sure my colours are nice and solid. As you can see here you still see the black shining through the white. I’m taking a sponge with no water and I’m just going to lightly press, dabby, dabby, dabby. And you want to just give your white a solid appearance but not covering the black that’s in the little crevices, because this really makes your chicken pop.
You now see how nice this is starting to look. Anywhere that you’ve got your colours dirty, like here I’ve got some red in, go and clean it up with a small brush. Remember your art is only as good as how well you finish right. It doesn’t help you spend all these hours creating a sculpture and then you rush the end. Rather spend your time. If you get over it, let it dry, come back. You can always finish it when you’ve got more chutzpah again. But really, really concentrate to finish well.
Painting with earbuds for more control
Another thing that I like which is a bit unconventional is, I like actually using earbuds. I use them in my paintings, I use them almost everywhere, especially these ones that have the sharp point, where you could just really get in where you want to get in, or you could I use them as a little sponge,
where I can now go and sponge on the dots without getting the paintbrush hair going astray, going wherever they want to go. I feel like I’ve got a bit more control with the earbud for just making that dot green.
Okay, I’m done painting our beautiful chicken. I’m going to let my acrylic dry. It will take about seven minutes depending on the weather outside as well. But it will dry quite quickiy. If it’s raining outside you can chase the acrylic with a hairdryer, if you want it to dry quicker. You guys will have various options with finishing.
Finish your sculpture off
If you want a matte finish you can use a matte clear, fast-drying spray paint. If you want more of a glossy, shiny one you do the shiny spraypaint. If you want that thick glaze look, the insane like this is, you know pottery that was made in the oven, you’re going to be using artist’s varnish.
You can just buy a cheap one and you want to coat the chicken quite thick. It will take about two days to properly dry, so it’s a much more tedious process, but it’s really worth the look because it looks epic. If you do that and if you even give it like three coats of see-through varnish, it really gets that glazed, amazing feeling.
I’m going to be doing the varnish so you guys can just see what that looks like. I’ve put it on the clingwrap or glad wrap. I like working on plastic when I’m doing the varnish because you don’t want to work on a cloth from where it snaps off and breaks a piece of your clay when dry. So the plastic I find you can peel off quite easily and if there are any varnish droplets you can just sand it’s lightly off.
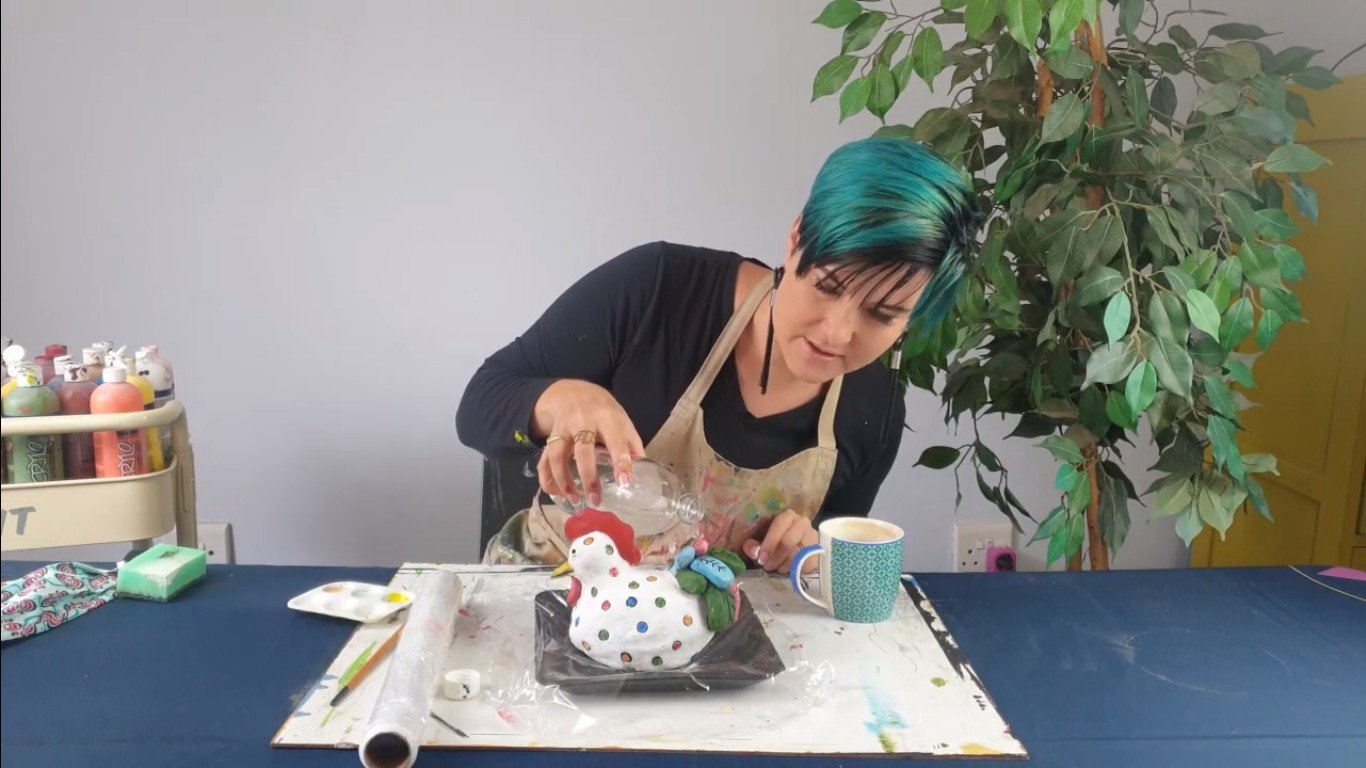
I use quite a lot. I have a cheap one here which is Lycol which is just like a student varnish. It’s not a very expensive varnish, and I like dripping it into all the little crevices so it really gets that glazed look, and then I’m just going to lightly brush it in with a dry brush. As you can see she’s got this beautiful glazed look now. I’ll let her dry overnight, and she should be completely done and ready for grandma’s kitchen by tomorrow.
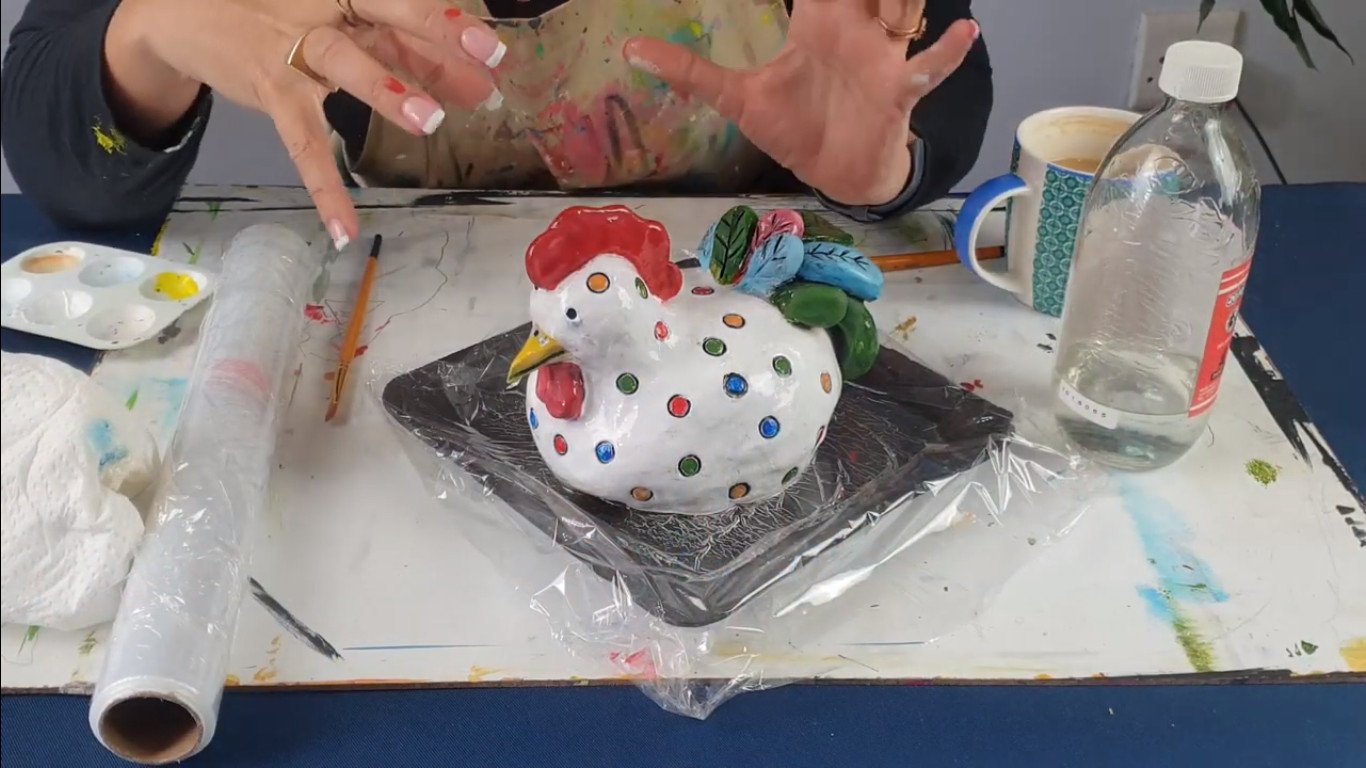
I’m artist Lillian Gray. I hope you guys enjoyed this project. Give us a thumbs up if you liked it and be sure to subscribe to our channel and not miss out on our next art projects and the next amazing hacks and tricks. Visit our blog for more exciting art projects.