Kids Art Projects
Creating an Armadillo out of air-dry clay in 10 quick and easy steps.

Jul
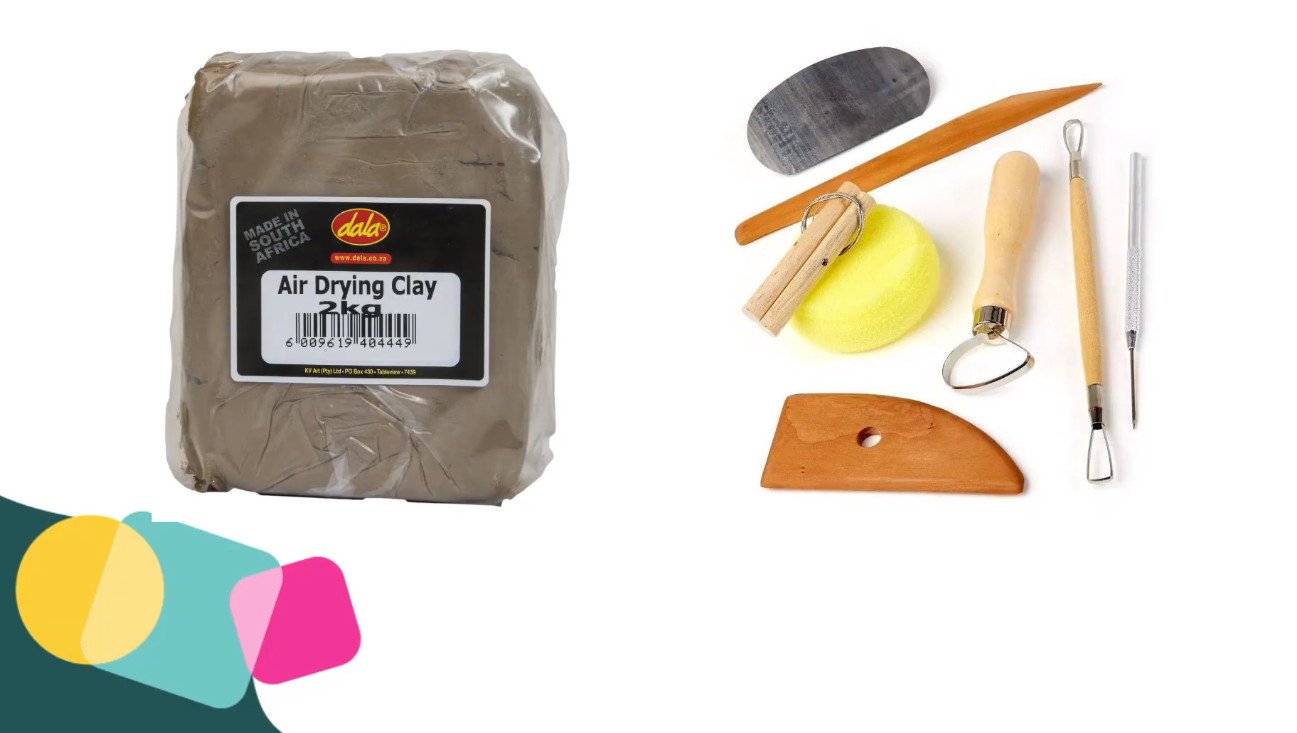
Hi, I’m artist Lillian Gray and today I am going to show you how to make the cutest little armadillo out of air-dry clay. I am using Dala’s air-dry clay. I simply love working with this. You can buy it by clicking on this link, and there’s also a beautiful clay toolset that’s quite affordable and easy to work with.
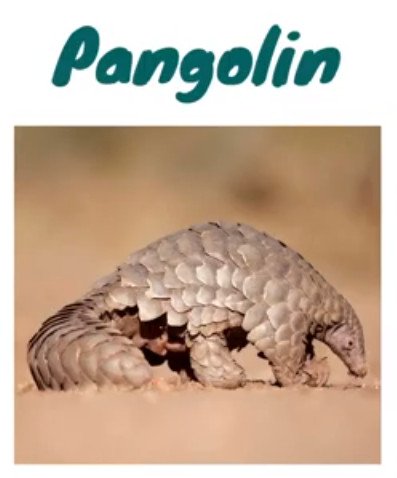
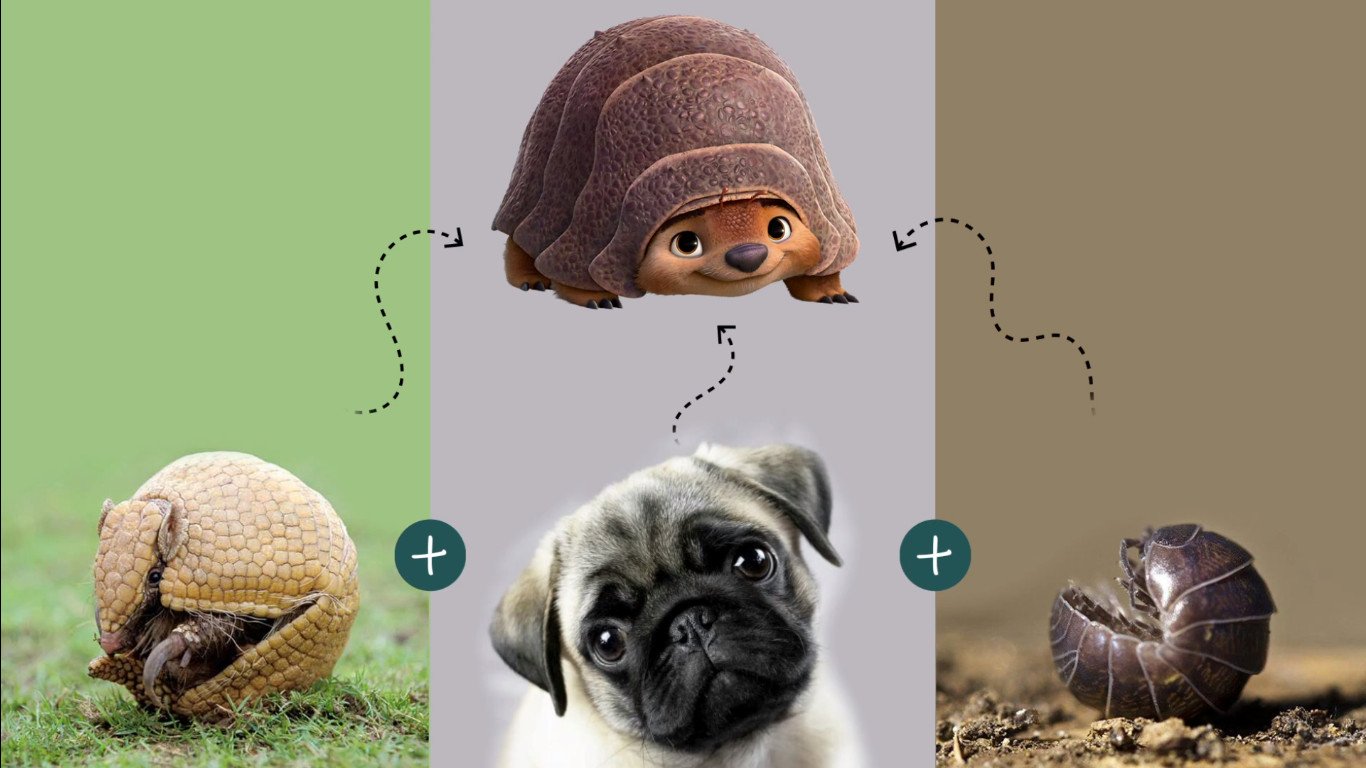
What is the differene between an armadillo and a pangolin?
First up, do you guys know what is the difference between an armadillo and a pangolin? A pangolin has scales it almost looks fishy and its tail is quite thick and massive, where armadillo has leathery skin, so that’s quite a big difference.
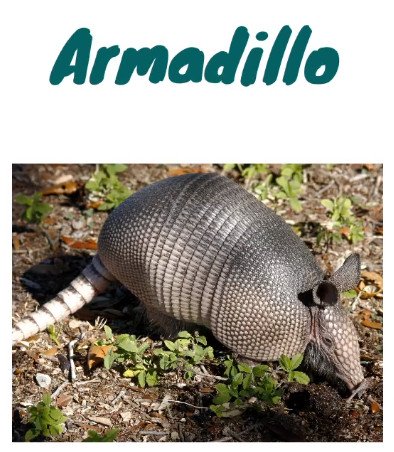
Armadillos are mainly found in South America and there are one species that lives in the North of theUnited States but they mainly live in South America. They’re an endangered species because we’re messing up their habitat, and they’re just so cute that I really wanted to honour them today.
Step 1: Cutting the air-dry clay
I’ve cut open my clay with scissors, just removing the plastic. I’ve got my clay tension wire that I’m now going to use to just split this clay into four equal pieces.
Step 2: Wedging my clay
I am kneading it almost like it’s bread dough. You want to avoid bringing too much air into your clay and trapping some air bubbles because that will make your clay burst and crack, and that’s really not what we want. Air is the enemy of clay.

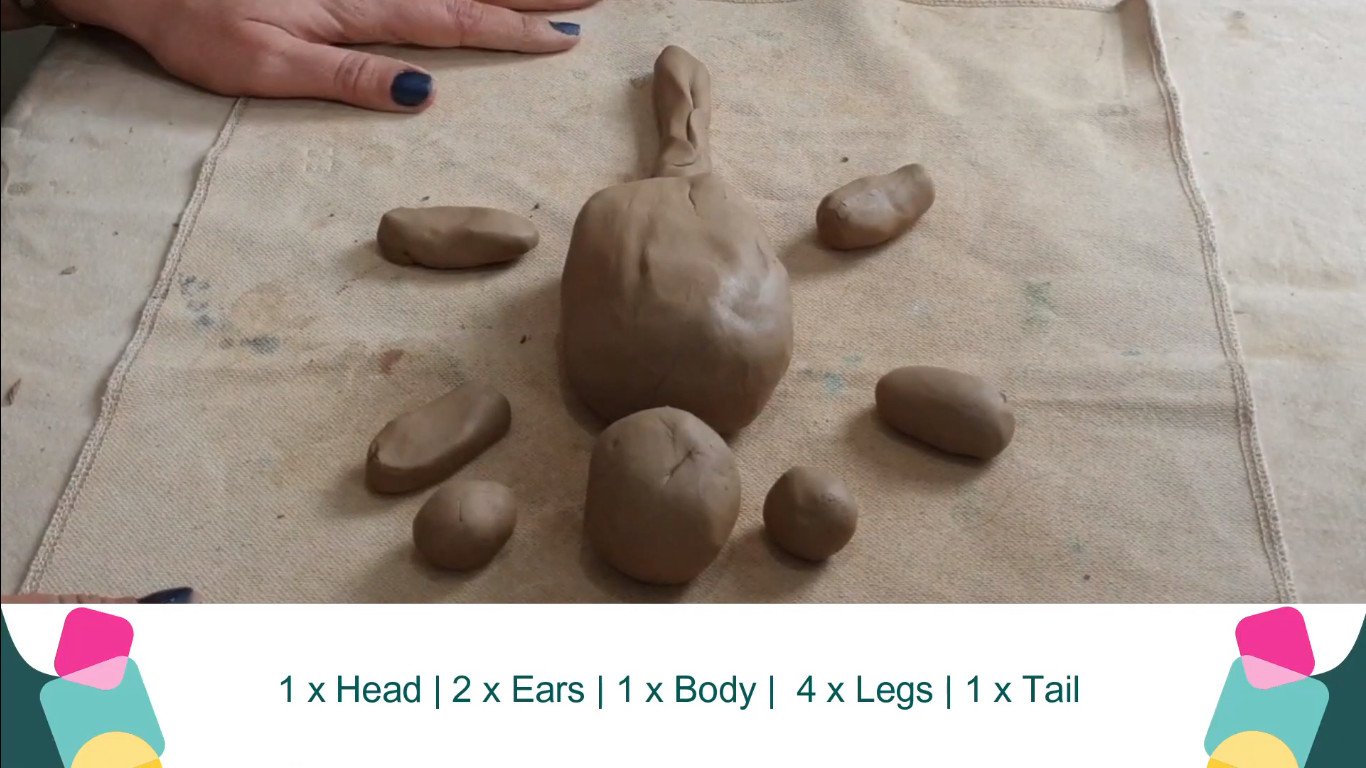
Step 3: Create basic shapes
Clay is very much like drawing. We use five basic shapes to construct a drawing when we draw, and the same happens when we do clay sculptures. I’m first just going to shape my basic shapes. I’m going to have a body for my armadillo, I’m going to have four little legs, I have a head, two ears, and a tail.
The reason I’m also making an armadillo today is that I watched Raya and the Last Dragon and I just love Tuk Tuk. Isn’t he the cutest thing ever? He’s a third armadillo, a third pug, and a third bug. That made me read up a little bit more about armadillos.
Step 4: Refine the shapes
Let’s start by shaping the body. This is quite a sturdy strong oval almost like a little loaf of bread. Think of your proportions when you’re making your basic shapes. You can always take extra clay away but adding clay is a bit harder. It’s made out of solid clay there’s no armature inside because you’re making quite a tiny little creature today.
They’ve got like a little snout almost like a piggy, so I’m kind of just starting to shape this for the snout. Now I’m going to join. Remember when we join clay we always have to scrape and we always have to use slip. Slip is clay’s glue, it is clay with a lot of water and that is what we use as our glue to join clay. It helps us to get rid of the air bubbles that form when we join two pieces of clay. I’ve got my little scraper which is a clay pin. You can also use a toothpick if you don’t have one of these.
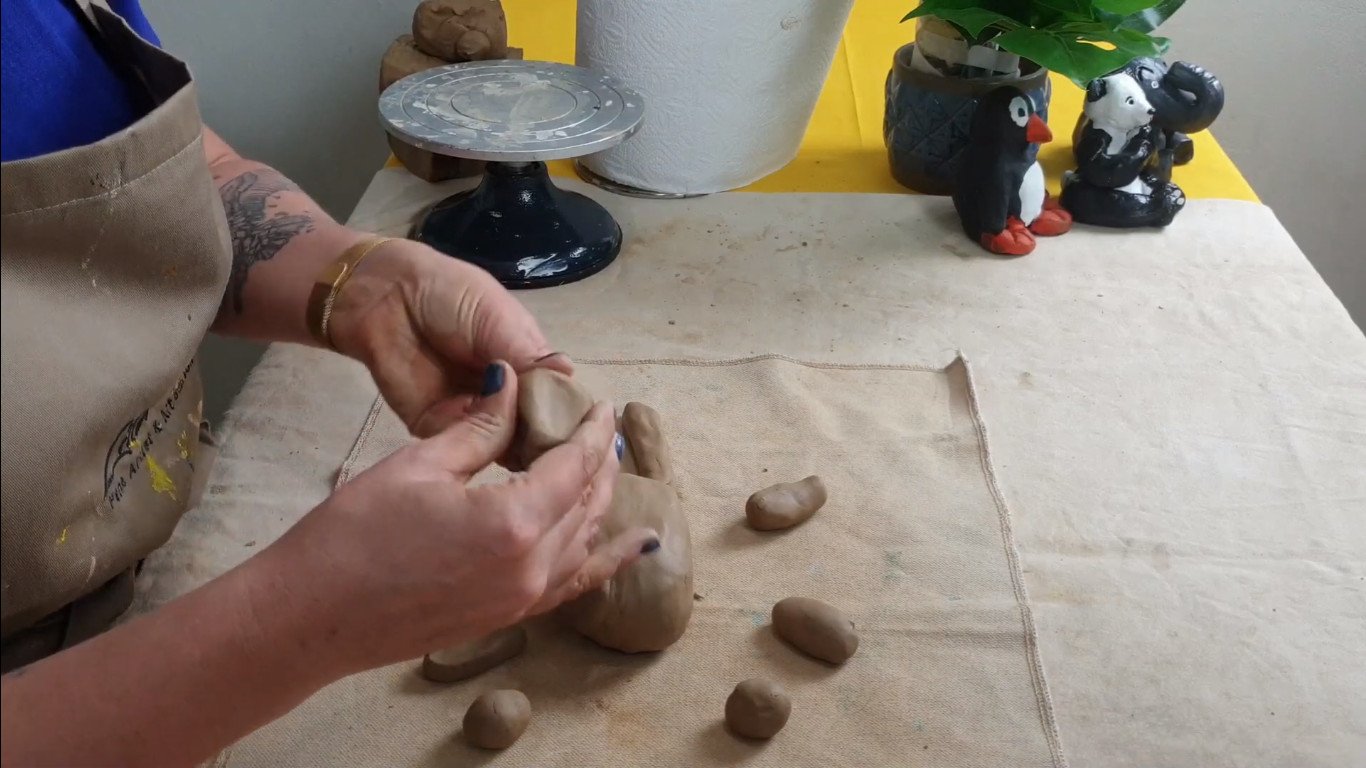
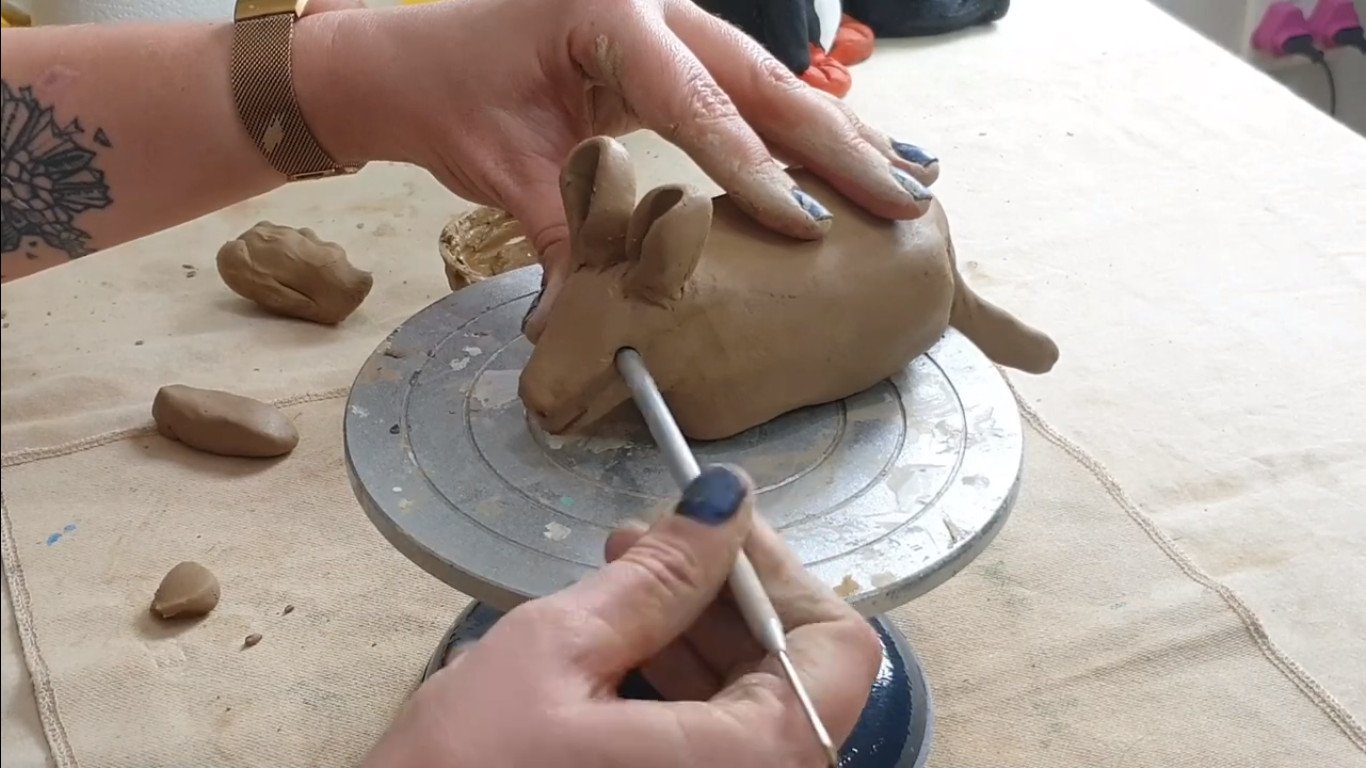
Step 5: Join the shapes
I’m first going to join the head. What’s important with the armadillo is that the head molds out of the body, it’s more to the upper part. It’s in a line with a back, it’s not lower down. Be careful about where you position this. I’m just planning so that I know where I need to scrape. I always scrape both sides of the clay that I’m joining.
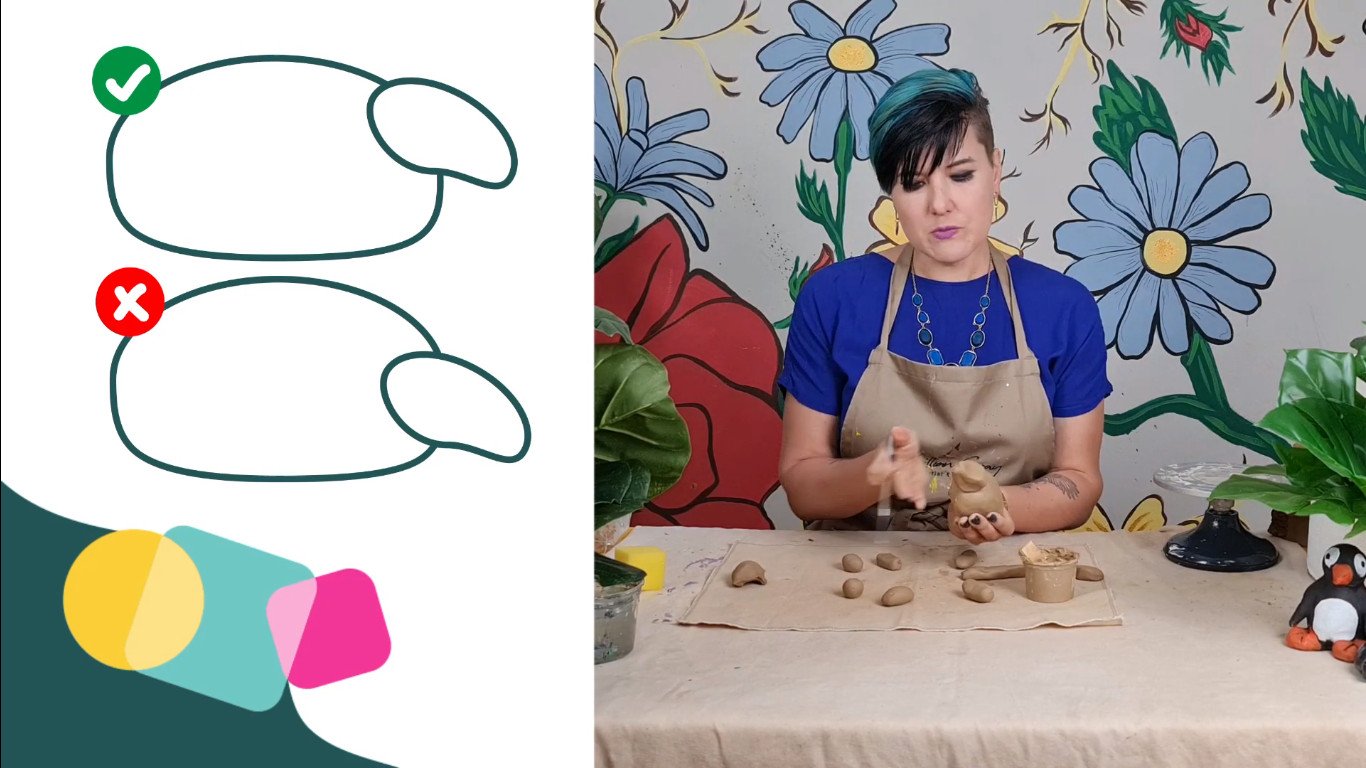
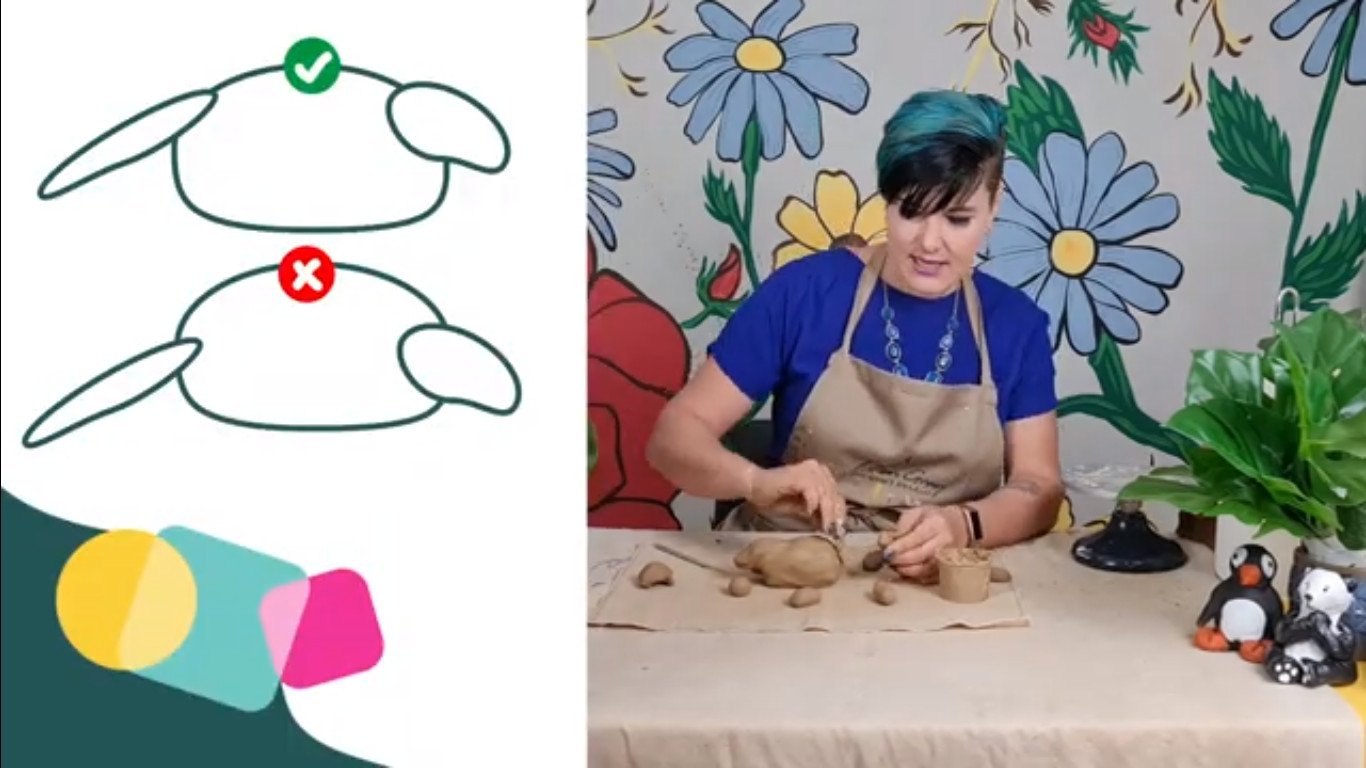
In Spanish armadillo means little armoured one. He’s basically built like a little tank, quite a sturdy little body. I’m going to start joining my tail. I’m going to scrape on one side, scrape on the other side. It’s important to note with the armadillo the tail flows out almost like the spine that’s being extended. Don’t make your tail too thin it will break off, you do not want that.
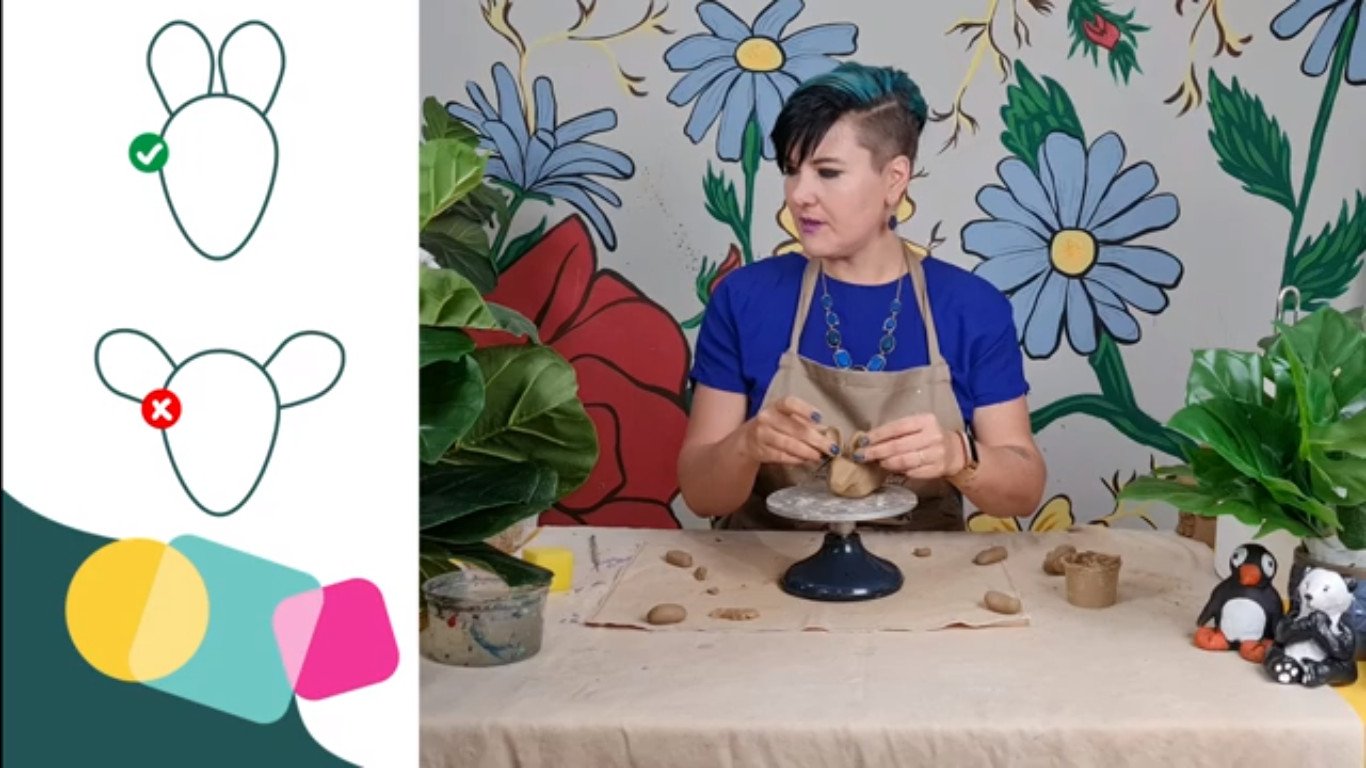
Now I’m going to put him on my pottery wheel. You don’t have to have a wheel. If you don’t have a wheel you can always just swivel your cloth around. I’m going to put him on my wheel and then start working on his little ears and the detail. They’ve got the cutest little ears. I’m now going to make the ears. I take the little ball and I’m going to squish it into a circle, and then I’m going to start squeezing it into a long tall raindrop, an oval shape.
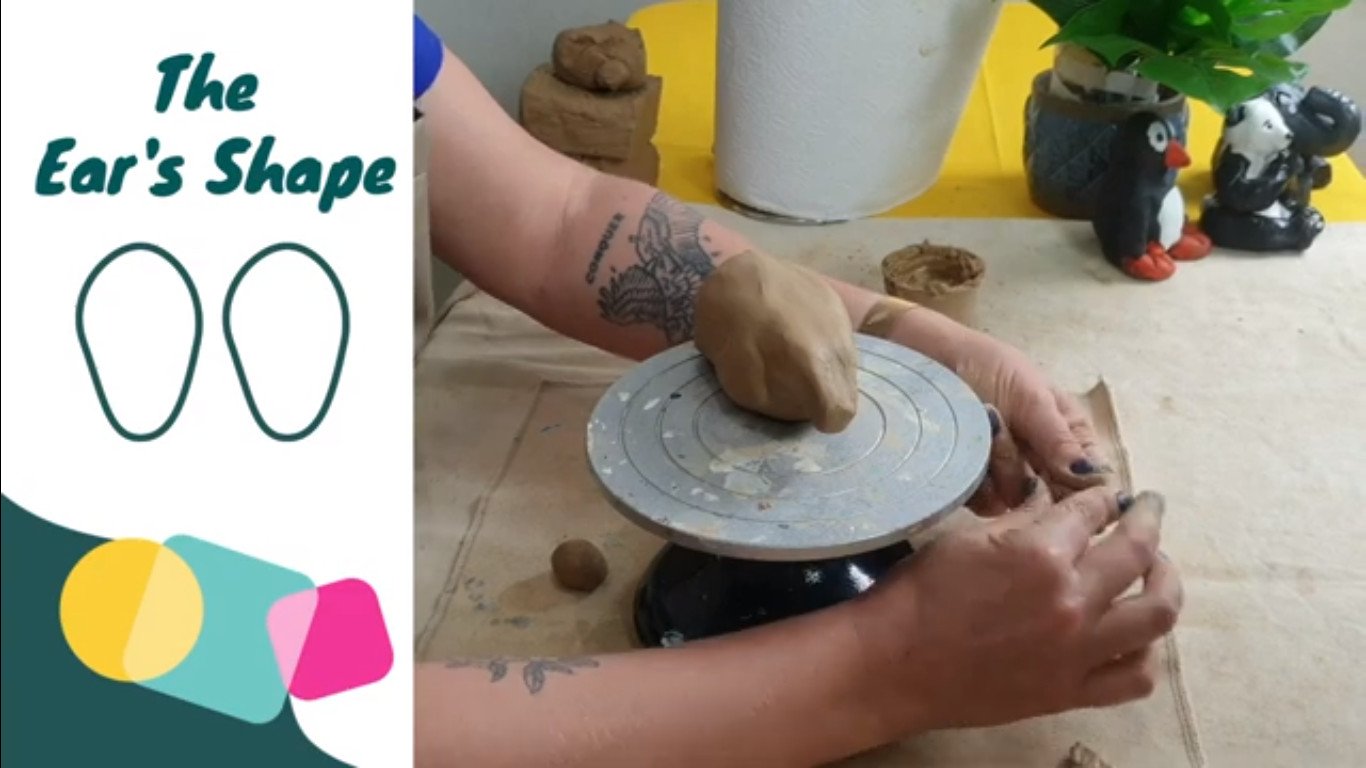
If your clay gets a little bit dry you can just wet your finger in some water and soften it up a bit. Don’t make it too wet. I’m just also planning on where I’m going to place them. They’re right at the top, they don’t slide to the side like a piggy’s ear, it’s more like bunny ears. I’m going to be placing them and then I’m going to join. Remember to scrape and add your slip I’m going to be taking the back of my clay pin and I’m shaping them so that they are a bit more round.
Step 6: Add details
All right, so I’ve decided to call it Amy, Amy the armadillo. I’m just going to tilt Amy up a little bit and start giving her the personality that I’m imagining. I’m adding little nostrils. I’m going to add a cute little smile. then I’m gonna use the back to see where I’m going to place her eyes. Her eyes are more to the side, not really to the front of her head but more to the side.
This is where we really start shaping the personality of our little sculpture because I like imagining what my little creatures like to do. Do they like tea? Do they like coffee? Do they like smoothies or do they hang out with? Where do they meet their other friends? I’m going to take a little bit of water and smooth out some of the sections.
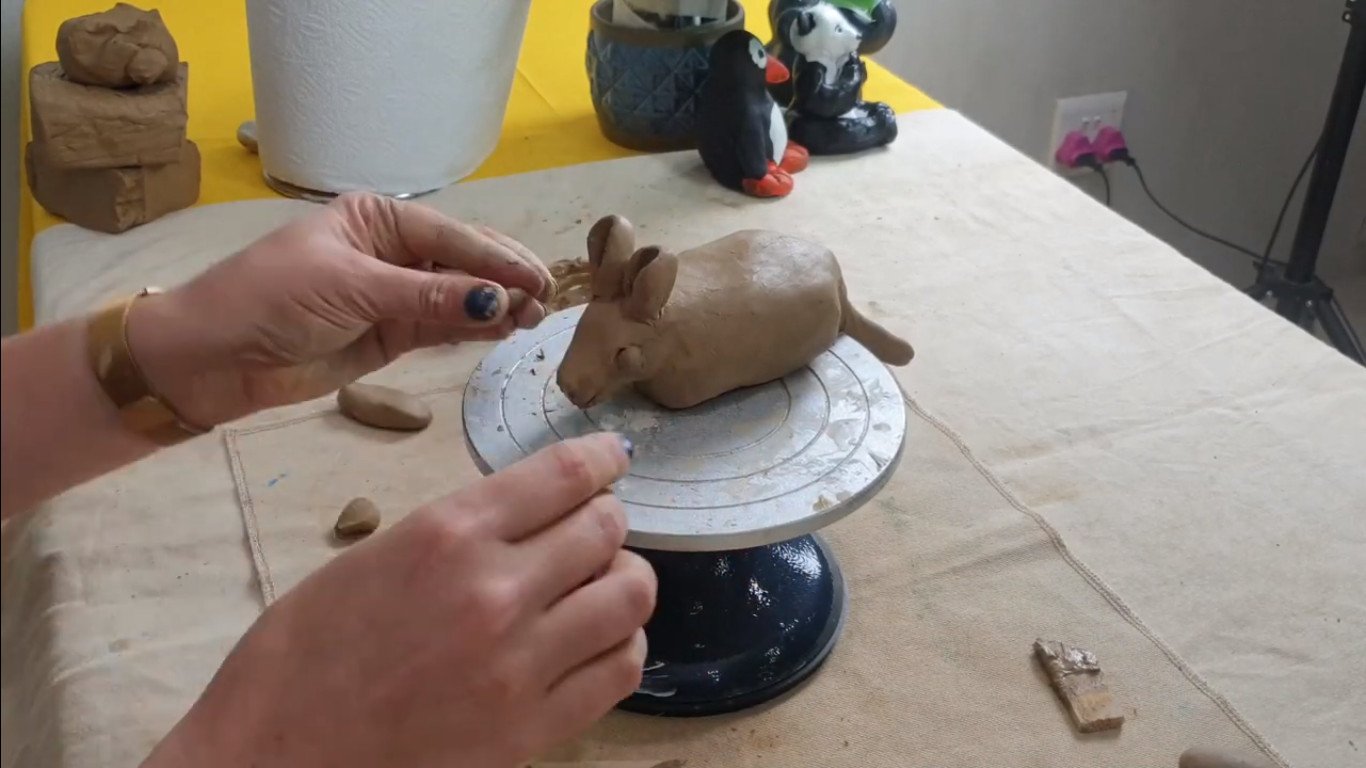
I want to make her beautiful cartoony eyes and make sure they’re the right size. I’m going to scrape the inside of the eye socket that I’ve created and I’m going to add a slip.
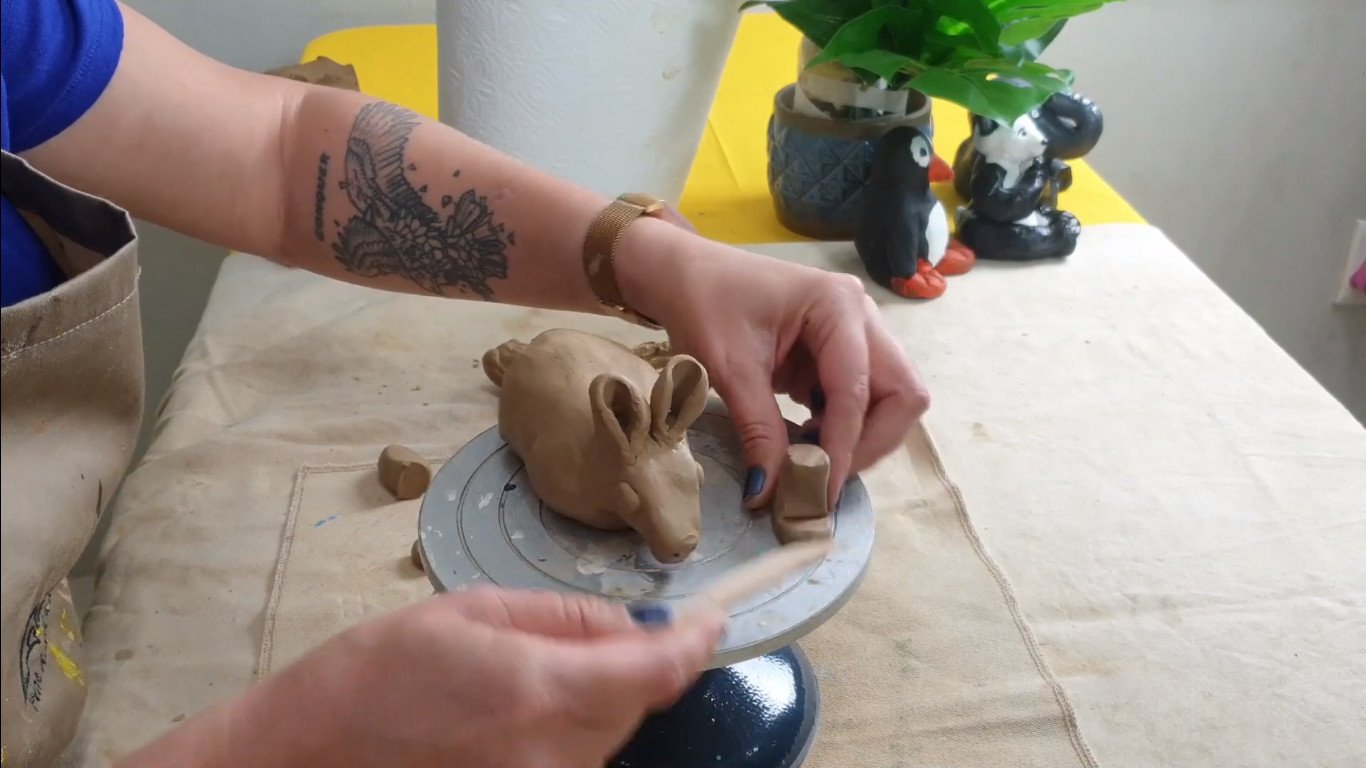
Step 7: Refine legs and feet
Next, I’m going to start working on our little legs and feet. I’m using my clay tool and that’s where I want her paw to be. I’m just going to bend this up slightly and then flatten it so that it looks like a little booty. I’m going to do that times four. Now I’ve got my four little booties and with my pin tool, I’m going to just add her little toes. I’m going to give her three little toes.

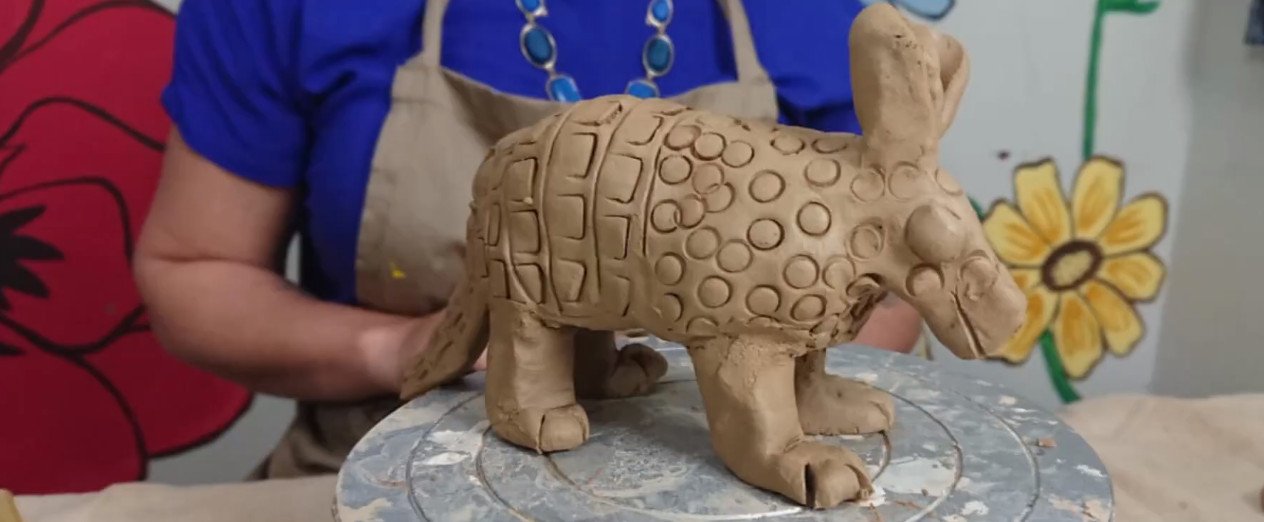
Step 8: Add the patterns
I’m going to be working on the armadillo’s body. They also have these little stripes that go on the back of their body to show where the skin folds when they roll into a little ball. Use a wet brush to smooth out the lines.
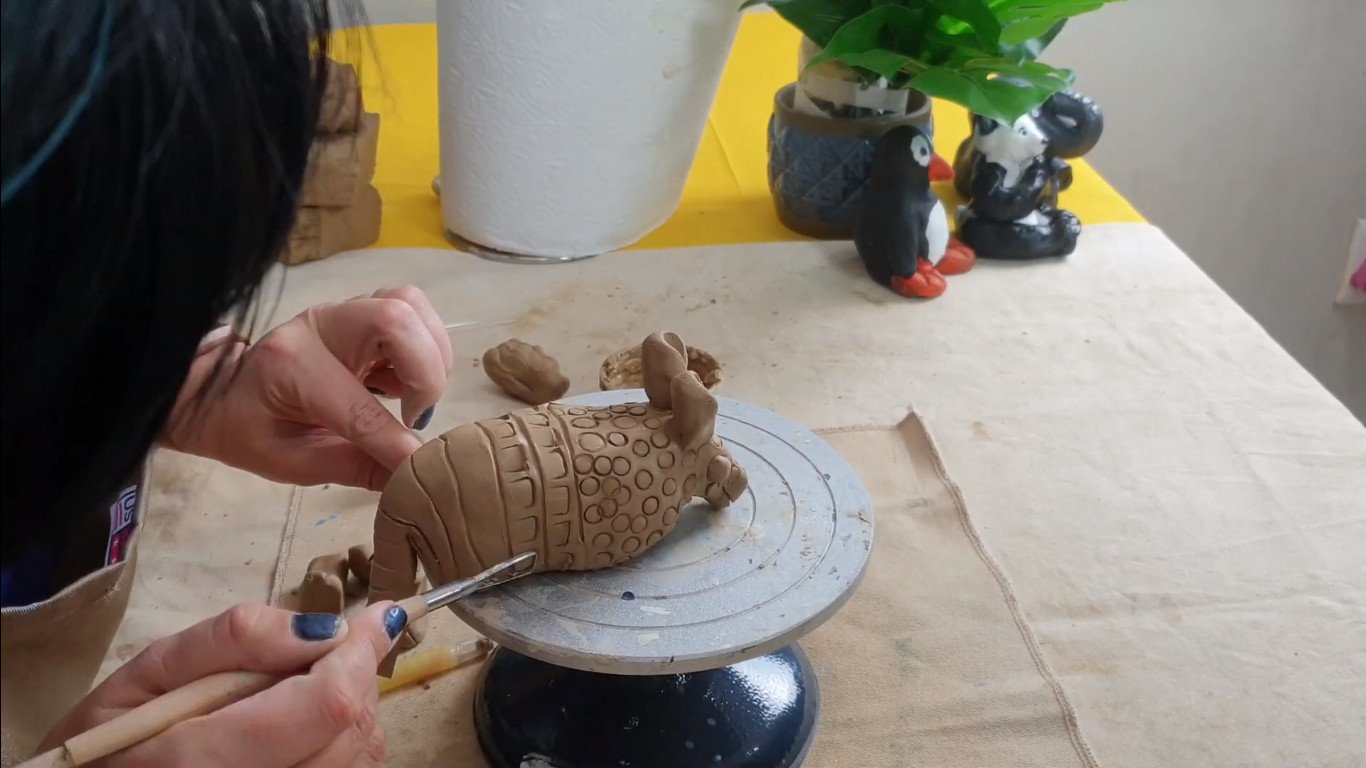
I’m going to move on to do the patterns. I have an empty twisty crayon, and you’ve got the front and the back which makes different kinds of circles. You can use any broken pen.
I am changing the patterns on the fold of the body. I’m going to be using a different pottery tool. If you do not own this pottery tool you can also use the back of a teaspoon handle which creates an interesting mark as well.

Texture is one of the seven elements of art so make sure you vary your texture on your little sculpture to keep it visually interesting and engaging. Scale is one of the design principles that we use in art, so make sure you vary the size of your pattern marks in relation to each other. Make some bigger and other smaller. Once again, use a wet brush to smooth out the patterns.
Step 9: Join the legs
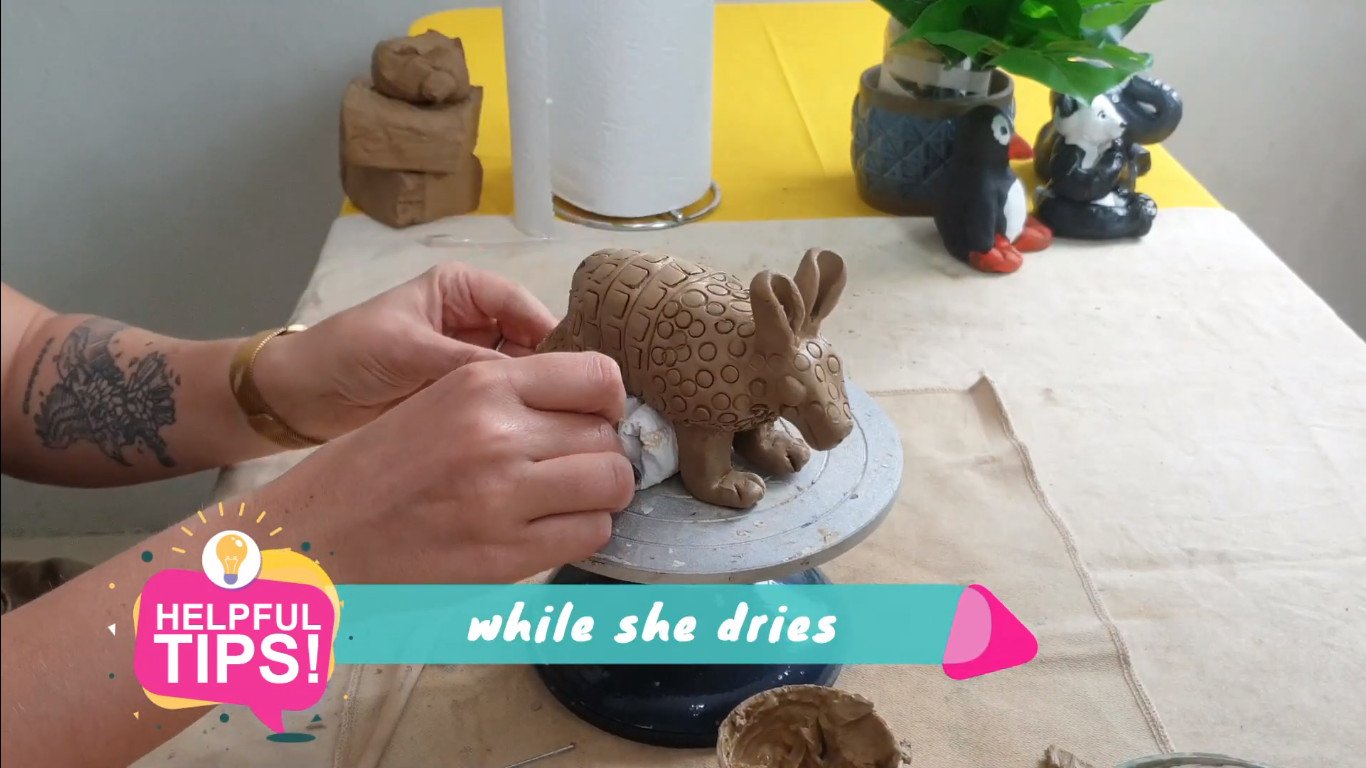
We now need to flip Amy around and attach the little legs. The first thing I’m going to do is prepare my legs by scraping them and adding slip at the bottom of Amy. Scrape the area where you would like to join the little legs, add slip and secure the legs firmly. Make sure they are secure by using one of your clay tools or your finger. Add a bit of paper towel to support her legs from bending while she is drying.
Step 10: Finishing your Armadillo
We have now reached the final but most important step of making a sculpture: finishing it off well. Take your time, change your little stance, tweak the little personality. and make sure everything is well-rounded and your surfaces are smooth. The more time you spend now, the less time you have to spend preparing her before you have to paint her.
Once you’re 100 percent done, store your little sculpture with a support structure, covering it in plastic, and let it dry slowly. You would like your air-dry clay to ideally dry over the course of a week, this prevents cracking.
Now that you know how to create a beautiful, cute little armadillo out of air-dry clay. I hope all of you enjoyed this video a lot. If you did, give us a like, a thumbs up, subscribe, and leave a comment. All those things really help our channel to grow and that enables us to create more awesome content for all of you. Visit our blog for many more amazing art ideas. I’m artist Lillian Gray. Stay tuned for the next video so that you can see how I finish off Amy the armadillo.
View other art projects on our channel.
-
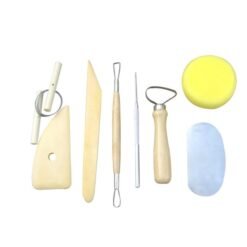
 Pottery Tool Set – Rolfes®R182.00
 -
Terracotta Air Drying Clay – DalaR127.00