Drawing Course by Lillian Gray
Lesson 15 I How to Draw ears
Mar
Watch the lesson for free on our YouTube channel
Free Drawing Course by artist Lillian Gray
This is a video and blog series teaching the fundamentals of drawing in an easy to understand way. The series consists of 15 lessons presented by artist Lillian Gray.
Introduction
In this lesson, I will show you how to draw ears using a super easy drawing technique. One you can use to either draw ears from memory or from a reference.
Let’s just admit it, ears actually look super weird. They look frumpled up and make me think of a crumpled up cloth. We tend to think of ears as super random and I have seen many artists simply drawing little squiggles to depict them.
First, let’s just understand what ears are meant to do. The outer ear, called the concha catches sound waves and channels them into the narrow passage called the ear canal. This is why the Concha pushes the ear out at the top. Think of it as a satellite dish trying to catch alien signals. The concha pushes the ear away from the head at the back and not at the front. Therefore the face of the ear is a bit slanted. The concha also pushes the ear out more at the top than at the bottom. This also gives the ear a slant from the front.

Placing the ear on the head
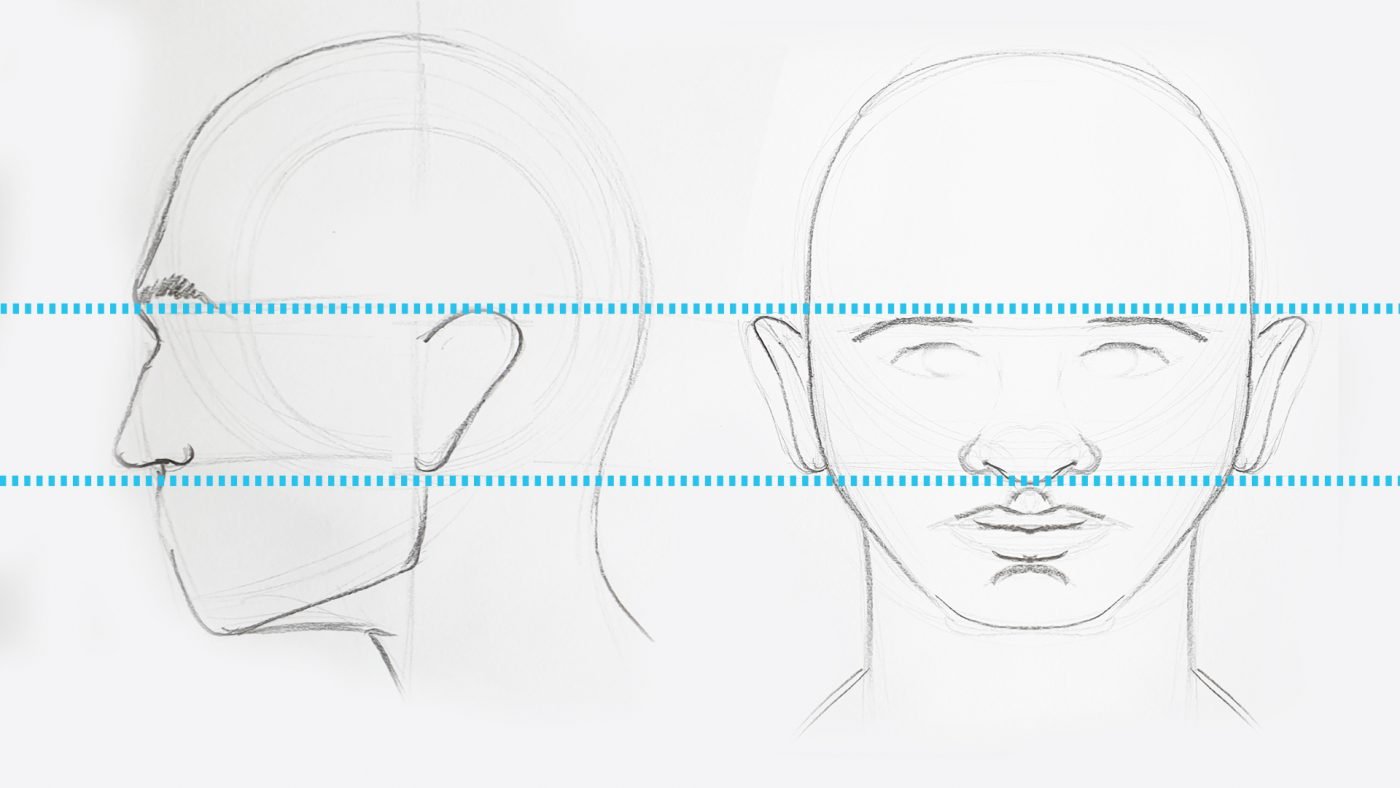
In order to understand how to draw ears, we need to know where to place the ears correctly on the head. When drawing a portrait from the front your ears are in line with your browline and your nose. This only applies to adults and not children and the elderly. More on this later.
When drawing the ear on the side of the head the ear still remains in line with the brow line and the length of the nose. You will notice the ear start where the jaw enters at the central horizontal line. The ear is not in line with this center line. It is tilted away from the center line. If you draw the head using the Loomis method the ear is located in the lower quadrant of the circle.

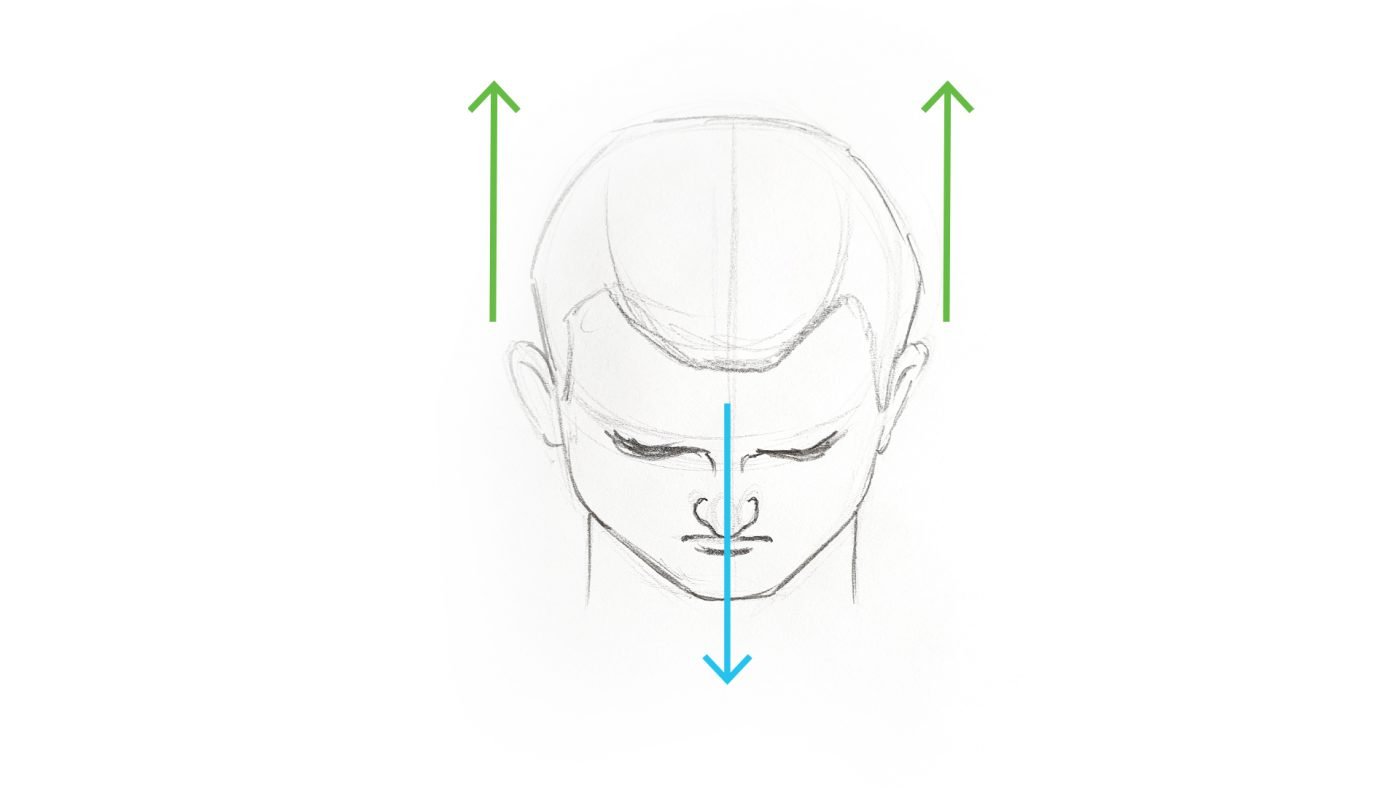
Ears also tend to help us determine the tilt of the head. When the head is tilted downwards the ears move up. When the head is tilted upwards the ears more down. Use the ears to help you determine the axis of your portrait before you start drawing al the facial features.

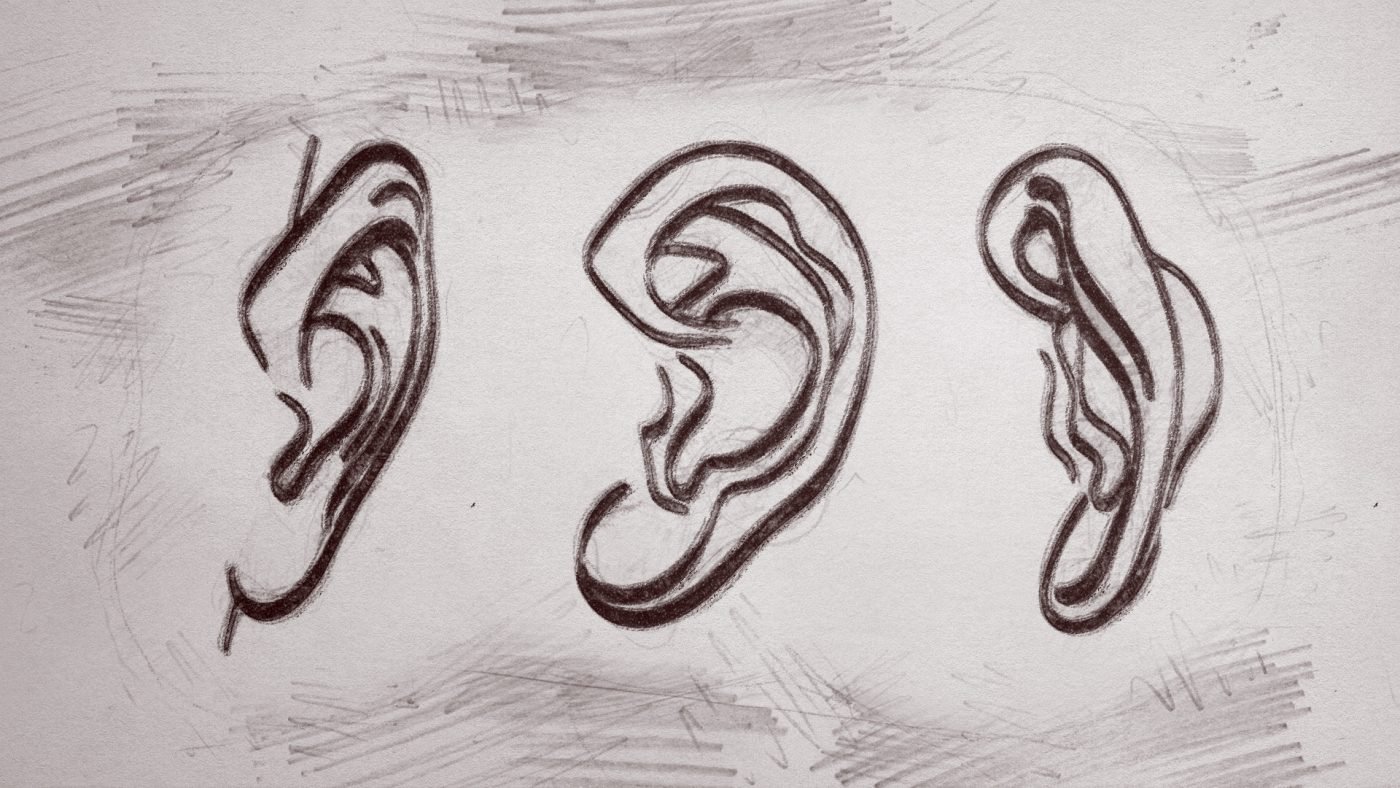
Ear in Basic Shapes
Now that we know where to place the ear on the head we move on to make sense of all the creases in the ear. A super-easy way to break it down is to think of the number 9 and the letter y. Do you see the resemblance? Remembering this number and letter is a helpful way to not only simplify ears but to also draw them from memory.


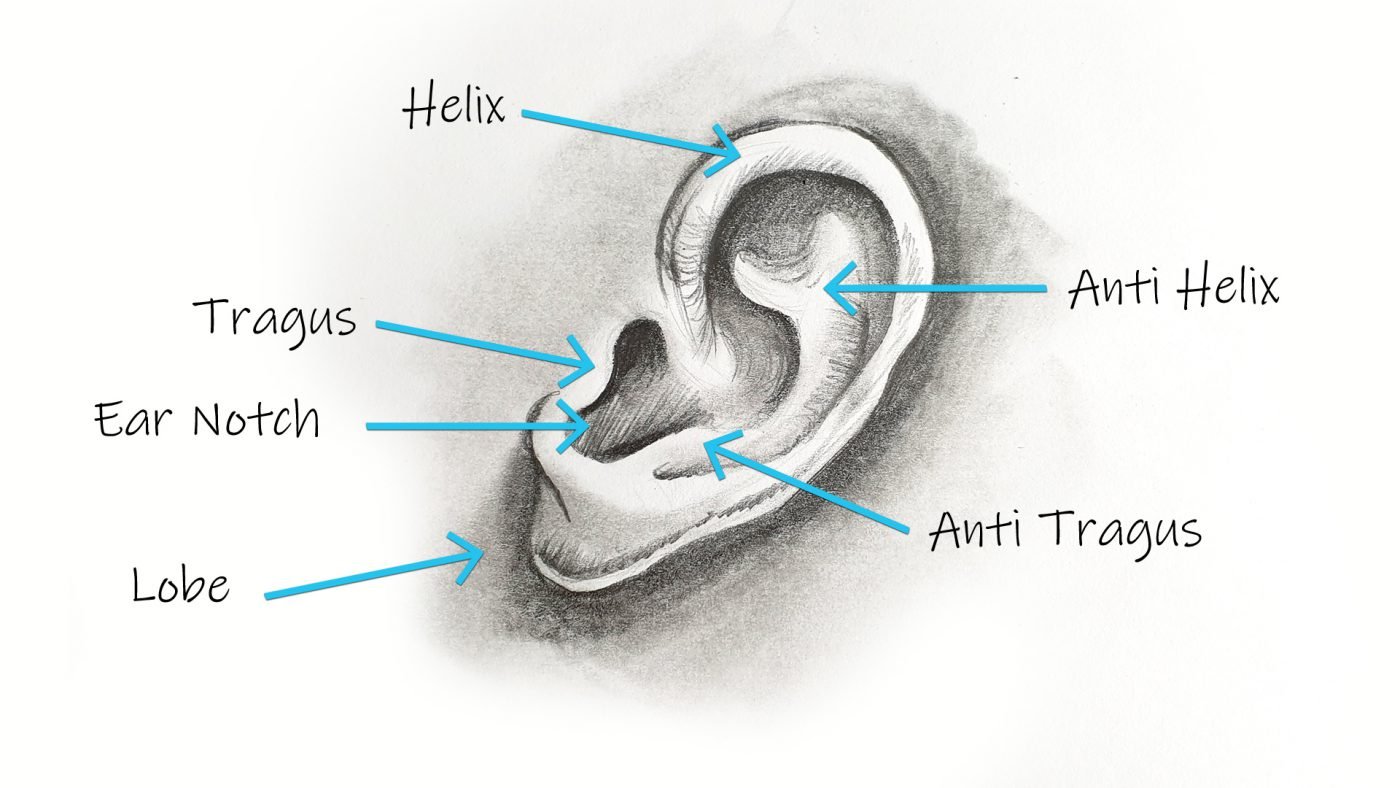
Structure of the ear
Now let’s take a closer look at the structure of the ear to analyse the folds in the ear even more.
The outer area is called the Helix. The evil twin of the helix is called the Anti-Helix and this is our Y. The little nob protecting the ear tunnel is called the Tragus and his evil twin is called the Anti-Tragus. Then there is the ear notch that looks like a keyhole and the Lobule that we usually pierce.
Ears come in many shapes and sizes and peoples conchas and helixes really determine how far the ears protrude from the skull or how big they look. We also get various lobule. A hanging one and an attached one.
Regardless of the drawing techniques in this lesson always observe carefully. Draw what you see and not what you think you see.
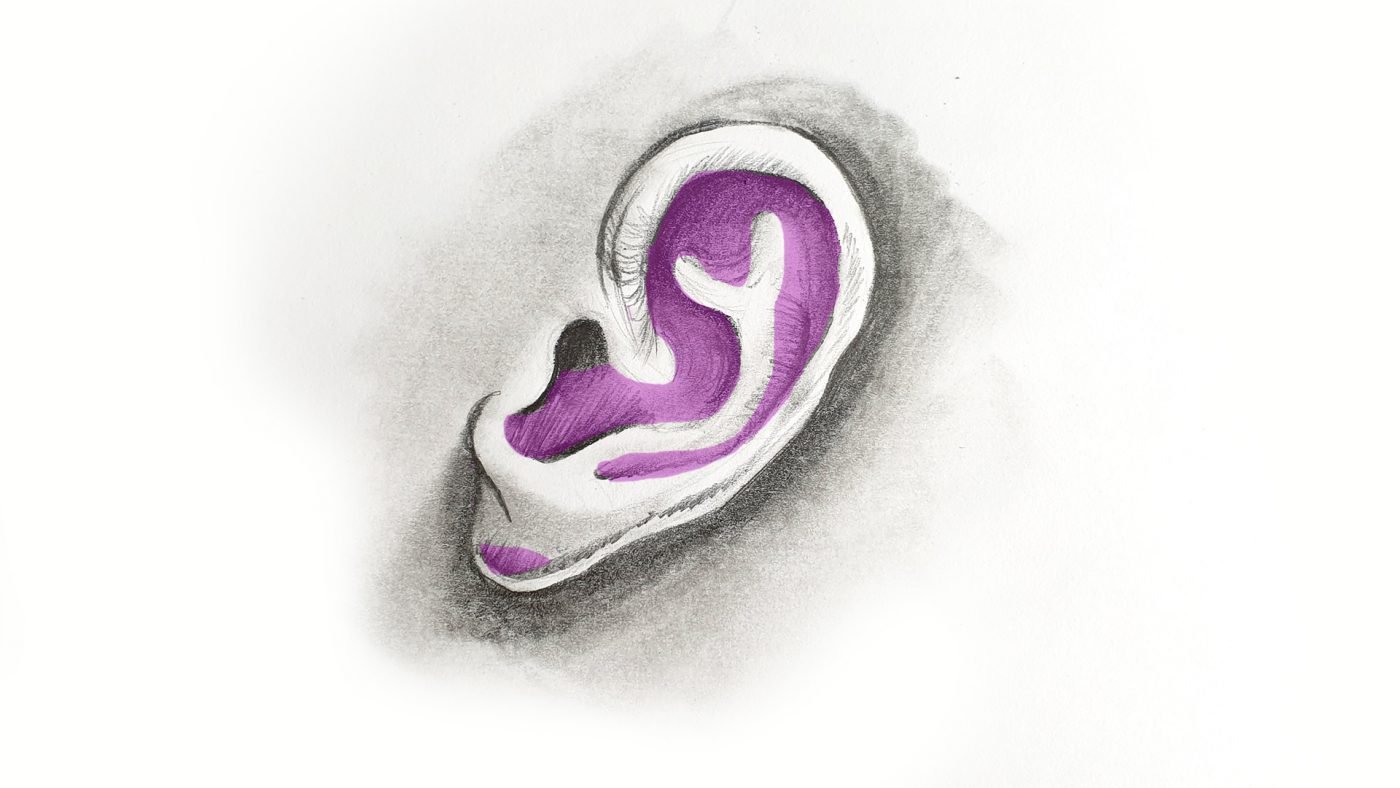
How light falls on the ear
Regardless of your subject matter you always need to determine the direction of your light source when doing art. When the light source is coming from the general right-hand top corner light tends to fall on the ear like this. The top of the Helix is lit as well as the bulge of the Anti-Helix and Anti Tragus. This cast dark shadows on these areas. The darkest value usually indicates the entrance to the ear tunnel.


Shading the ear
When shading the ear be aware of the contours. The indents and bulges. This usually helps me a lot in determining which edge of the Helix, Anti-Helix and Anti Tragus catches the light and which edge is cast in shadow.
How Ears Age
As an artist, you also need to be aware of how ears change through the different stages of life. Babies have the cutest little ears. To me, they look like they are made out of icing sugar, so cute and petite….but then we start to grow up. Bones, stop growing after puberty and muscle and fat cells also stop dividing. But cartilage – that’s the plastic-like stuff in ears and noses – cartilage continues to grow until the day you die.
Not only does cartilage grow, but the earlobes elongate from gravity. And that makes ears look even larger! I’ve seen some old men with massive noses and long droopy ears. In order to draw ears you must pay attention to how they look.
Exercise 1: Understand the basic shapes and shading
Familiarise with the basic shapes of the ear. Practice the 9Y-technique. See if you can add the shading as well.
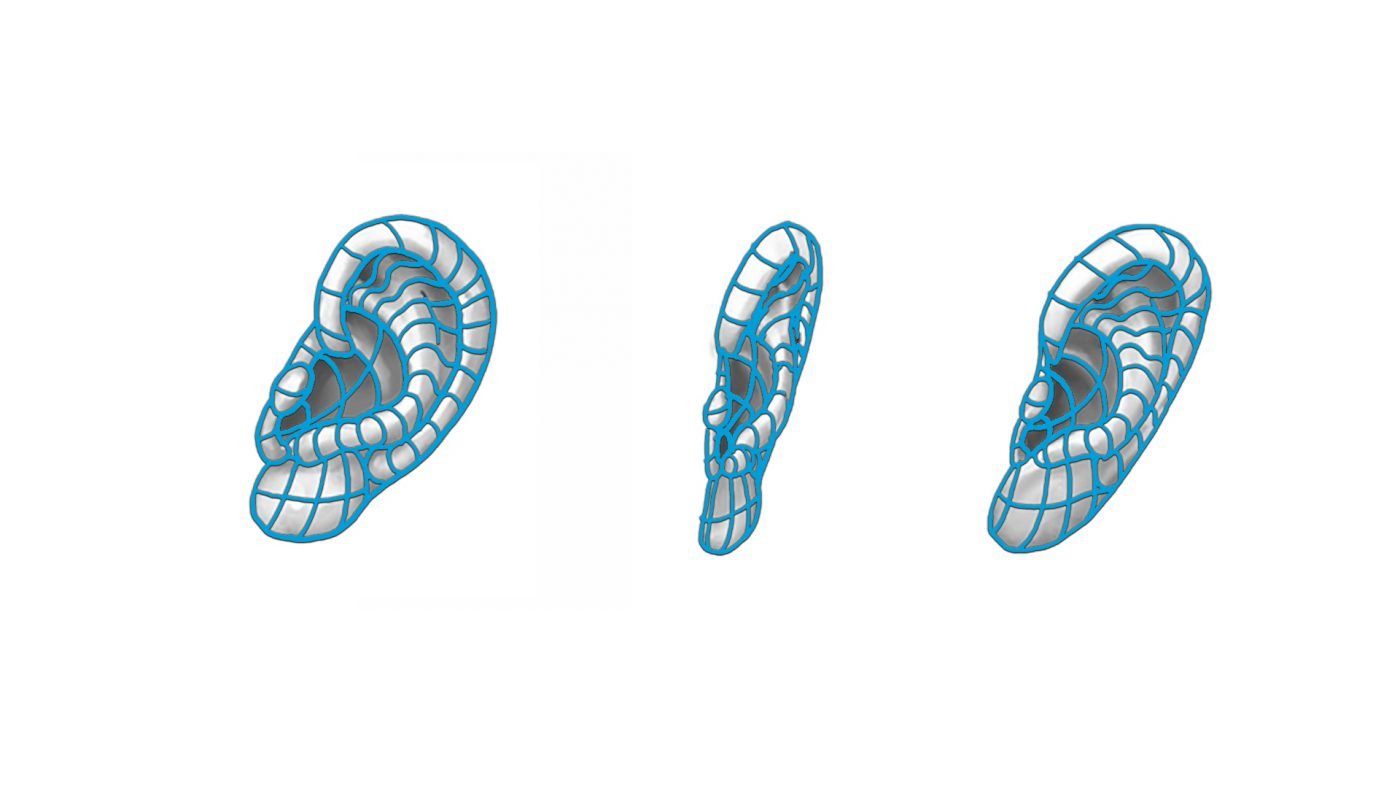
Exercise 2: Various angles
Now draw the ears from various angles. See if you can determine the heads main axis by looking at the ears.
Shop Drawing Supplies online with us
Our online store aims to remove all confusion when it comes to shopping for art supplies. We only stock what is really needed and don’t flood you with choices. To view drawing supplies:
-
 A3 Toned Paper Clay Pad 120gsm FabrianoR380.00
 -
Faber-Castell Graphite Sketch SetR115.00
-
A3 Toned Paper Sand Pad 120gsm FabrianoR300.00
-
Cretacolor Kneadable EraserR25.00
-
A4 Toned Paper Clay Pad 120gsm FabrianoR205.00
-
Mechanical Pencil HB 0.5MM – DerwentR136.00
-
Drawing MangaR215.00
-
Fundamentals Of Drawing 3 – Leonardo CollectionR245.00
-
Black Charcoal Pencil 3pcs – Koh-i-NoorR89.00
-
Set of Paper StumpsR52.00