-
×
 Cretacolor Kneadable Eraser
1 × R25.00
Cretacolor Kneadable Eraser
1 × R25.00
Subtotal: R25.00
Watch this lesson for free on our YouTube channel
This is a video and blog series teaching the fundamentals of drawings in an easy to understand way. The series consists of 15 lessons presented by artist Lillian Gray.
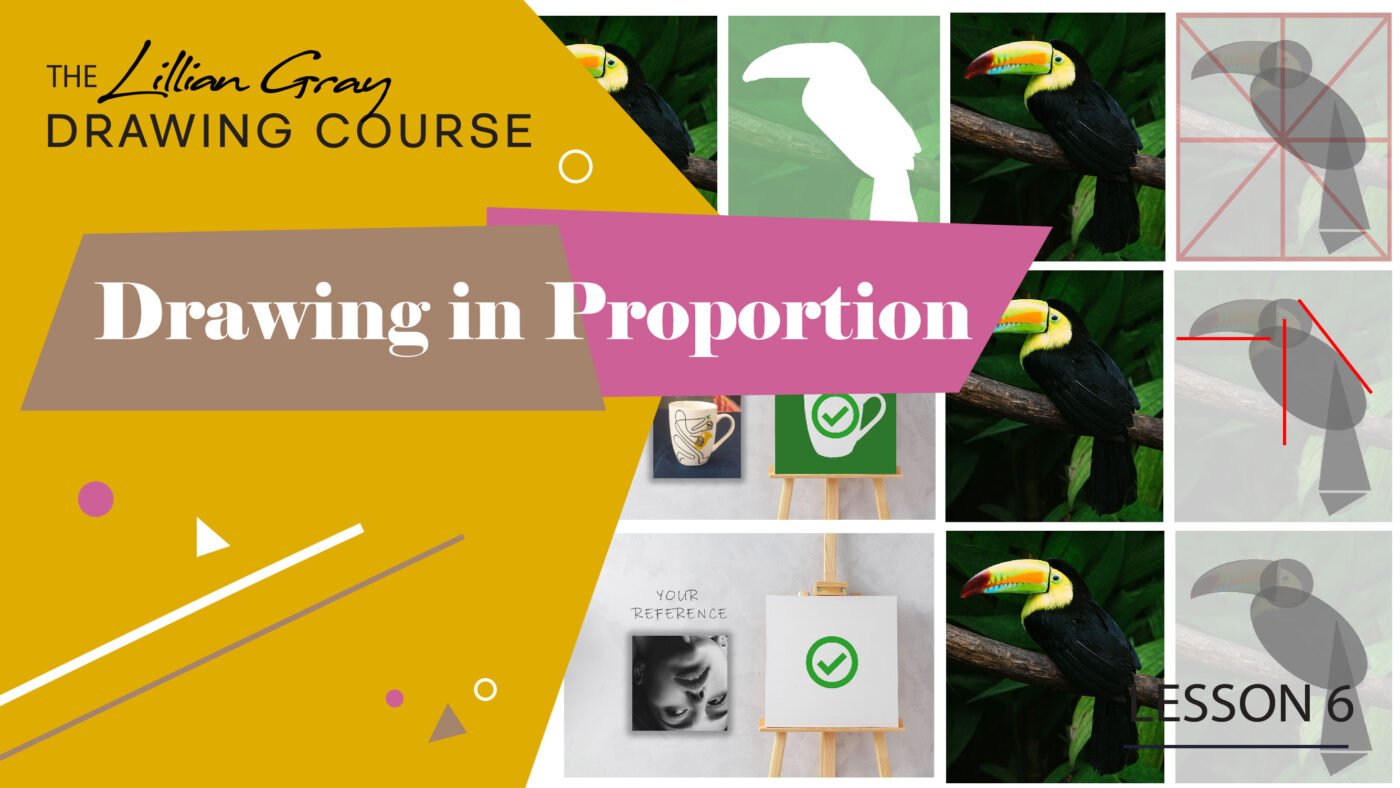
In this lesson we will be covering how to draw objects and figures in proportion, using a variety of different methods.
-Draw what you see – don’t draw what you think you see.-
Laura Wenma
What a waste of time if you add all the detail before the proportions are 100% correct. A bit like dressing a chimpanzee and trying to pass it off as human. So we need to get our proportions right before we spend time on shadows and creating depth.
Learn the rules before you break them. I know there are masterpieces out there that aren’t drawn in proportion, Van Gogh and Picasso jumps to mind. However, these masters could all draw proportionately before they started developing their own unique style. So I will say it again. First, know the rules before you break them.
Renaissance artist believed in Classical styles and – proportions. You weren’t considered an artist if you couldn’t draw. It is vital that we train our eyes to see proportions. To tune in our hand and eye coordination so that what’s in our brain is actually transferred to the paper. This lesson will focus on various methods that will aid you to draw the correct proportions.
As an artist, you have a toolbox e.g plyer, screwdriver, drill etc. and you need to know when to pick which tool for which job. Same with art. You need to know when to use which technique. We are going to look at 6 techniques or different tools to achieve correct proportions.
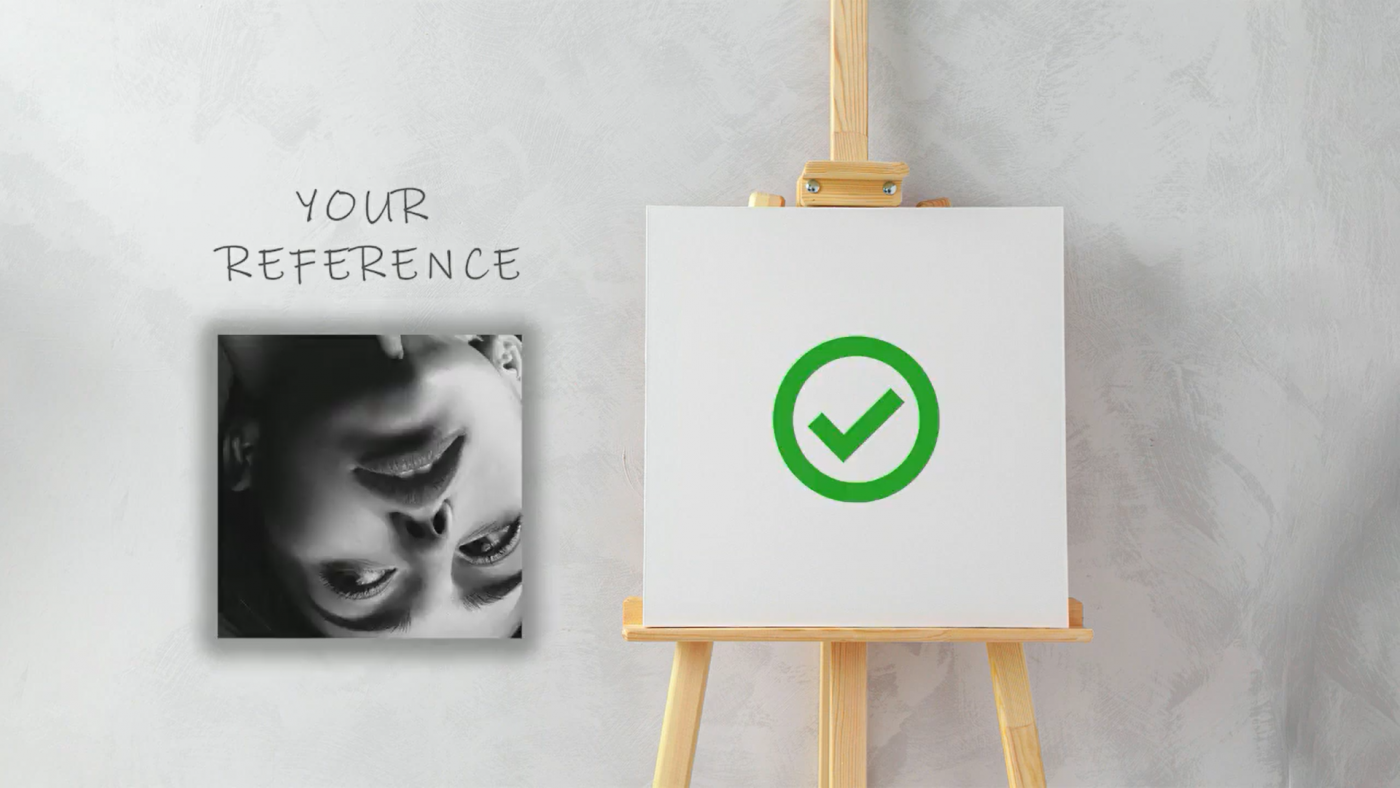
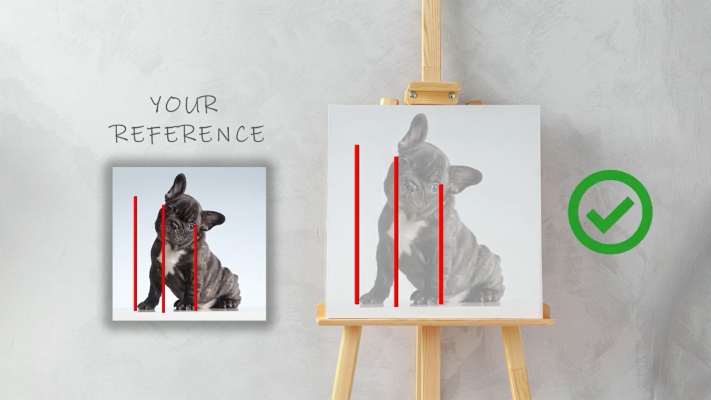
First, make sure your drawing surface is the same proportion to your reference. You will have a hard time fitting a square reference into a rectangle picture surface.

Close your eyes and imagine what you are going to draw – See it in your mind’s eye.
Will it fit into the page? Sometimes we are so eager to start we just jump in and only halfway realise there is no space for the legs. Others might start too small when they actually intended to fill the page. I always say “Good art takes time.”
When I start on a canvas I plot out where my basic shapes are going to be and make sure my picture will fit in before you start drawing


This is an excellent exercise to change the way you think about drawing. When we have looked at something so much that our left brain really inhibits the way we draw. We draw with understanding and not with our eyes. We need to strive to draw what we see and not what we think we see.
In order to trick your left brain – Turn your reference photo and the drawing upside down. And you draw the wrong way around. Suddenly, you can no longer recognise the features of a face, and at once you can see the differences between the drawing and the photograph much more clearly.
When the photo is the wrong way up, you are unable to clearly identify what it is you are looking at or to name them (‘an eye’, ‘a nose’, etc) and this is precisely the benefit of this method. As your right brain wakes up, it starts to ask what shapes are these. As you cast my eye over the upside-down photo you can now only see abstract shapes in different colours.
We all have an idea in our heads as to what the features of the face look like and these are ideas we have probably had since childhood and school. They are not based in very much reality and certainly very little in true observation. But when we draw we allow these impressions to intrude and we are likely to draw what we think we see, and not what we actually see.
By turning your page upside down you will disrupt all these assumptions and fixed ideas and really start to look. You’ll be unencumbered by such received ideas for the first time, and will find yourself really studying the actual forms you are seeing with much greater accuracy instead of what you think you were seeing.
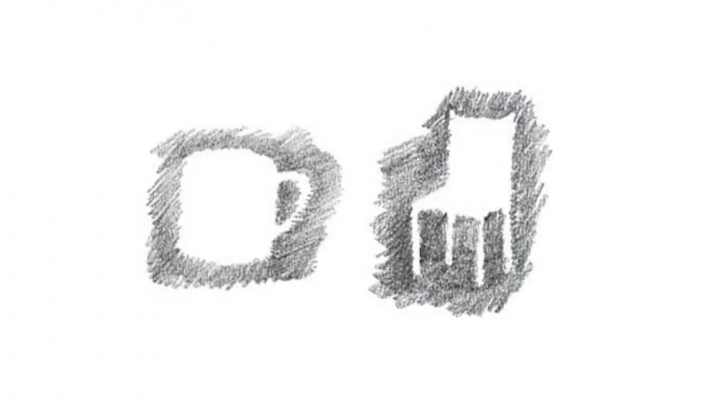
Negative space is the space around an object. Often when you focus on the area around an object and draw that it will greatly improve your drawing.
Every object has a positive and negative drawing space. You really have to tune your eye in to see the negative space. We are no longer drawing the coffee mug or the chair, but the space around the coffee mug or chair.
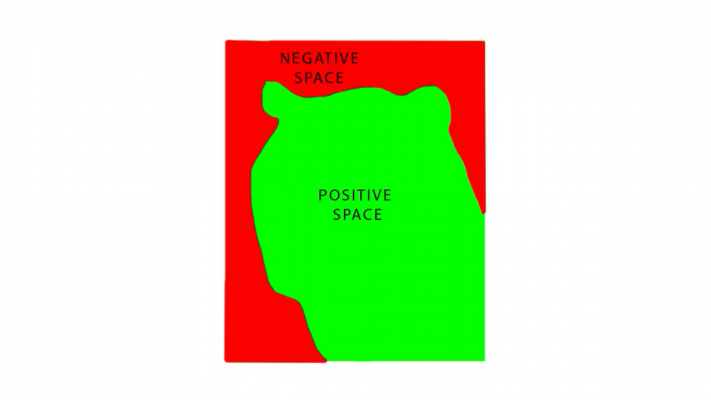
Shade in the Negative Space of your object, with NO line work or Outlines. Only capturing the surrounding space.
I love adding straight lines to objects so you can clearly see the object. I am also constantly drawing in guidelines to see where one object lies relative to another object and that you have drawn it in the correct way or above each other.
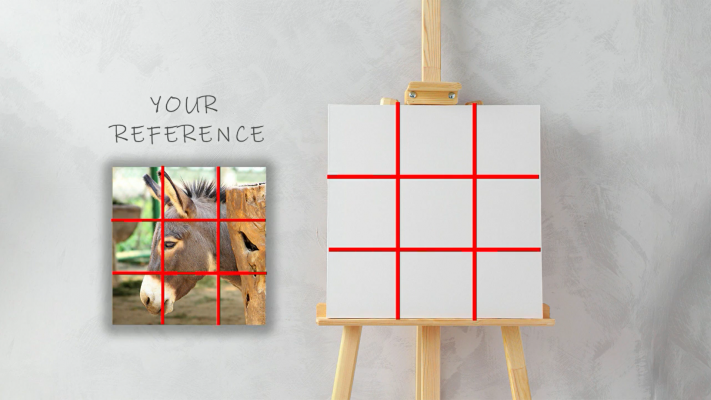
This method is a grid that is placed over a reference and drawn onto the picture surface. The artist then proceeds to copy each square exactly. This method is great for beginners and will aid you in the first steps of drawing things accurately.
Personally I am not a fan of this method – the main reason being that you will become dependent on it and never learn to draw freely by yourself. I have met so many people that get stuck here. This method has the tendency to suck all the joy out of drawing and becomes very controlling. Use this method as a stepping stone to eventually drawing freely using universal shapes.
Although there is some value to certain grid exercises. But do not only rely on the grid that you eventually cannot draw without the grid.
Let’s make a Pizza.

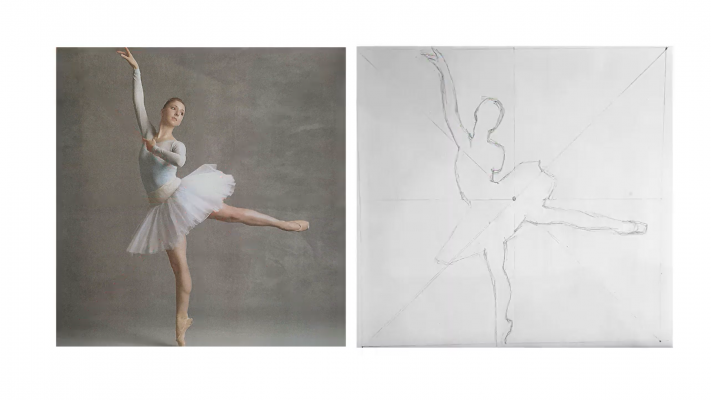
Now we are going to combine universal shapes with this lesson. To identify the shapes and draw them into proportion, by first simplifying the shapes, checking with your guidelines, pay attention to your negative space and use a pizza grid when you really get stuck. With all these techniques you will know which tool to use when to get your universal shapes will be 100 % in proportion
Our online store aims to remove all confusion when it comes to shopping for art supplies. We only stock what is really needed and don’t flood you with choices. To view drawing supplies