Kids Art Projects
Let’s complete your cute pig sculpture with only 4 colours
Jun
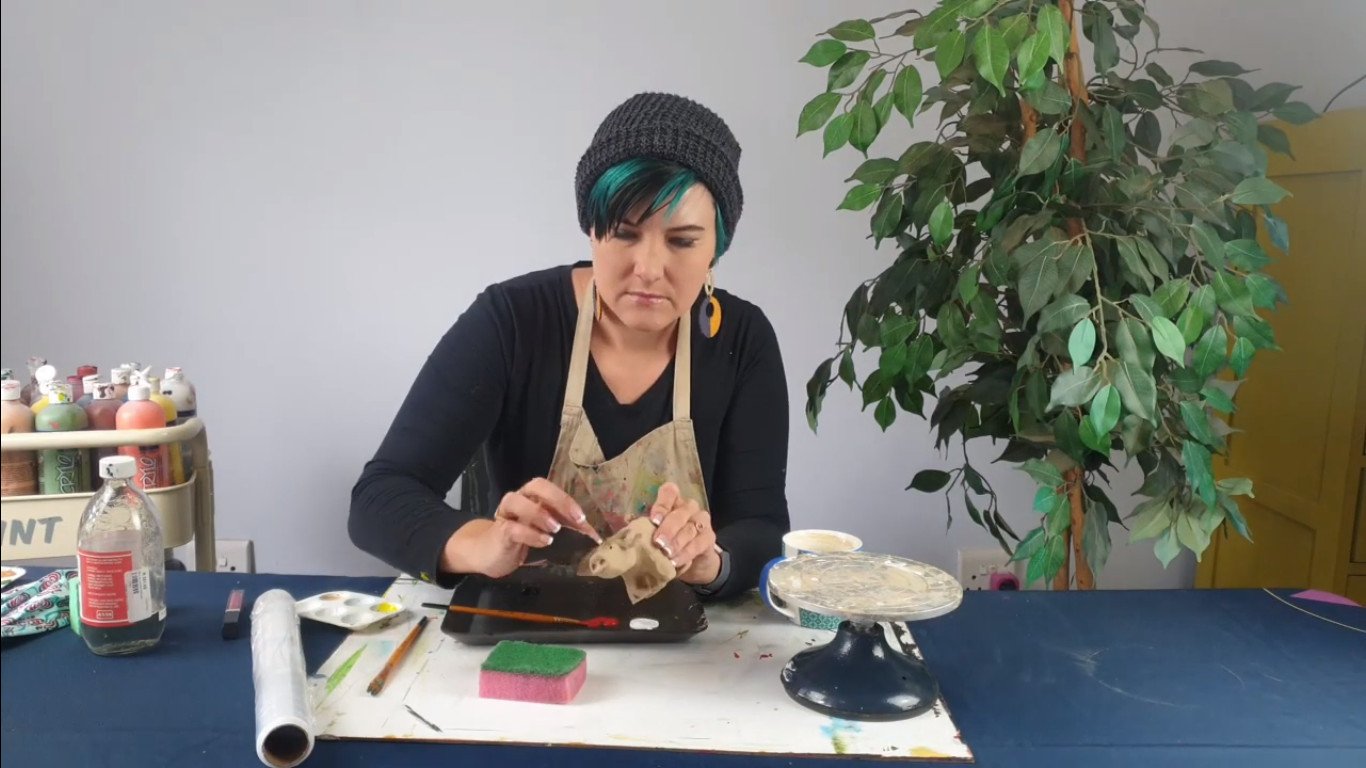
Hi, I’m artist Lillian Gray and this is my awesome creative cat called Peanut! Today we are going to be finishing our pig sculpture.
Smoothing out your pig sculpture
So, this little piggy is dry now and ready to get finished off. I’m going to sand all the little rough areas off and just get it nice and smooth, to give it a proper finish. We never want our art to look homemade. You want to make everybody just go, Oh, my word, where did you buy that? So we’re going to sand this all down, and if the sandpaper is too course you can use the top of a new sponge. It also works really well.
We are going to use normal acrylic paint
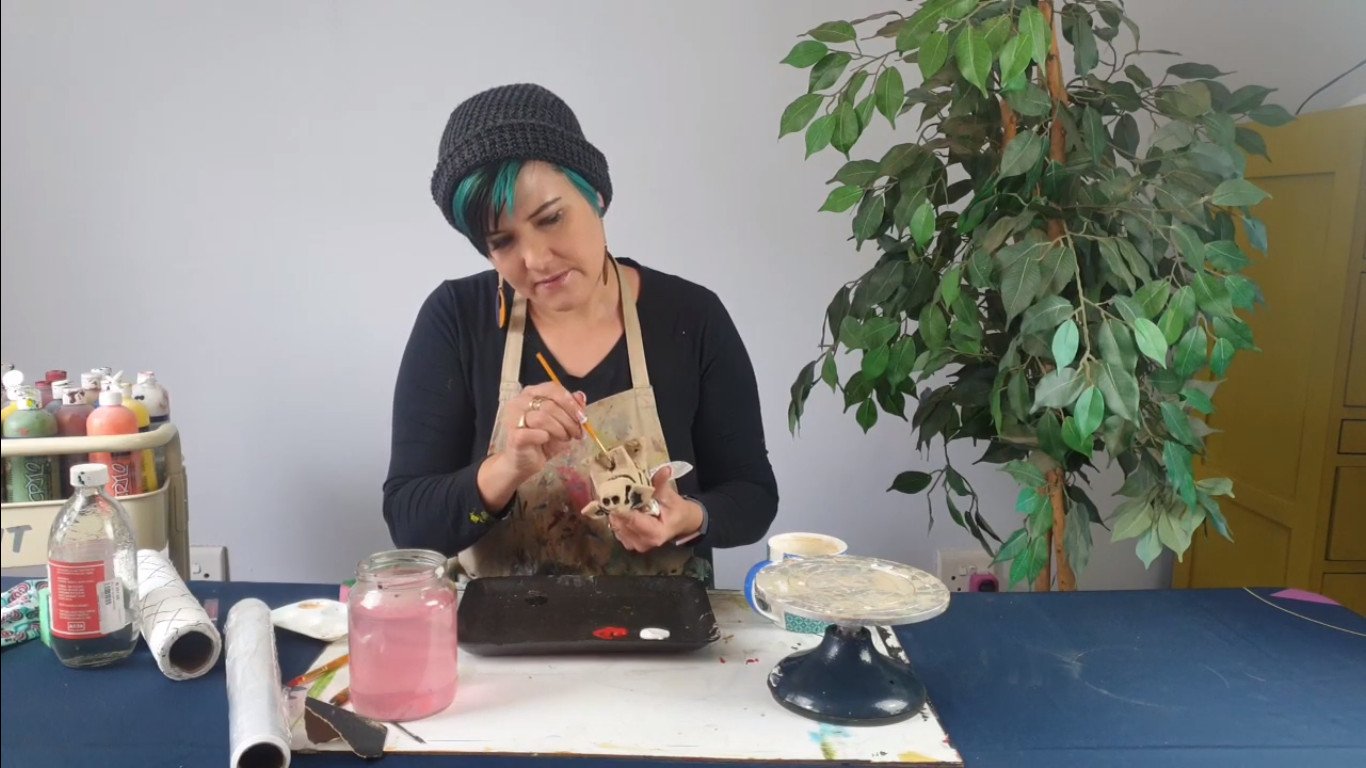
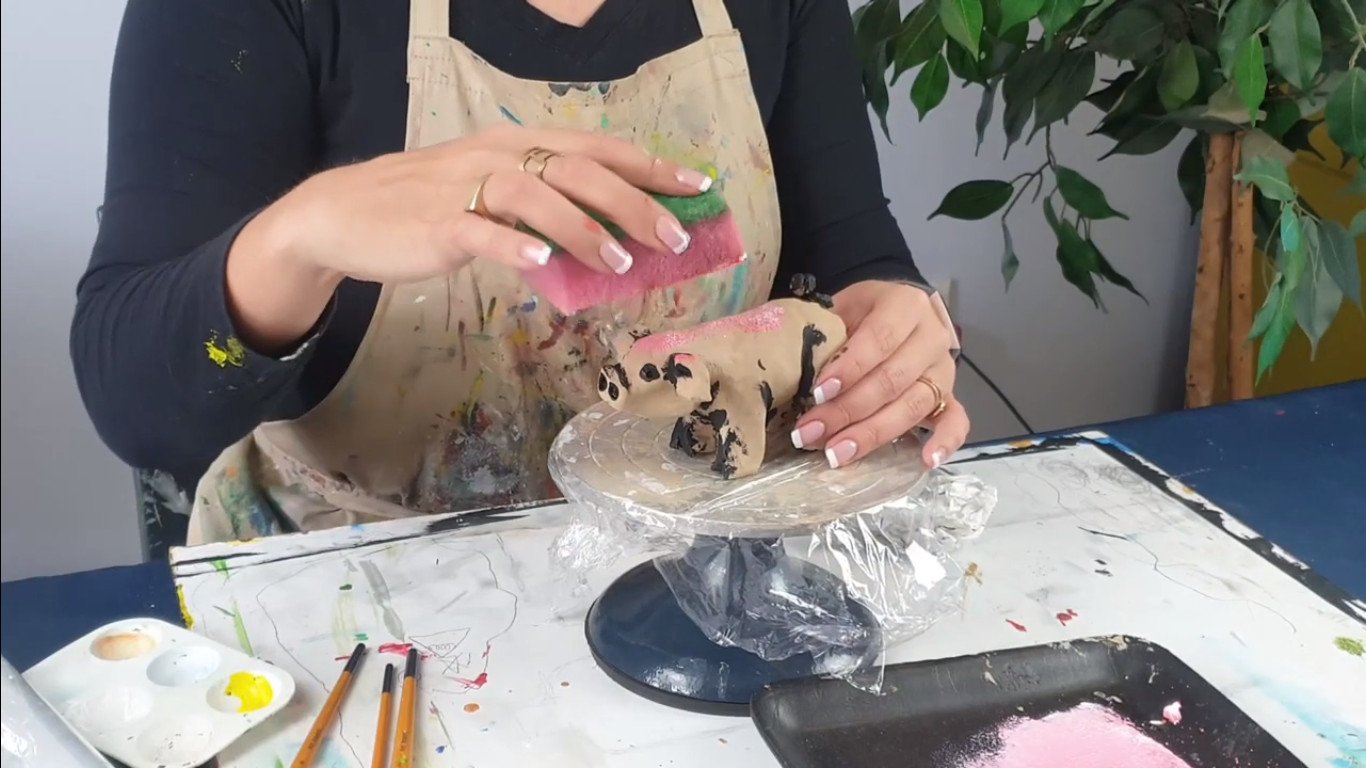
Adding black for some drama and shadow
First I’m going to add black for the drama. Let’s get started on that. I’m going to start with a pointy brush and I’m really going to work in the black on all the little areas that are recessed, so I’m going to give the pig in the folds of his ear a little bit of black, in his eyes, and his snout. He had a fold in his ear where all the dark shadowy parts would be right.
This is just really going to make your piggy pop, and not be very boring. It just really adds to the form of the sculpture. I’m also just painting in there where his legs join his body. I’m going to paint in-between the legs, where there will also be a bit of a shadow. So just really amplifies all the shapes and forms that are really big.
Really wash your brush well. Never leave your brush standing in the water. The water sucks into the wood then this starts flaking often and your whole brush gets damaged and the metal falls off, and you don’t want that. Dry your brush properly afterward, push it back into shape, and put it next to your water. I’m going to let the black dry. It dries quite quickly because the clay is super absorbent, and it is acrylic.
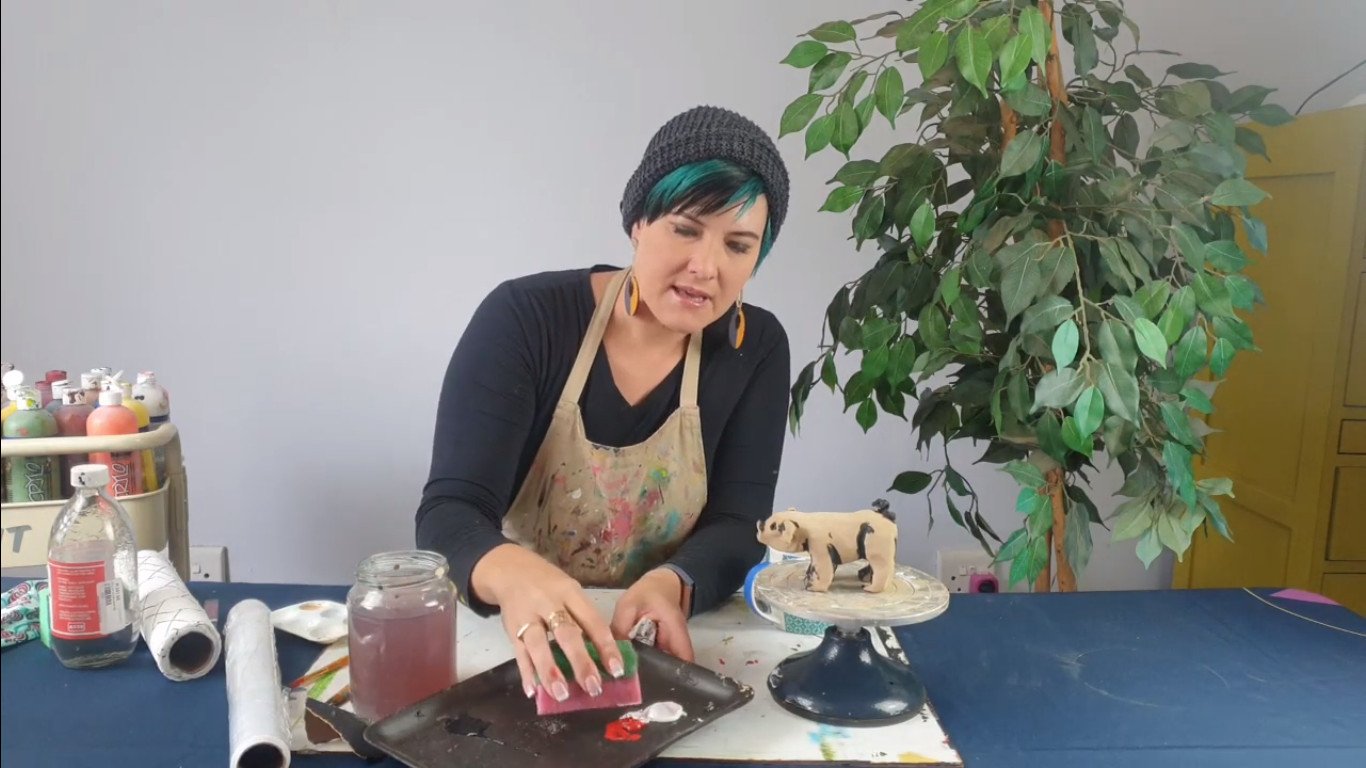
Painting the piggy
I’m going to plonk it back onto my clay stand and what I’m going to do now is, I’m going to be mixing a pink and I’m actually going to paint most of the pig using a sponge. I want to show you guys I’m going to be mixing my pink with a sponge. Now, this is how pink I want my piggy so I’m ready for the next step. I wouldn’t want paint on my pottery wheel so I’m just covering everything right here to keep it clean.
I’ve got my sponge and no water added. it’s not a mudbath and I am gently dabbing. You do not want to cover all your black. That defeats the purpose. You do now want a sponge in your pink and I have under mixed. Under mixed means, you can still see the white and the red. It’s not completely, evenly mixed. The reason is it really adds a lot of drama to your sculpture if there are different colours.
I’m just sponging and I also like the sponge effect for the pig, because it really does look like the skin of a pig, which is hairy and puffy, right? Remember you can also cut your sponge with normal kitchen scissors, you can cut your sponge to a smaller size if you need a smaller size. The sponge works wonders to keep the black where you want it, right?
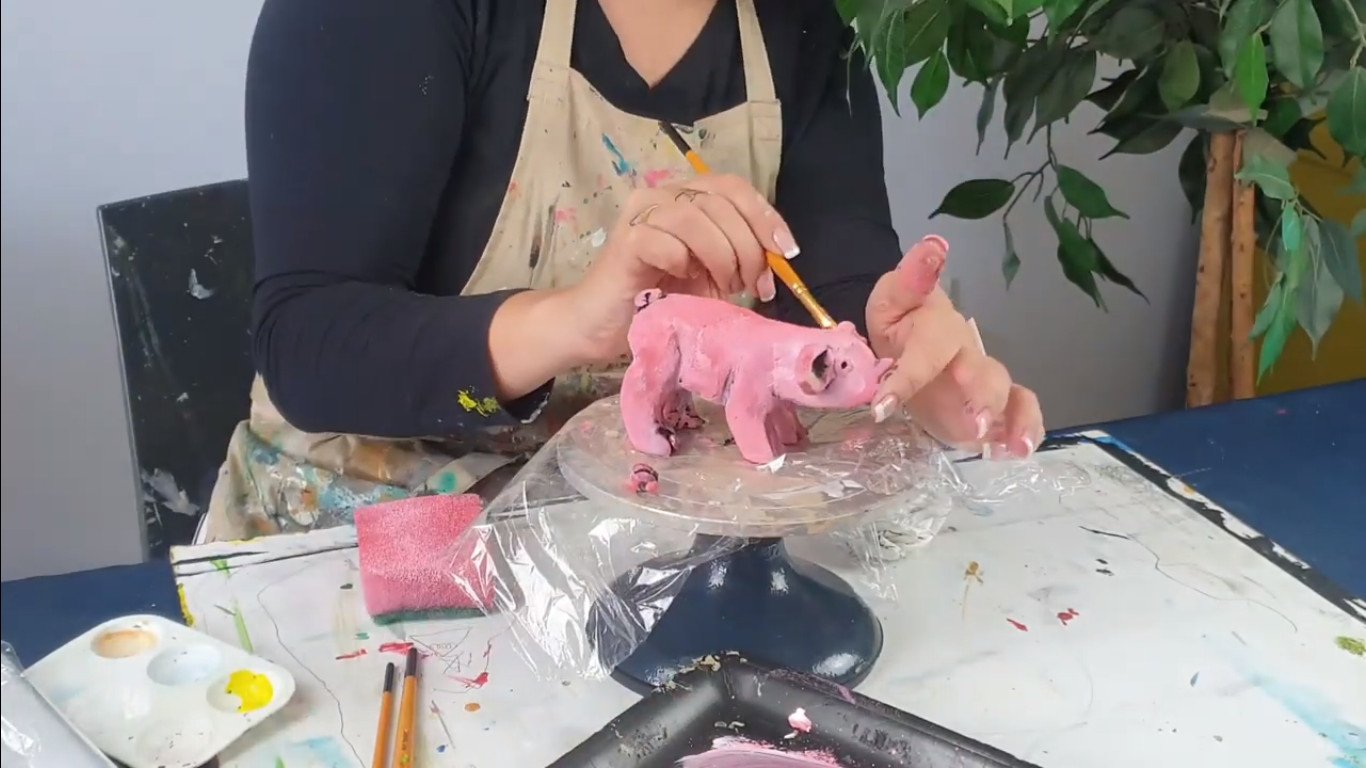
Everywhere the sponge couldn’t go, I’m just dry brushing in some pink. I am NOT adding any water to my acrylic. I am NOT filling my entire brush with paint. Dry brush means just a little bit of paint on the edge of your brush and I’m just brushing in where I want. As you guys can see the tail fell off. I’m not going to freak out and break down in tears. Stuff happens. I want to show you how to fix it.

I am going to reattach this tail. The best thing you can use is just a great superglue, another thing is the epoxy glues where you’ve got to mix the two and they activate. That really helps with clay. I’m just going to put on some Loctite super glue and then do my little tail. It dries quite quick so I’m not wasting a lot of time with waiting for that before I can finish off and play with my piggy.
We’re now going to glaze this baby or seal it. You guys have options you can either use a matte spray paint or a clear glossy spray paint to seal this off with. Please wear a mask guys or you could use a varnish to give you that nice, thick glazed look. So please wear a mask especially with spray paint. It is really toxic, and work in a well-ventilated area. Let’s seal it up!
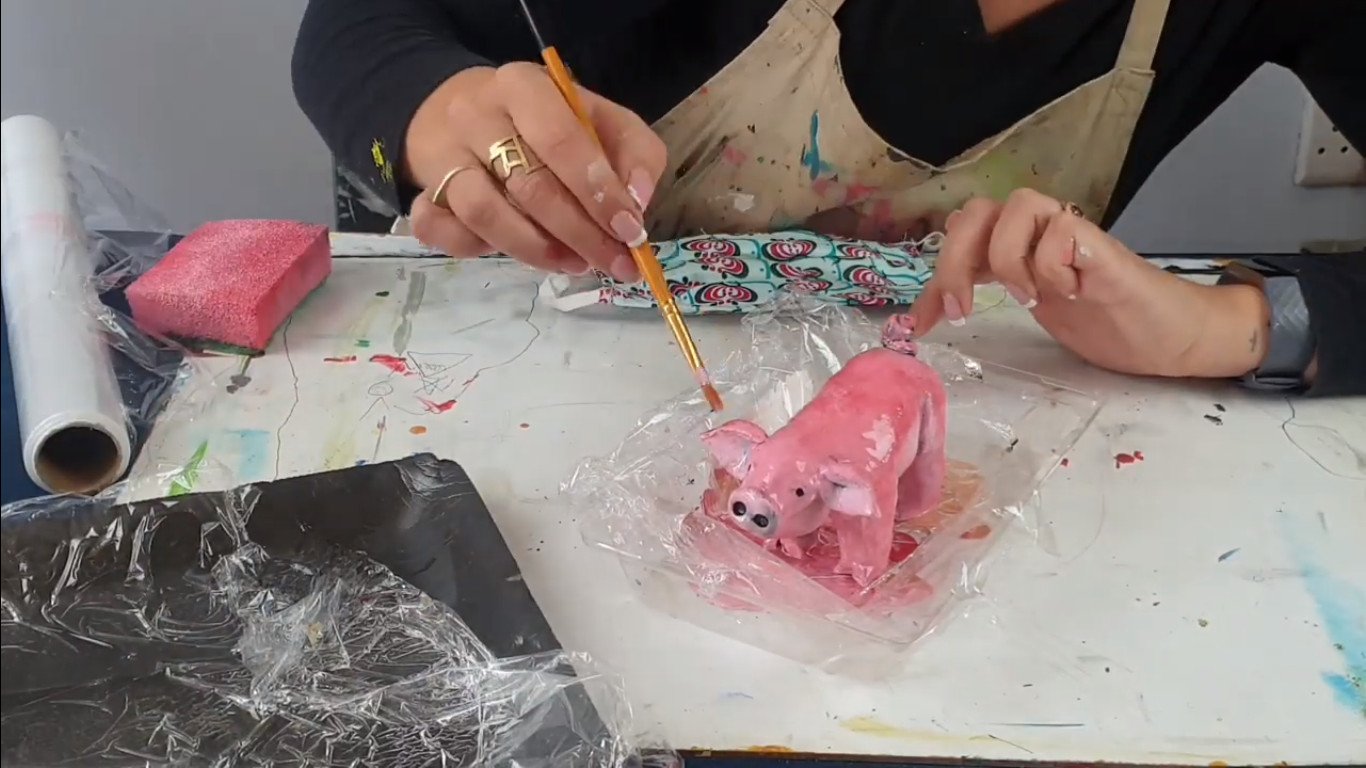
I’m just using a normal artist varnish. This one’s a nice cheap one so you can glaze it a few times. if you want and I’m just going to brush it on and really seal my pig nicely. Make sure your acrylic paint is super dry before you start this step.
All right, that’s it. Our piggy is all done and ready to go to the market. She is looking beautiful and I hope you guys enjoyed this lesson.
Give us a thumbs up and be sure to subscribe to our channel to not miss out on an awesome art project.
Check out our blog for other art projects.
I’m Lillian Gray. See you guys next time.