-
×
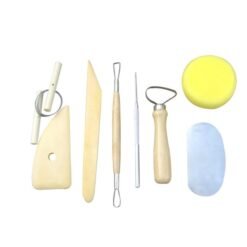
 Pottery Tool Set - Rolfes®
1 × R182.00
Pottery Tool Set - Rolfes®
1 × R182.00
Subtotal: R182.00

Hi, I’m Lillian Gray, South African fine artist, and today we are going to be covering the basics of working with air-dry clay. In this video we will be covering:
So stay tuned for how to store your clay which is a very important step, so we don’t have a lot of tears at the end of the stunning project.
This step is super important to get your air-dry clay malleable and to get rid of all the air bubbles inside. Air is the enemy of air-dry clay and will make it crack.
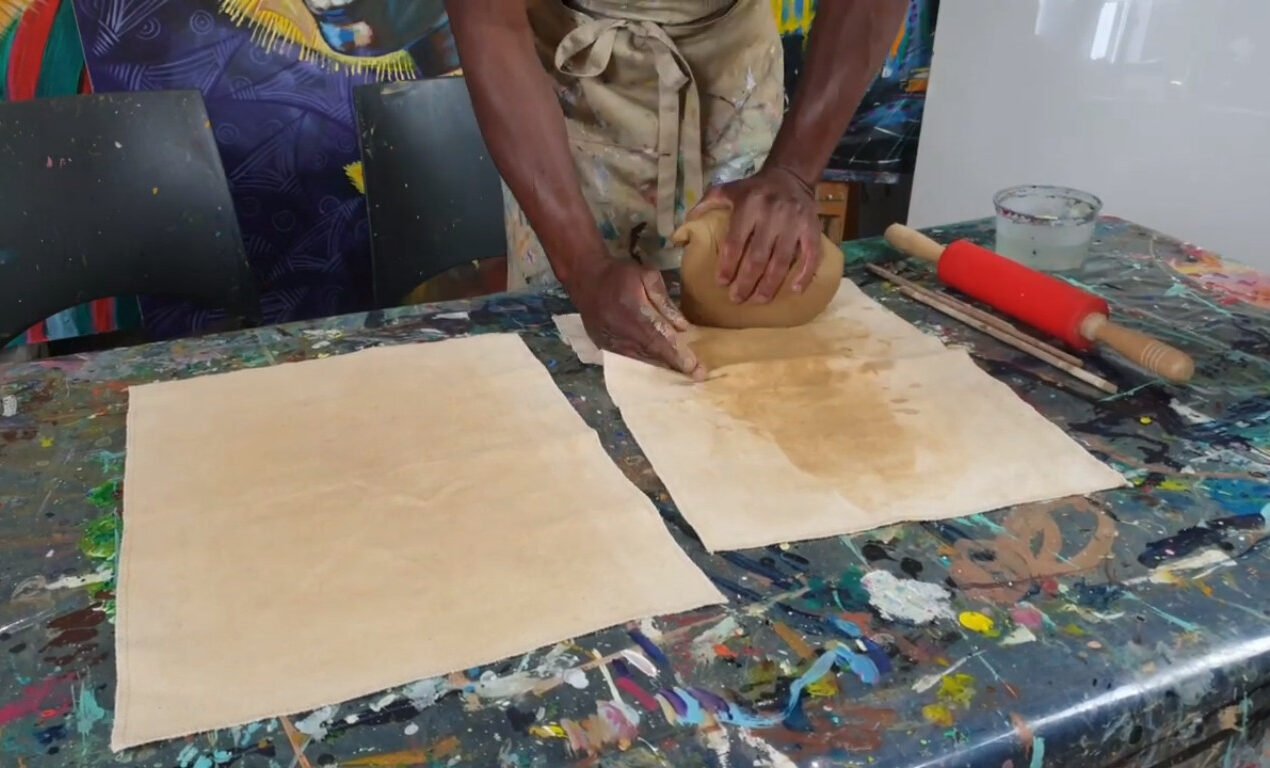
Use a roller to roll out the slab of clay. If air bubbles appear while you are rolling, pop them with a pin and continue rolling. Use two dowel sticks to make sure that your slab has an even thickness all over.
To cut your clay, you can use a sharp, pointy edge, to get a proper, square slab.

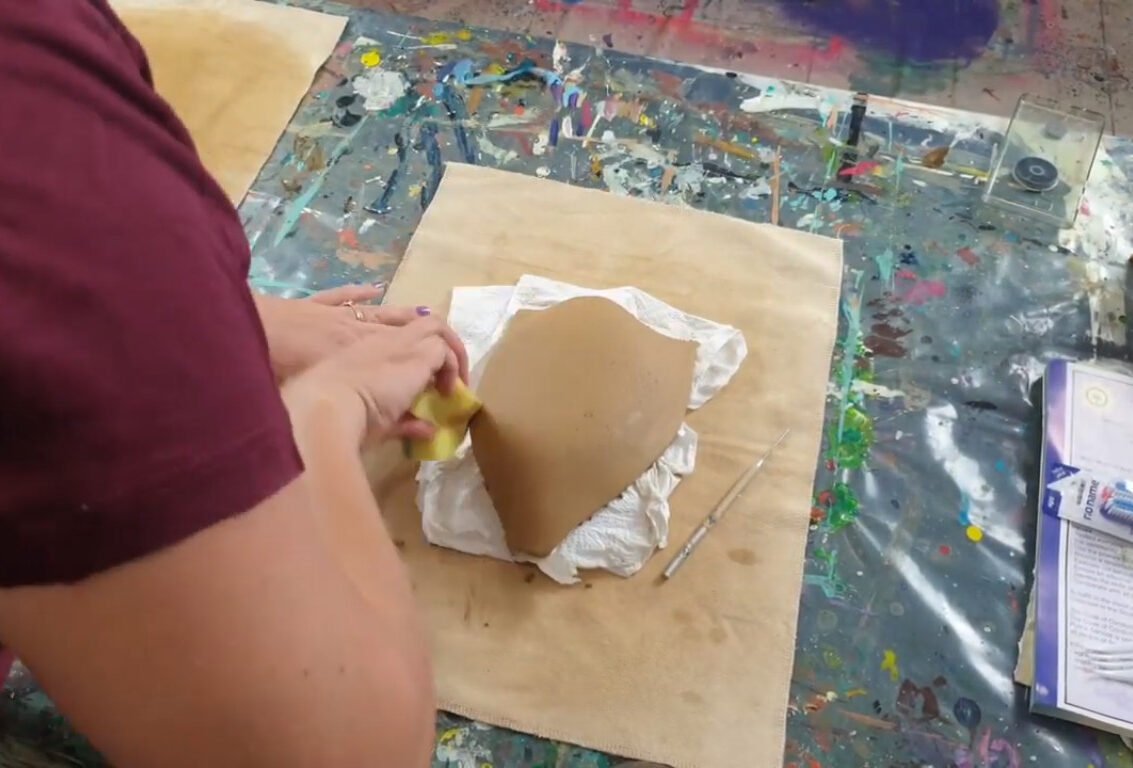
When you are using shapes and forms, it is very important to cover them with soft paper. A paper towel works very well. The reason is that clay shrinks and needs a bit of movement. The paper towel allows the clay to shrink a bit, while it is drying.
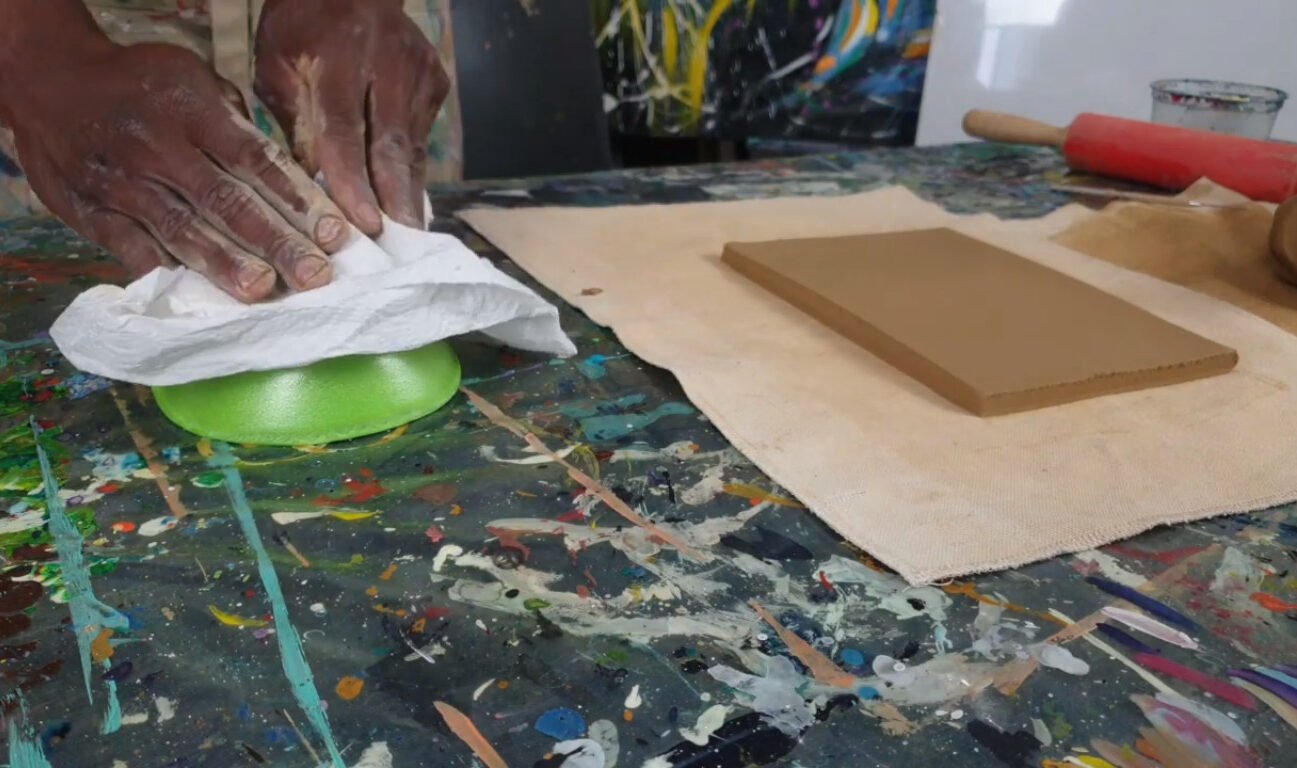
So just gently press, not too hard, to get it shaped over the form.
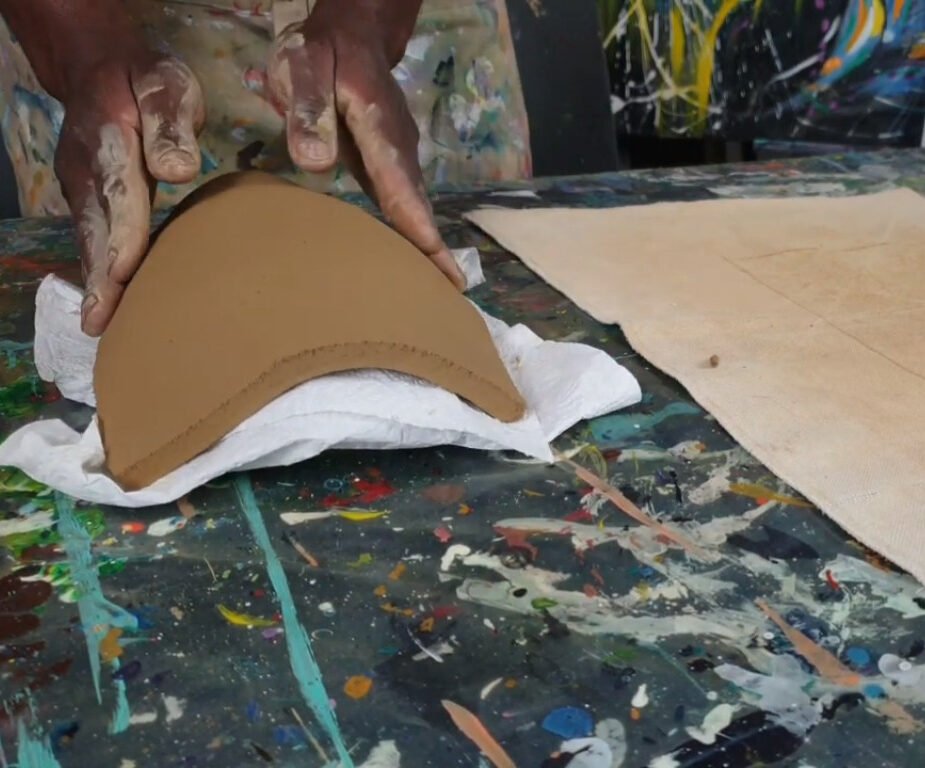
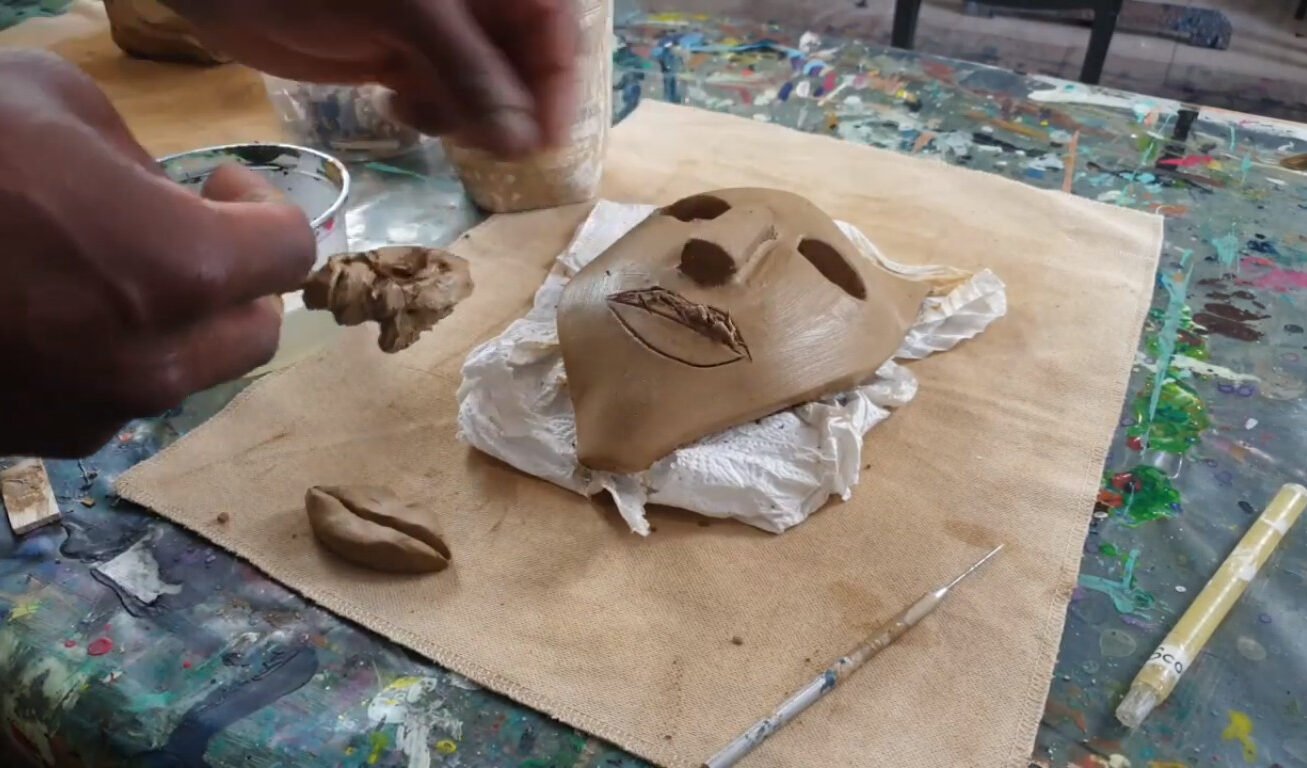
I have decided to make an African mask for this exercise. I’m still going to use my little pen, just to cut and I’m going to now figure out the shape for my beautiful African mask. You have to round off clay, it is very important to not have a jagged edge.
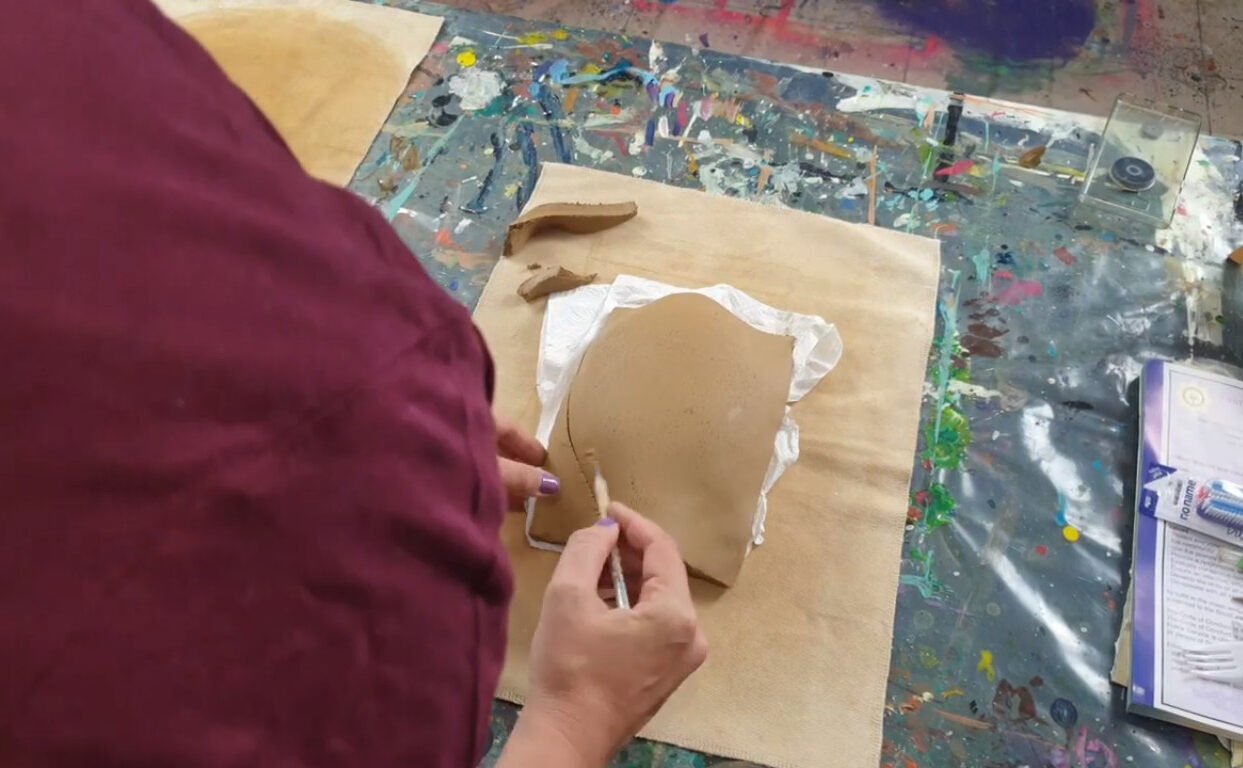
So you would want to get a sponge, and I’m just using a basic kitchen sponge and wet it. But then really get all the water out. You don’t want this to become a mud bath you really just want to take your water and finish off these edges. Make sure everything is exactly the way you want it.
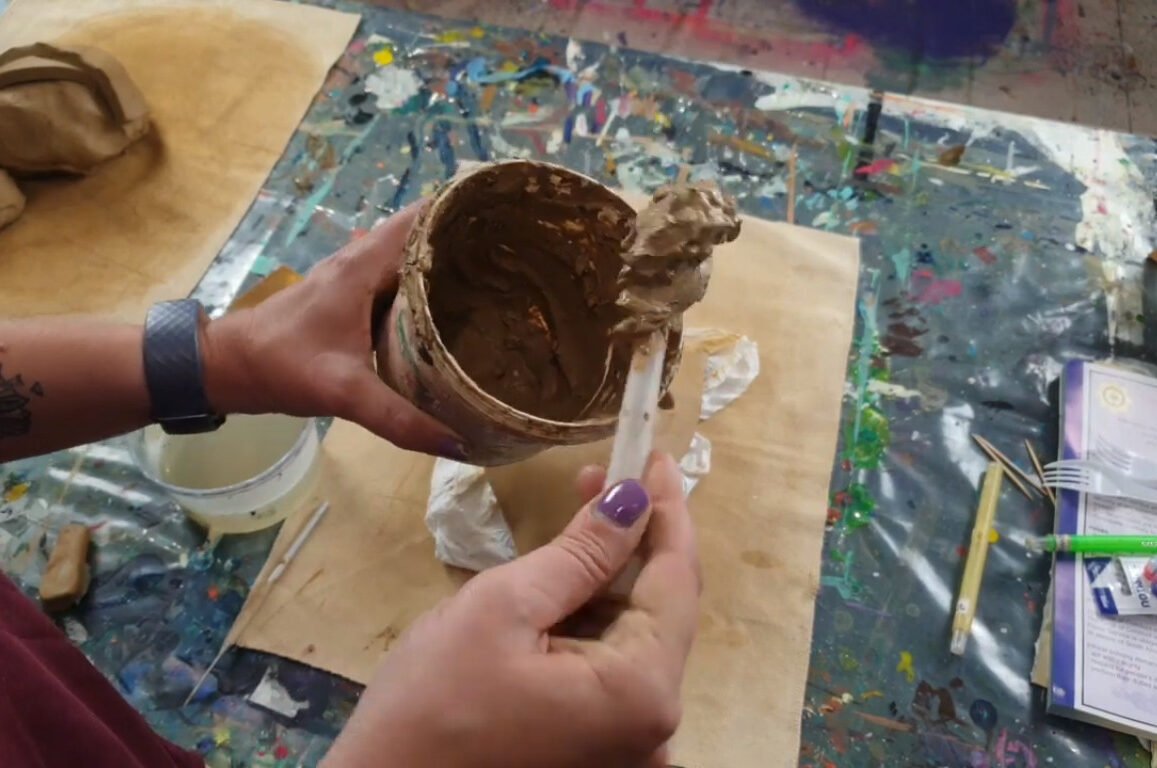
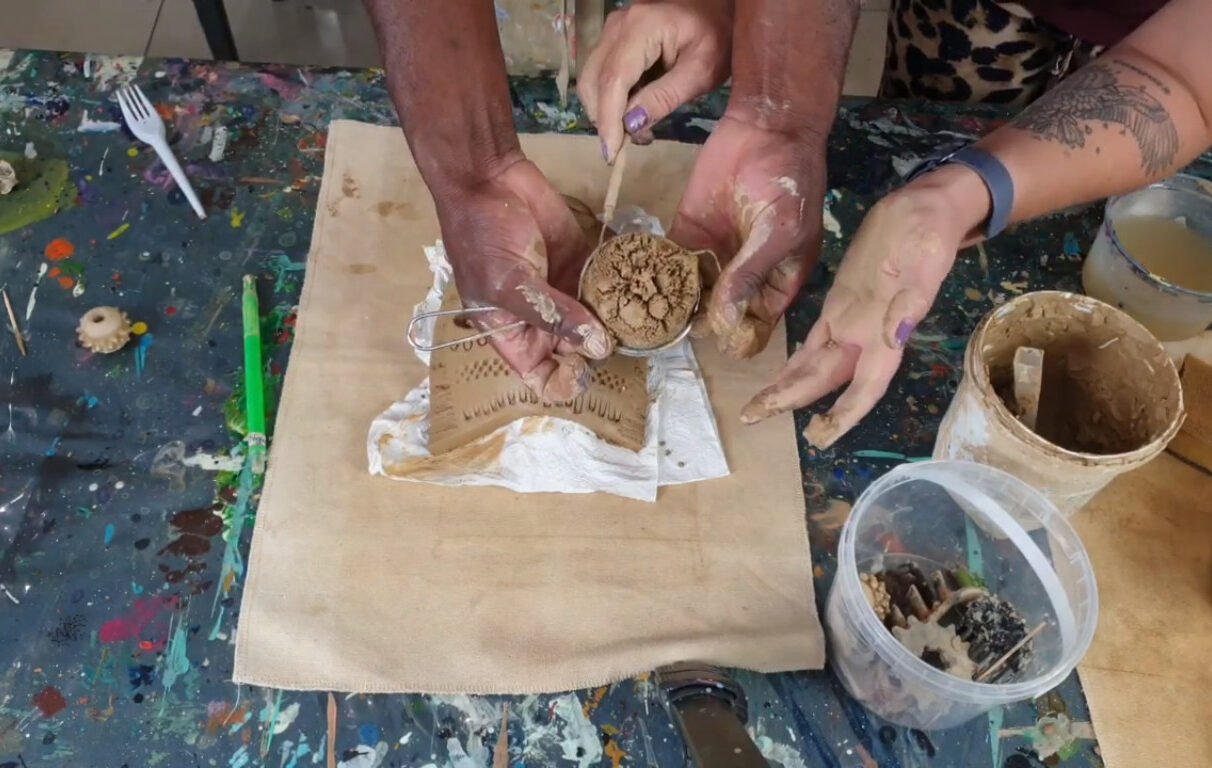
A super important part of working with clay is to make proper slip. To make slip, take some of your air-dry clay, you just mix with water. Don’t add too much water because that’s just gonna be one mushy mess. It should actually be like the texture of toothpaste. That’s quite important. You cannot do clay without slip. Things will crack and fall apart. Slip is like the glue of clay, so it’s very important to make proper slip. I’m going to show you how to use your slip when you are joining certain things.
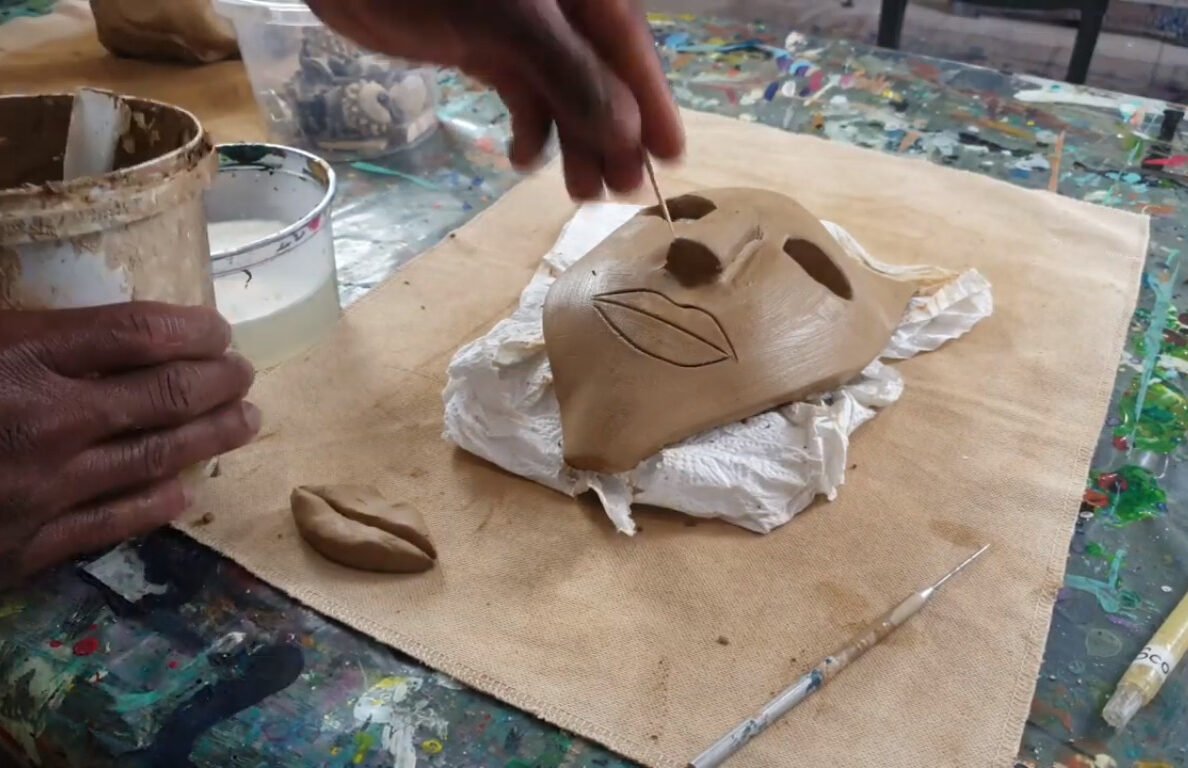
I’ve made a nose from my mask. If I’d like to adhere this nose onto my mask it is important that you scratch, you then take your slip which, remember, is your glue. You’re going to add your slip. Then, also scrape the other side and then join it and work it in with your fingers.
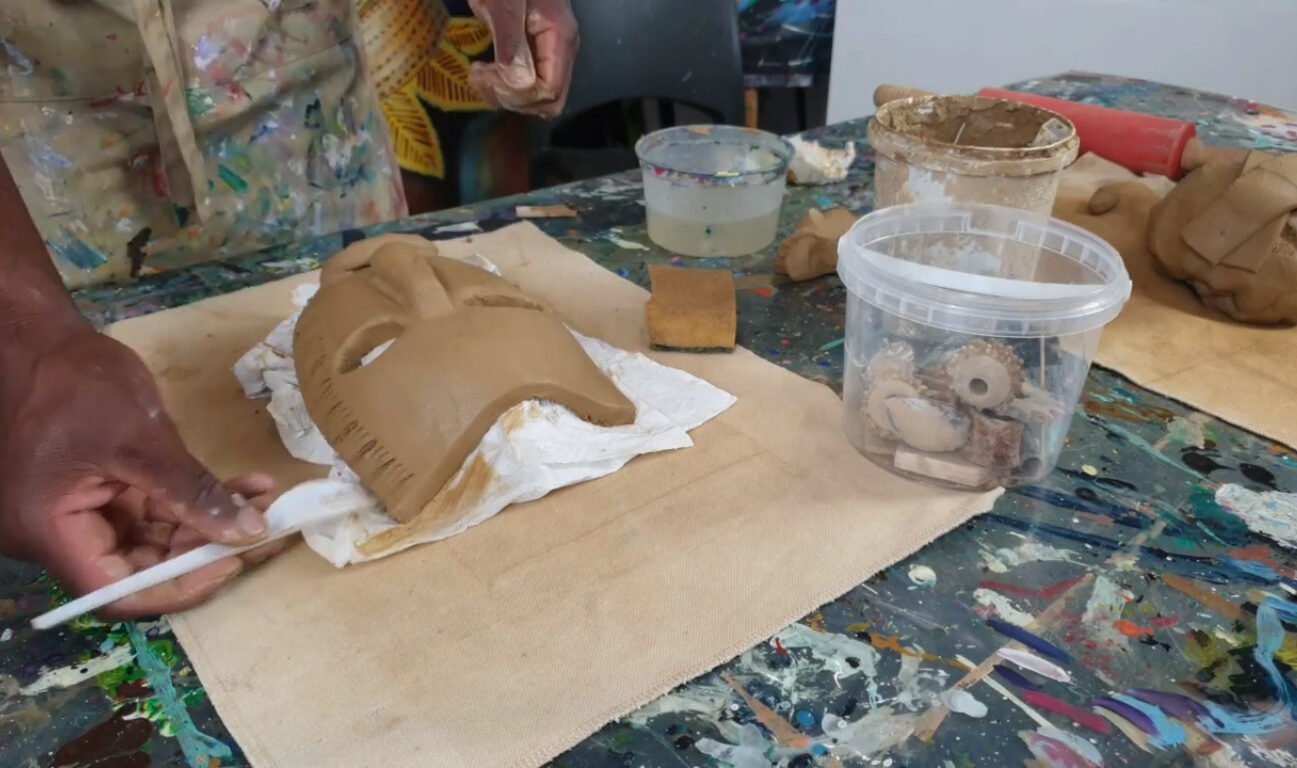
I take my stick, I scratch a bit with it, I stick it, I press it nicely, softly, easily. and then I stick it. I press it down nicely softly easily

Then I go for my second one, which is the bottom one. I scratch again. I also scratch the back of it. I push it soft, easy again and then I got my African face.
We are now going to show you guys how to actually decorate this mask and make it really pretty. So the first thing Gody is going to do is to show you this trick with a fork
Old discarded crayons work really well. These are those twisties that we all used to use at school. And I am going to use the front of this to make lovely facial tattoos and add some patterns to our African mask.
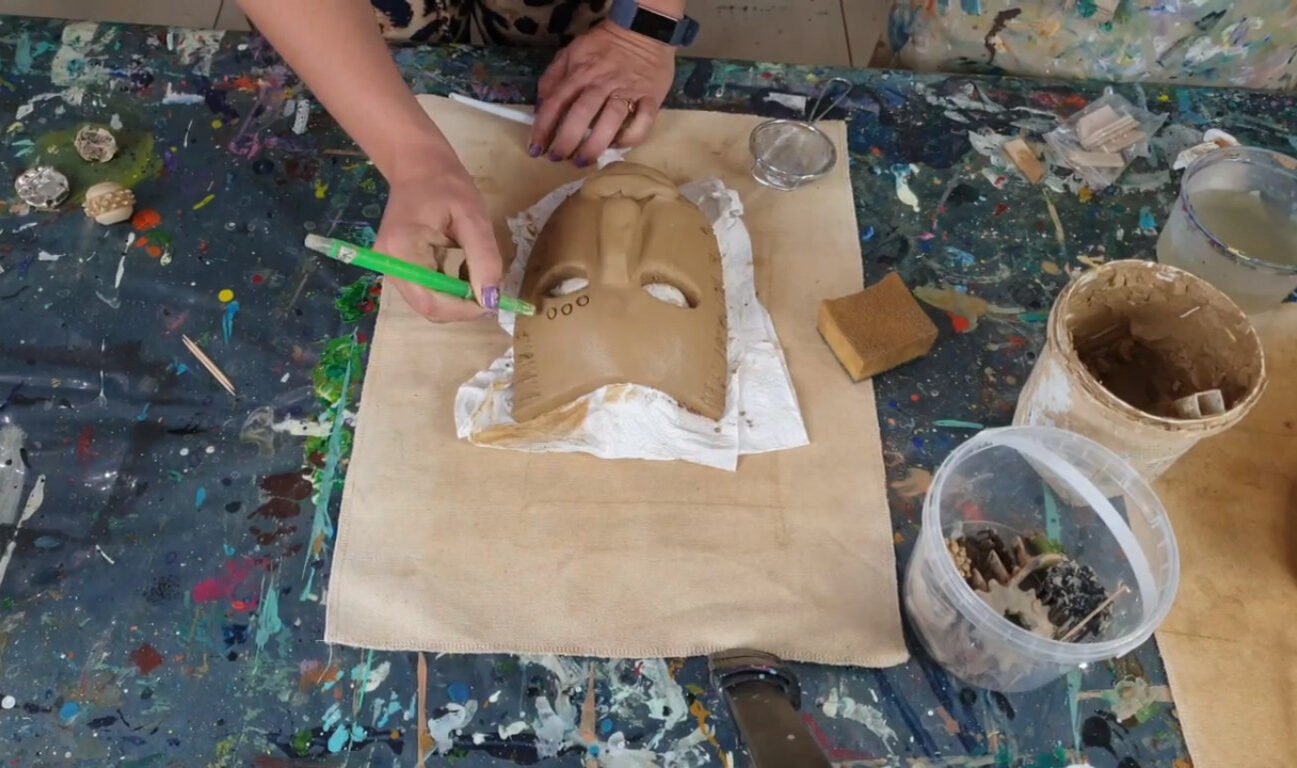
I also just want to show you, you can use the back of your fork which also makes interesting patterns.
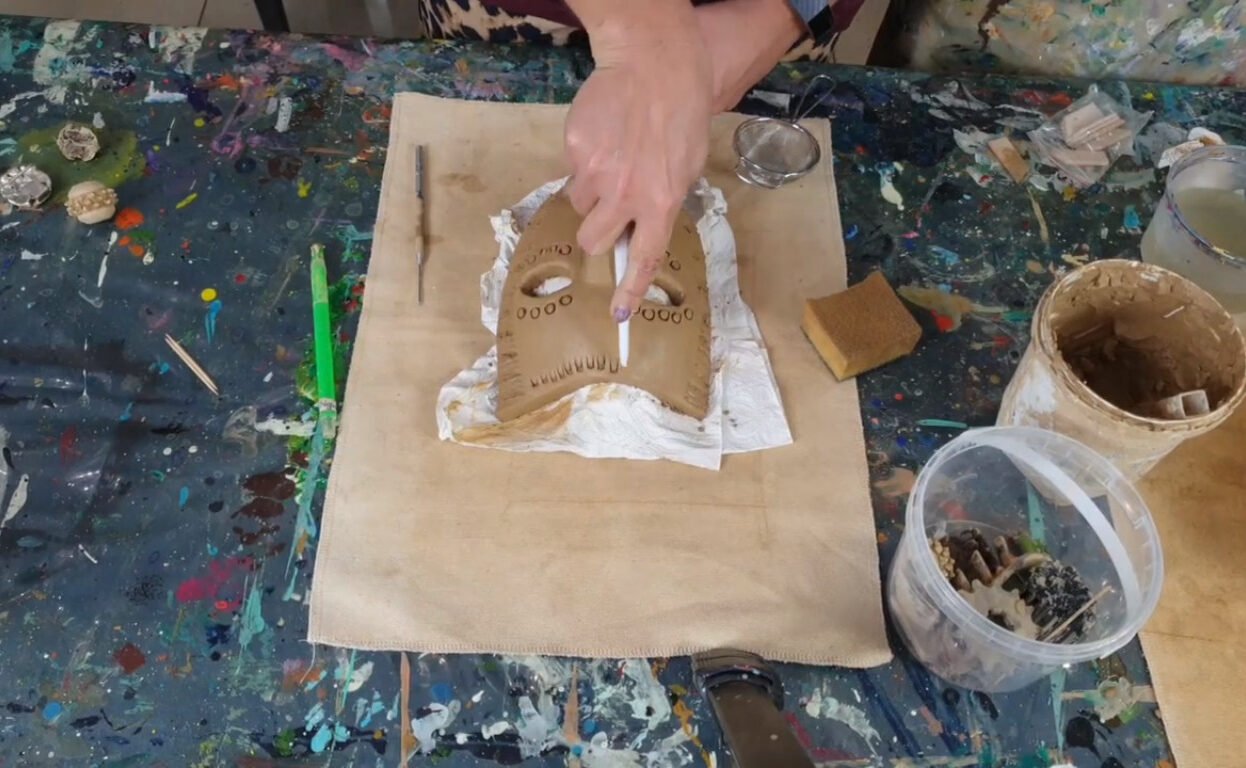
You guys can go and find buttons or interesting beads that you can roll over the clay to make some interesting textures. Gody is also going to show you one of our favorite tricks on how to make hair or shrubbery out of clay. We push the clay through a sieve. Once it protrudes you get these fine, fine strands. Remember, when you’re going to be joining this and placing this on your mask or any other clay surface you need to use slip to join these. I’m going to remove it using my little pin and I will be placing that on my mask.
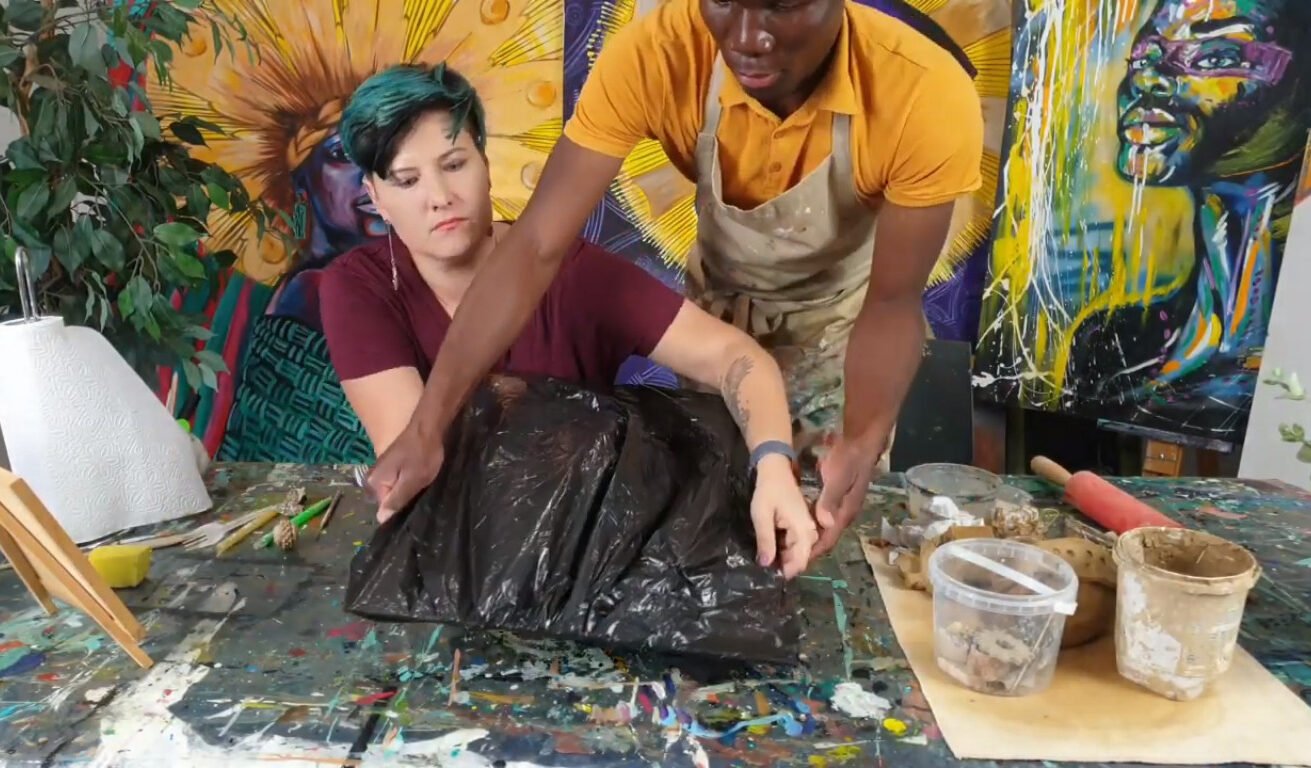
We’re now done with our mask and what is really important is to let your clay dry slowly, So remember you’re working with air-dry clay which means you need to finish your project in one go, and number two, it’s got to dry slowly. To do that you want to store it in tight plastic, in a really dark cupboard. What Gody and I are going to do is, we’ve placed it on a board, nice and hard. We are going to cover it in plastic so no air can get So we’ll be storing this away. Two very important steps, after day one you need to take it off the hard mold that you’ve used if you’ve used one to shape.
By that time some of the moisture is already out and it can start cracking if you leave it on a hard strip. So by that time I’m going to take away that green shape that we’ve used and then day two and three and by day three or four, you are going to take the plastic off. Let it dry completely. I’d say we take about a week before we actually paint on top of the clay.
Now you decide whether you are going to paint or polish it with shoe polish. There are various finishing options and I will show you that in my next video.
Visit our blog for some more amazing art projects.