Drawing Course by Lillian Gray
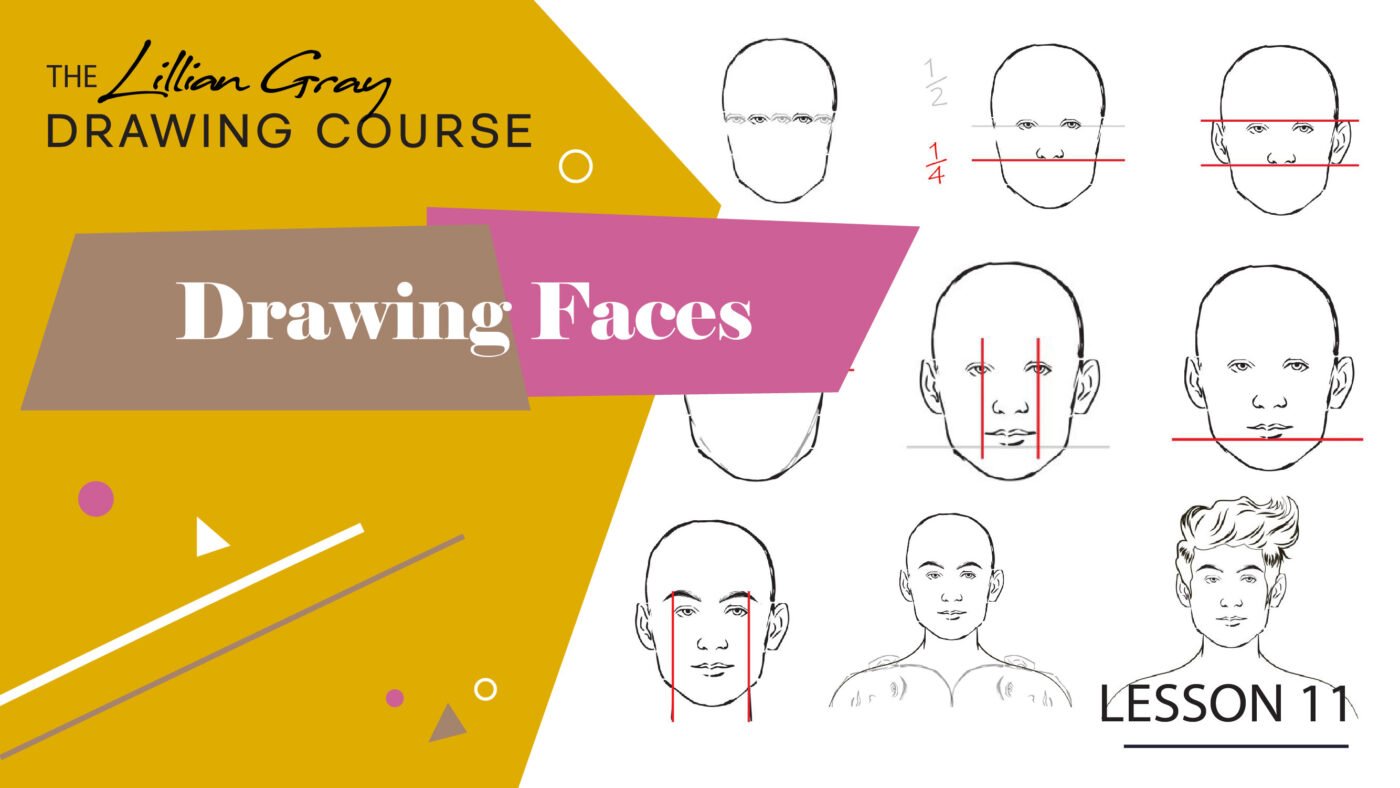
Lesson 11 | Easy guide to drawing a face
Mar
Watch the lesson for free on our YouTube channel
Free Drawing Course by artist Lillian Gray
This is a video and blog series teaching the fundamentals of drawing in an easy to understand way. The series consists of 15 lessons presented by artist Lillian Gray.
Because we spend all day looking at people and our own face , we are very aware when something is a little off in a portrait drawing or painting. This is an easy guide to drawing a portrait in this lesson Artist Lillian Gray shows you step by step how to draw a portrait with easy rules to follow. While lots of repetition and direct observation are the most important to consider when drawing a face, here are some other useful tips to keep in mind as you practice drawing. You can use these proportions for both male and female portraits.
-What is more important than reading books; reading people’s faces. –
Anis Mansour
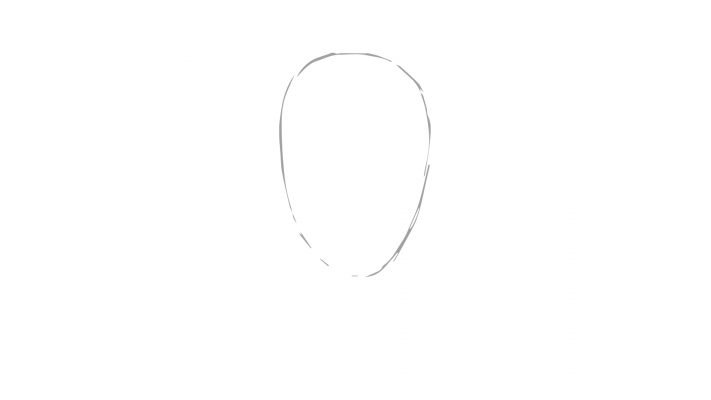
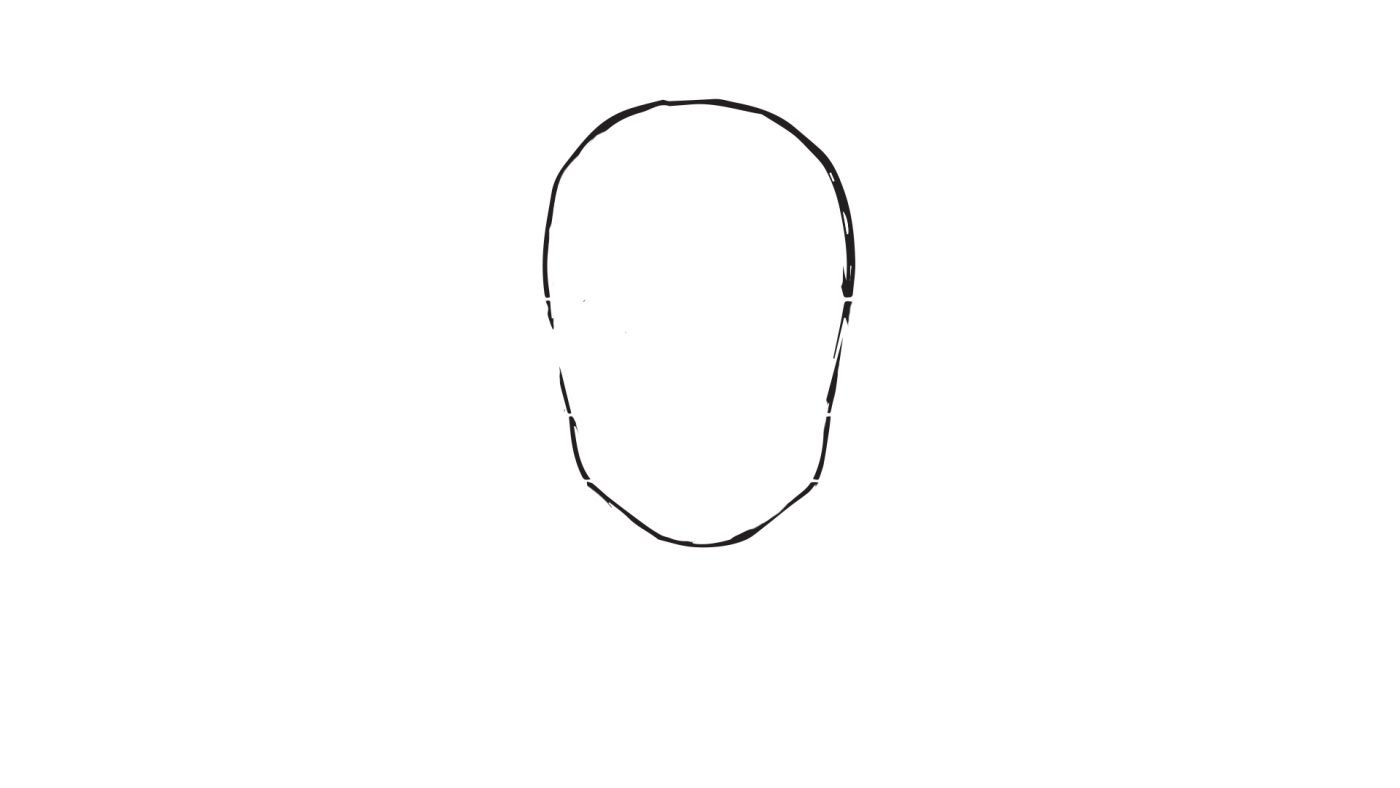
1. Know your Proportions.
Before you draw the face you must draw your figures head. Heads are not perfect circles, and they are not perfect ovals either. You can think of them as kind of egg-shaped, with the tapered end toward the bottom. Of course, this varies depending on the actual person and the angle you are seeing them from. But let’s start with an egg…
2. Refine the jawline.
If you are drawing a woman, this egg shape might do well to describe her jawline, but let’s say we’re drawing a man with a slightly more angular jaw and flatter chin. Let’s bring the jawline out.
3. Where to place the eyes?
Well, we have a tendency to think the eyes are closer to the top of the head than the bottom because they are the highest facial feature. But that’s not really the case.
As you can see, the eyes are just about halfway between the bottom of the jaw and the top of the head. There is a lot of head above the eyes, as any of us with a receding hairline know. But I skipped a step here — how far apart should the eyes be? How big should they be?

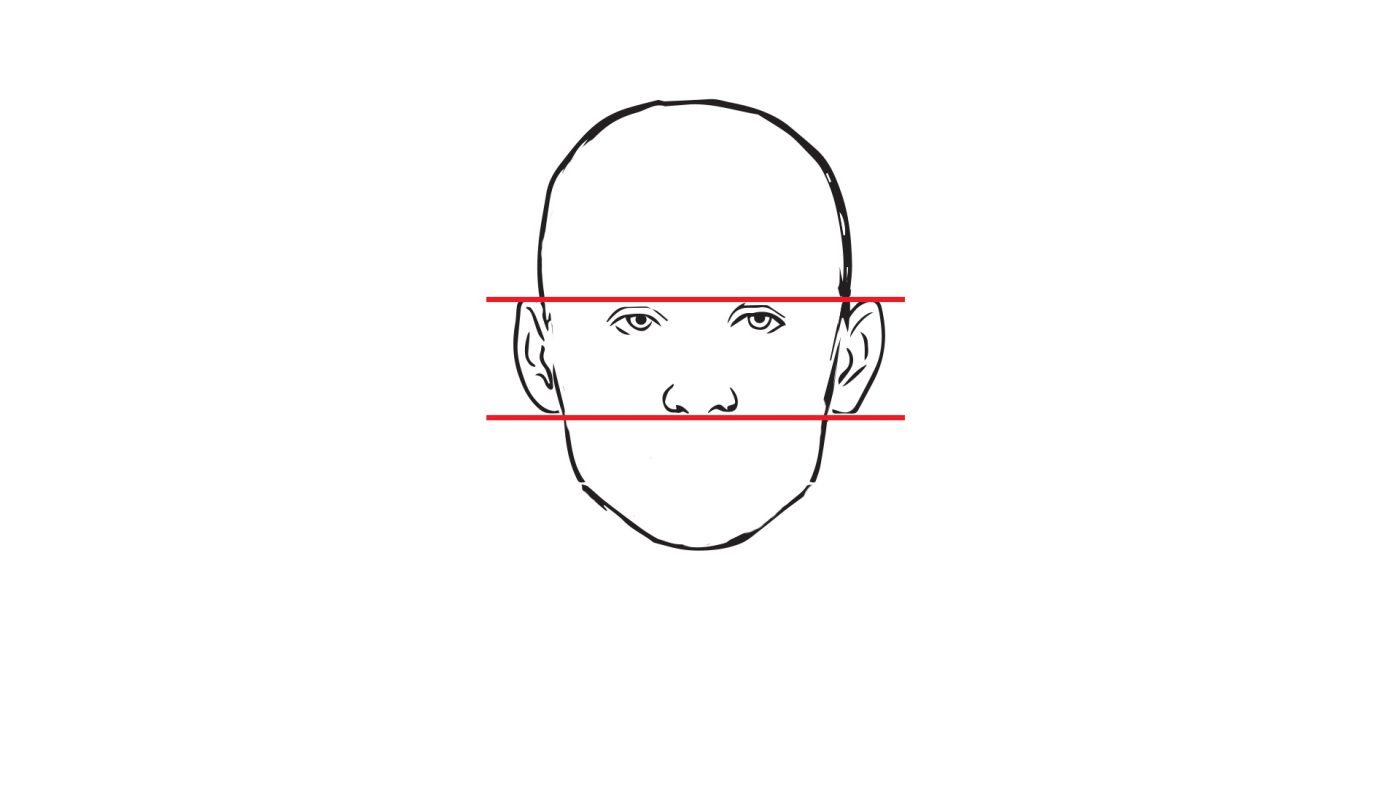
4. A good rule of thumb is that the head is about 5 eyes wide.
That means the gap between the eyes where the bridge of the nose is located is about the same width as the face on either side of the eyes. Like any rule of thumb, it’s important to remember this isn’t always the case, and that this applies only to drawing the face head-on in a portrait.

5. Now let’s add the nose
Noses do vary quite a bit in width, so keep that in mind. The sides of this guy’s nose extend a little past the inside corners of his eyes.

6. Add the ears
Locate the tops just above the eyes, and bring them down to a point almost halfway from the eyes to the bottom of the jaw. Depending on the person, the ears can stick out a lot or a little, so there’s not a good rule for that other than careful observation.
Well, what do you know — after drawing the ears, you now have a great idea about where to locate the nose!
7. The mouth is a bit trickier.
Rather than the mouth itself being halfway from the earlobes to the jawline, use that halfway point for the bottom lip. The width of the corners of the mouth often extends to about the location of the iris in the eyes above.

8. Width of the mouth
The width of the mouth is equal to the width of the irises when looking straight ahead.

9. Eyebrow placement.
This is another feature that varies greatly from person to person. Do keep in mind that each eyebrow is generally wider than the eye below it. They also tend to be thickest toward the bridge of the nose and taper toward the sides of the face, where they often also sweep downward.

10. Width of the neck
Draw two lines horizontally down from the outside of the eyes. This will give you the width of the neck.

11. Width of the shoulders
The width of the shoulders is equal to two head widths.

12. Don’t make the mistake of placing the hair on the very top of the head!
The hairline is typically about a quarter to a third of the way from the top of the head to the eyebrows.
These proportions work just as easily for a woman. Adjust the jawline to be a little more rounded, make the ears a bit smaller and the neck a little narrower and you have a pretty convincing female face.
The other cool thing about knowing your proportions is you can use them to draw a head in profile, too! Just extend your proportion lines across and you have a great way to keep your head proportions consistent.

Well done!
You have now completed your portrait drawing using all the correct measurements and proportions!
FREE DOWNLOAD
Download a handy template to practice on here.
Shop Drawing Supplies online with us
Our online store aims to remove all confusion when it comes to shopping for art supplies. We only stock what is really needed and don’t flood you with choices. To view drawing supplies:
-
 A3 Toned Paper Clay Pad 120gsm FabrianoR380.00
 -
Faber-Castell Graphite Sketch SetR115.00
-
A3 Toned Paper Sand Pad 120gsm FabrianoR300.00
-
A4 Toned Paper Clay Pad 120gsm FabrianoR205.00
-
Mechanical Pencil HB 0.5MM – DerwentR136.00
-
Drawing MangaR215.00
-
Fundamentals Of Drawing 3 – Leonardo CollectionR245.00
-
Black Charcoal Pencil 3pcs – Koh-i-NoorR89.00
-
Set of Paper StumpsR52.00