-
×
 Mechanical Pencil HB 0.5MM - Derwent
1 × R136.00
Mechanical Pencil HB 0.5MM - Derwent
1 × R136.00
Subtotal: R136.00

Watch the lesson for free on our YouTube channel
Drawing eyes can be tricky, in this lesson we will break the eye down for you using basic shapes. First, let’s look at the structure of the eyeball.

Also notice when looking at the eyeball, it is covered by the eyelids – the eyelids curve around the eyeball.
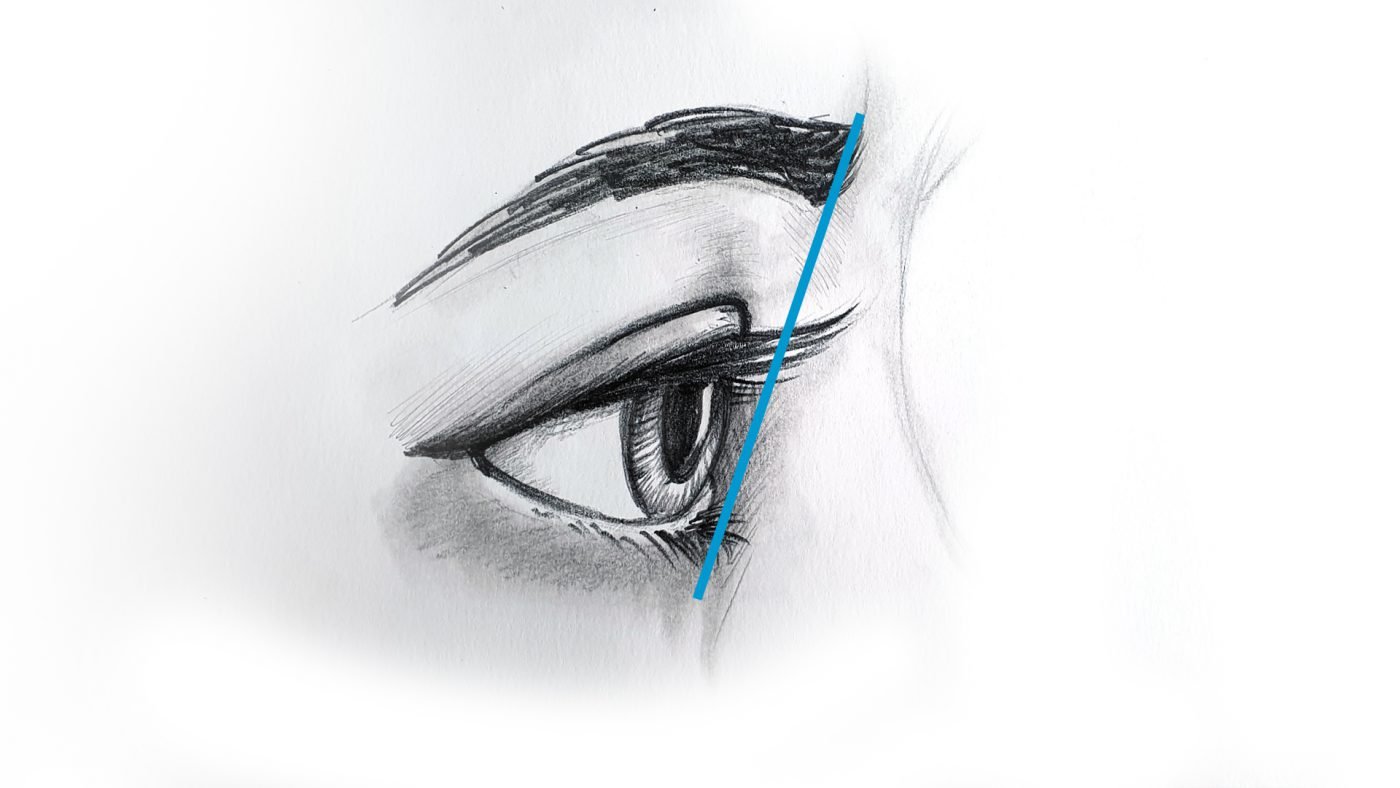
When we view the structure of the eye from the side, it is essential to understand that the eyebrow ridge protects the sensitive eye. In the same way, the eyelid protects the eyeball.
When we look at the eyeball from straight on, please note the concentric circle. These circles are precisely parallel to each other. When we only look at the Iris, we start moving the eye looking to the left or the right. The further the Iris moves away from the centre – the more it becomes an oval.


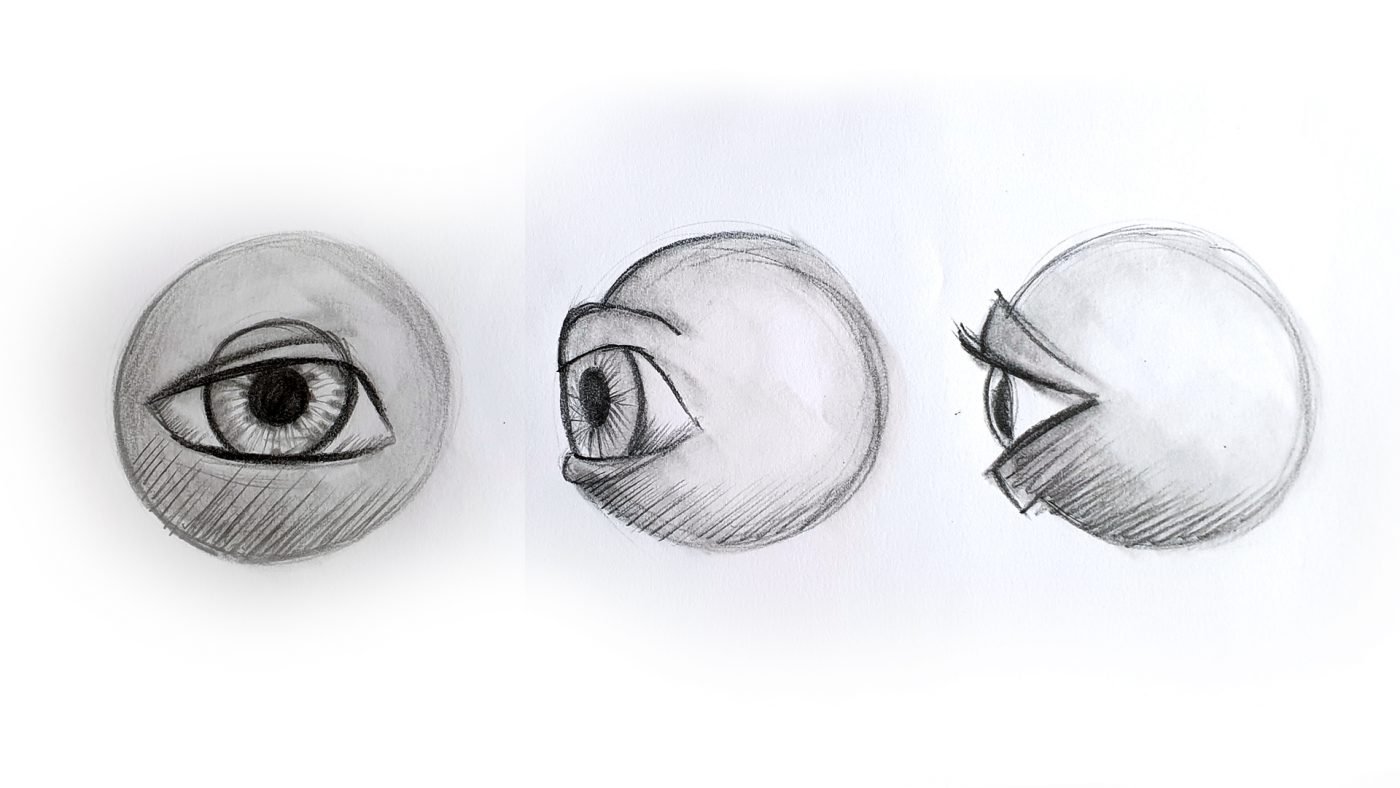
When we simplify the eye to its most basic shapes, it just becomes a circle and two triangles.
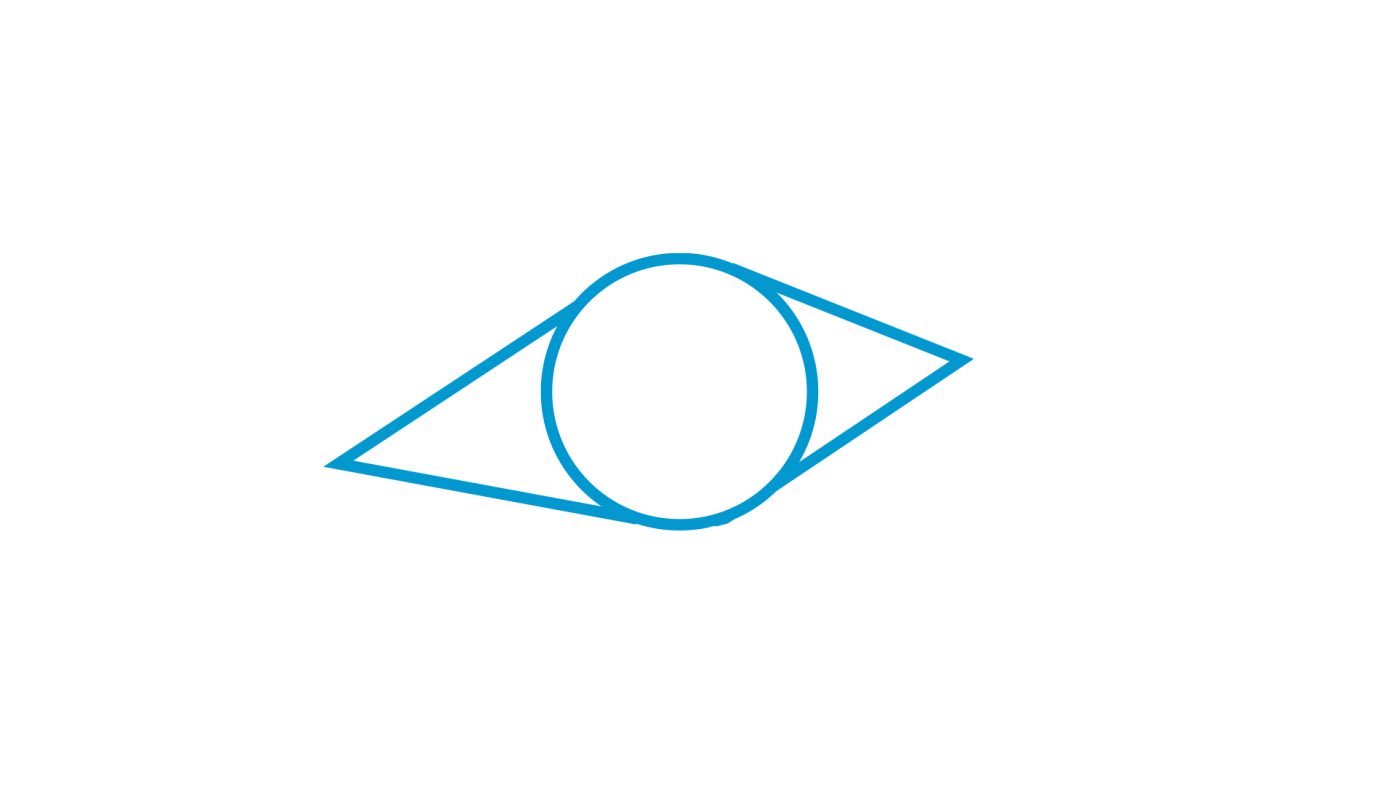
Once you have done so, now look at the more complex triangle hiding in this shape. What is the actual form? Don’t draw what you think you see. The trick to drawing eyes is to draw what you see.
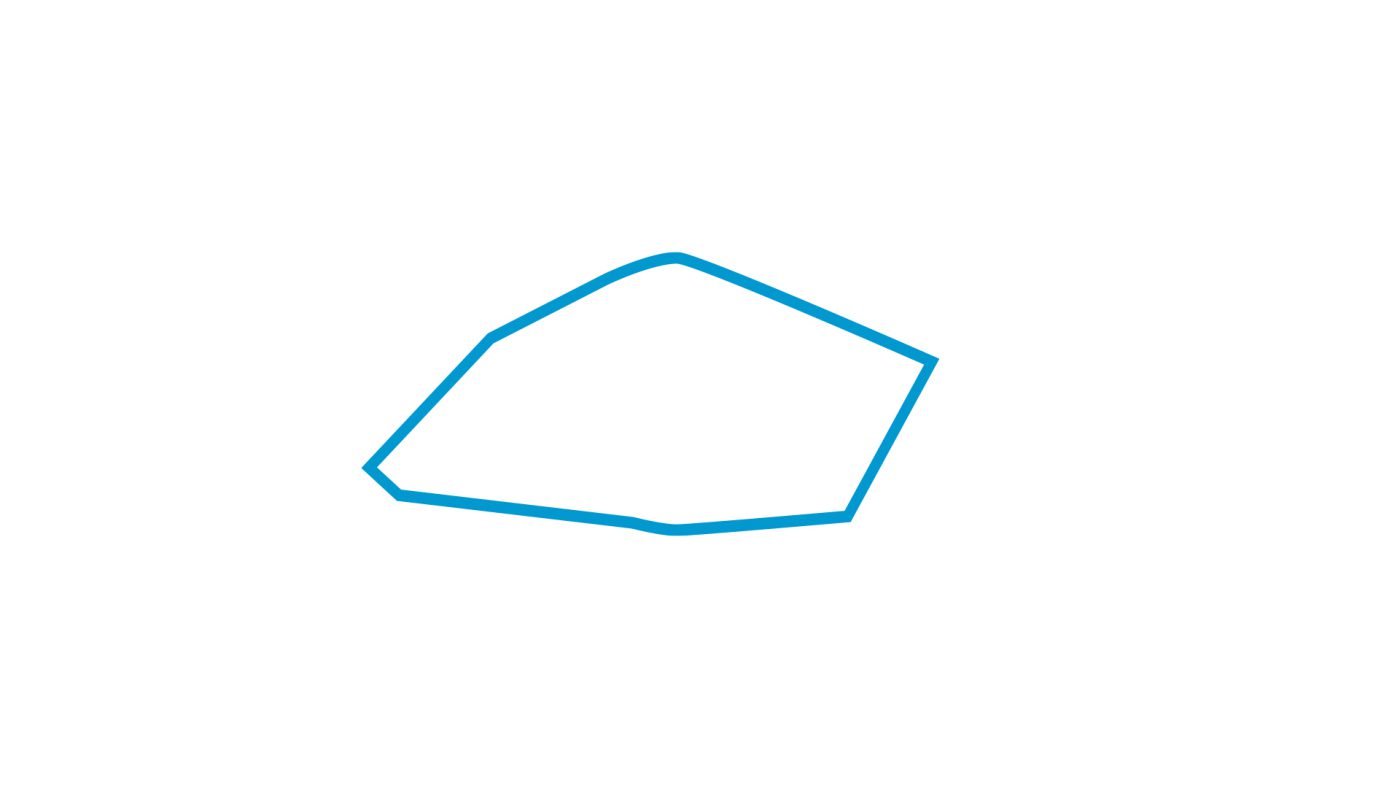
If you are struggling to get your basic shapes in proportion, a pro trick to use is to look at the negative space of the eye. Draw the white of the eye, stop focusing on the Iris and pupil of the eye; this is a great way to double-check that your basic shapes are in the correct proportion.

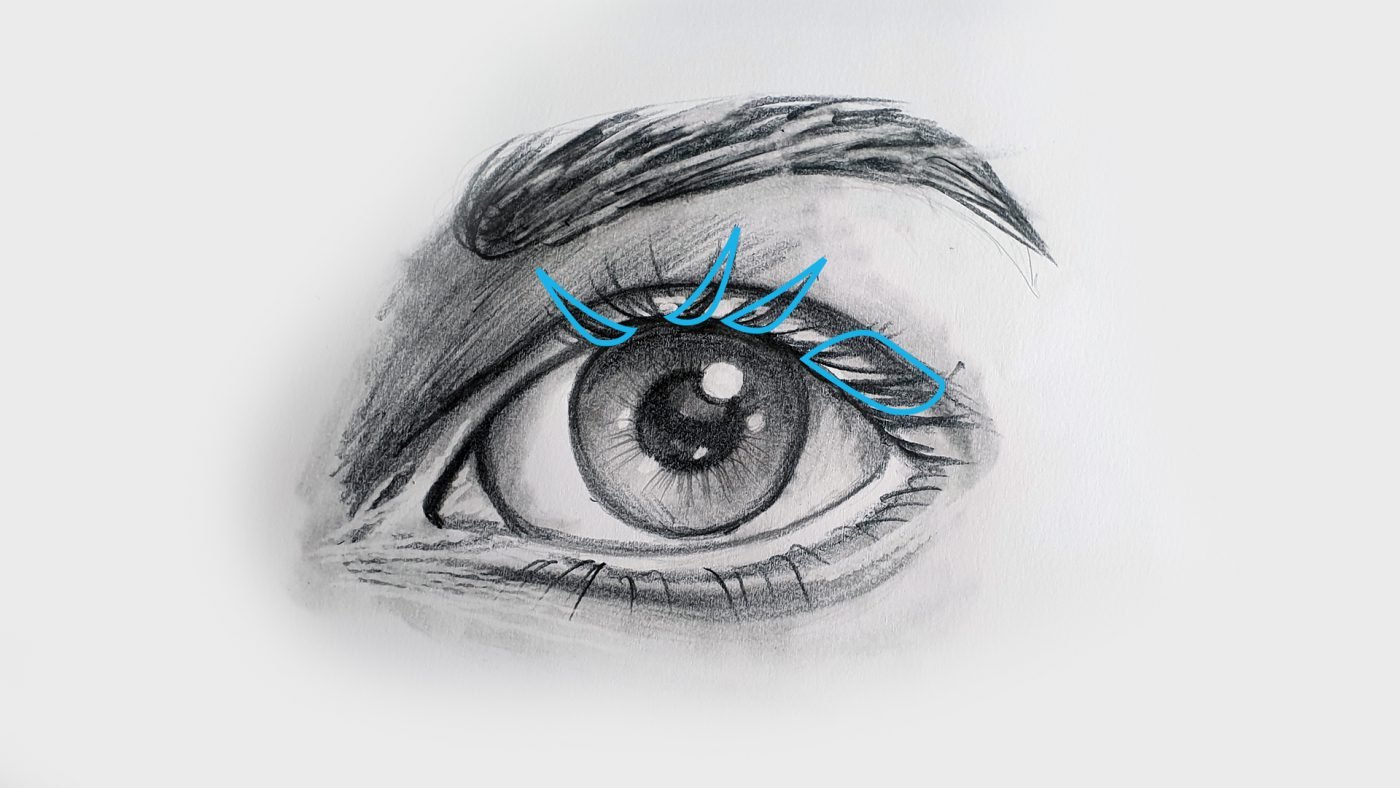
Once you have your basic shapes down, start looking at the plains surrounding the eye. The top eyelid is usually divided into three plains. The bottom eyelid is divided into two plains. Whenever you have to construct plains, imagine that you have to reconstruct the object out of a cardboard box and what that would look like.

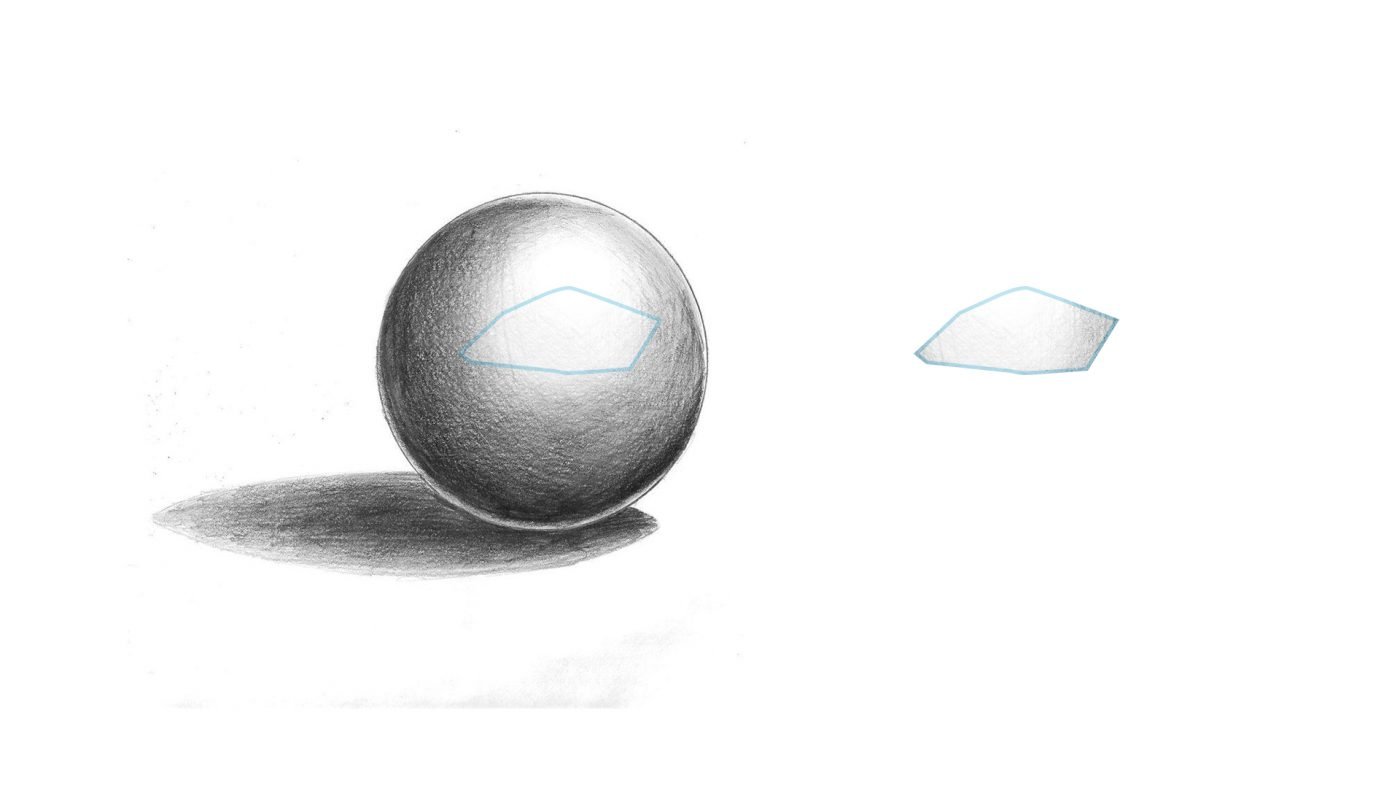
Once you understand the structure of your plains, consider which plain the light would fall on the most. Which plain is bent away from the light; this helps when shading your eyes. Think of the eyeball as a sphere that we have to shade to depict the form. In the same way, the white of the eye is never really white because we need to indicate those shadows, to give the feeling of the round sphere.
Another significant shadow that plays a significant role in the white of the eye, is the shadow that the top eyelid makes at the top of the eyeball.

When drawing eyelashes, group them. Think of them as little triangles. Try to avoid drawing every single strand on its own. Quite quickly your eyes can look like dolls and not real.

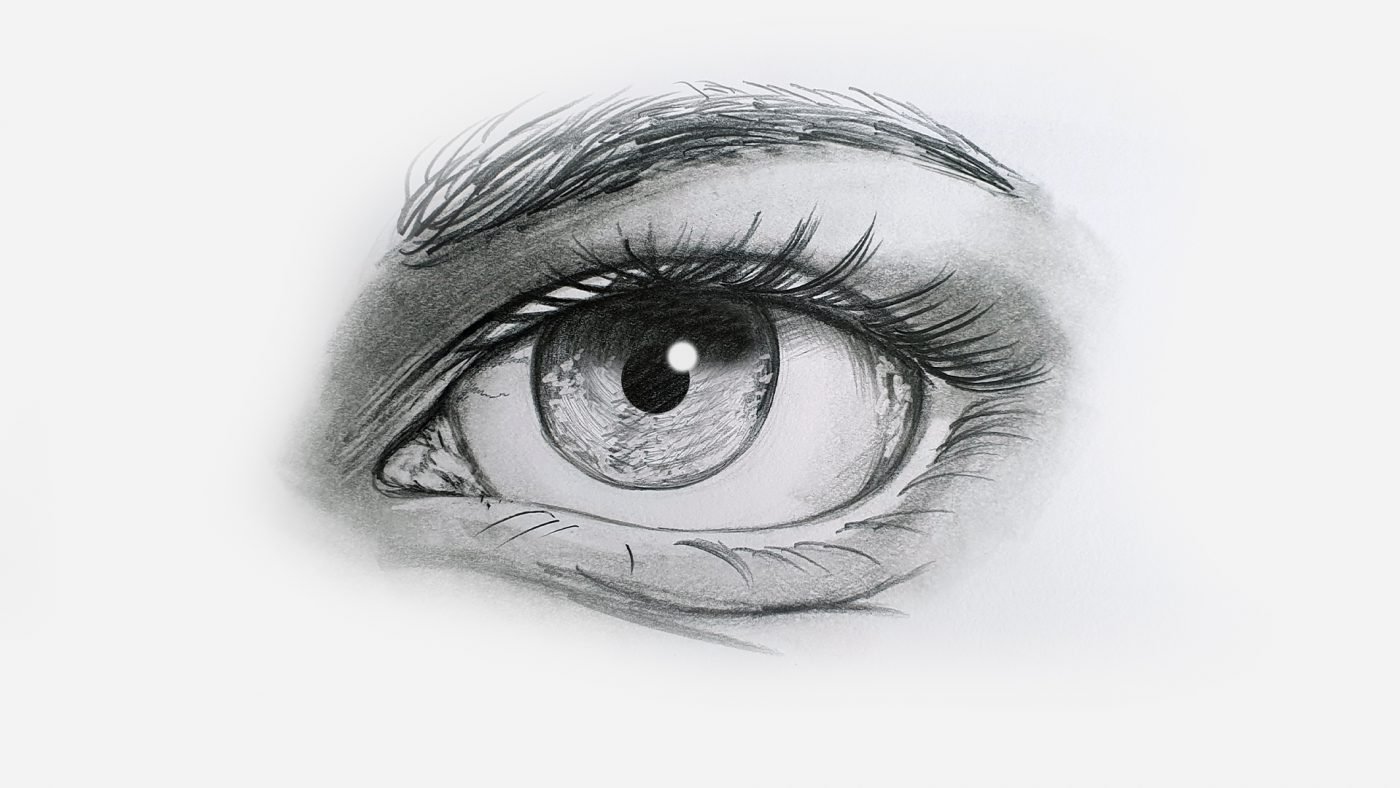
One more thing to be aware of is that usually, the highlight of the eye is at the darkest area of the Iris.

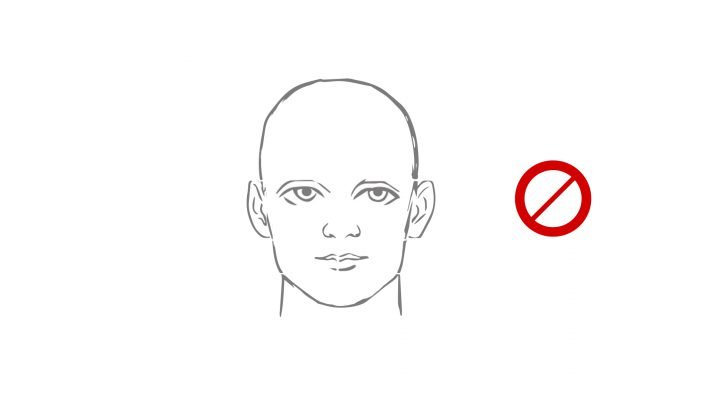
1 – People tend to make the eyes too big, remember five eyes = the width of the head. One eye needs to fit precisely in between the two eyes looking straight ahead
2 – Also, remember the concentric circles. It is impossible for your pupil and iris not to be parallel when looking from the front

3 -When looking to the left or the right, these ovals still stay in relation to each other
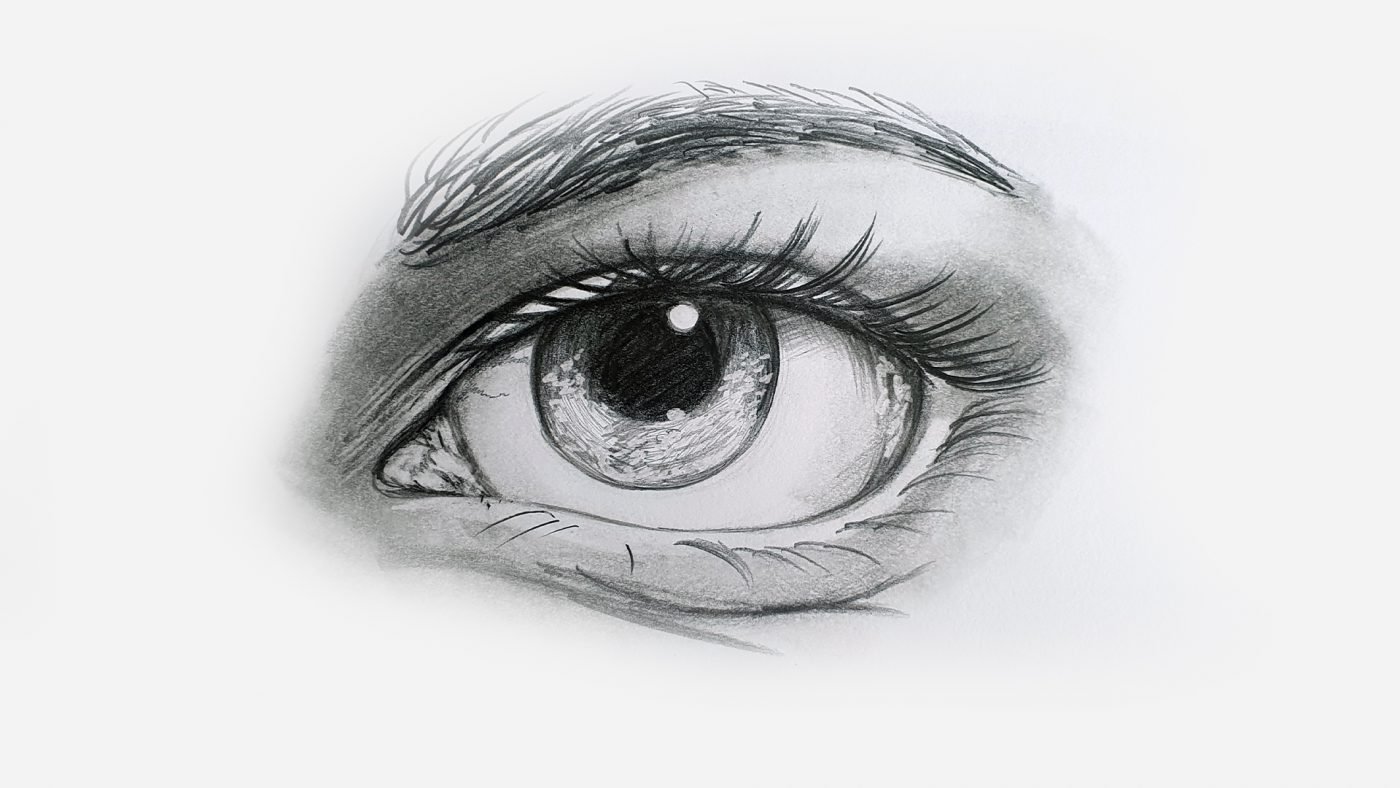
4 – Make sure that the gaze of the eyes is in the same direction. When not aligned, they look like chameleons. We usually do this by having the highlights on the same place
5 – Always let the iris touch the top eyelid; this is when the eyes look relaxed. When there is a space there in between, the eyes look more fearful.
Pay a lot of attention to the skin around the eyes. When we simplify eyes down to funny cartoon lines, it is the eyelids that determine the emotion. The only thing that changes here the shape and tilting of the eyelids. When you pay attention to the skin around the eyes, we start looking at micro-expressions. There are more emotions in a person’s face, with the skin around the eye than inside the actual sight. E.g. moving the bottom eyelid up by even a millimetre, can show tenderness. Same as with opening up the top eyelid just a little bit can show fear. It is those micro differences that change the expression and emotion that you want to capture.

Combine all the lessons you have learned so far and break down your eye into the basic shapes, which is just a circle and two triangles. Then you are going to apply your shading lesson where you are going to add the form – darker and lighter pencils. Then start adding textures – Is it a younger-looking or older skin? Is there blending? Remember you can put your highlights back with your eraser.
You need to practice a drawing eyes, practice as many as you can from magazines or photos that you find, even National Geographic – they have excellent “un-photo shopped” images.
Our online store aims to remove all confusion when it comes to shopping for art supplies. We only stock what is really needed and don’t flood you with choices. To view drawing supplies: